I made the jump from Windows 7 to Windows 10. I generally like this upgrade, although connecting to my college’s VPN has gotten much harder. Well, not harder, just more tedious. In Windows 7, I could click on my internet connection icon in the system tray, and then click on “HighlineVPN,” and I was connected. I didn’t think it such a miraculous thing until that functionality disappeared in Windows 10. I can still do those same steps, it’s just that now when I click on “HighlineVPN” a new window opens where I can click on “HighlineVPN” again (?) which then gives me the option to connect by clicking the connect button(?!). I guess the programmers wanted to make sure that I really, really, REALLY wanted to connect to this VPN.
With a little effort, I now have a keyboard shortcut that will connect/disconnect me from my college’s VPN. Sweet!
[Why do I want to connect to my college’s VPN? The VPN provides extra security when I’m connected to, say, my local coffee shop’s wifi – hackers monitoring that wifi wouldn’t be able to gain access to my computer without weaseling their way through my college’s IT security measures as well. And when I’m connected, I can do things just as if I were sitting in my campus office, like print to my building’s copier.)
Ready? First, make sure you have already set up a connection to a VPN. If you’re not sure how to do that, contact your institution’s helpdesk.
Creating the code to connect/disconnect your VPN
Open up Notepad on your computer, then copy and paste this code, replacing myvpn with the name of your VPN. (Shout out to the good folks at StackOverflow for this solution!)
@ echo off
Ipconfig|find/I “myvpn” && rasdial myvpn /disconnect || rasdial myvpn
Do File -> Save as. Type a descriptive filename, and end it with .bat. Put the file somewhere on your hard drive where you can find it. Not on your desktop. You have too much stuff on your desktop already. Choose someplace like your C: drive. Mine is here — C:\Users\sfrantz
This is what my HighlineVPN.bat file looks like in Notepad.

You have just created a little computer program. Good job! When you open this file, those lines of code will run. The first line just tells the computer not to show you the second line of code. The second line of code handles the VPN connection. If you’re not connected to your VPN, it will connect you. If you are connected, it will disconnect you.
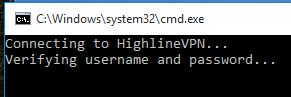
A black window will briefly appear showing you what the computer is doing. It will show this when connecting.
Note: If you want to edit your .bat file, right-click on it in the folder, and select edit. Double-clicking on it will run the program, and your VPN will connect/disconnect.
Creating the shortcut
Desktop shortcut. Navigate your folders until you find your .bat file. Right-click on it, and select “Create Shortcut”. Then drag that shortcut to your desktop. If you want to connect/disconnect from your VPN, double-click on your shortcut. Frankly, if you’re going to do this, you might as well just put the file itself on your desktop rather than bother with the shortcut. But as I wrote earlier, you already have enough stuff on your desktop.
You can create keyboard shortcuts to these kind of Windows shortcuts, although it didn’t work for me with this shortcut. Maybe because of the nature of this kind of file, I don’t know.
Instead, I used Phrase Express. Phrase Express lets Windows users create a keyboard shortcut for just about anything. I mostly use it to expand something short into something much longer. For example, when I type !STP it expands to Society for the Teaching of Psychology. In this case, I’m going to use Phrase Express to create a keyboard shortcut that will open my HighlineVPN.bat file – and opening it is what causes my computer to run the code that connects/disconnects my VPN.
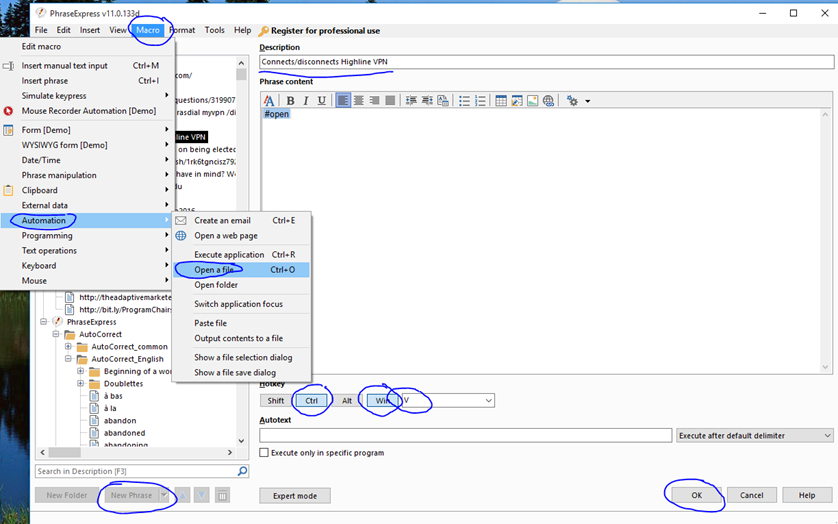
Within Phrase Express, I created a “new phrase” by clicking the button at the bottom of the Phrase Express screen. I typed a useful description so I could find this later if I needed to – like when writing a blog post about how to do this. I selected Macro -> Automation -> Open a file. Phrase Express asked me to navigate my folder structure until I located my HighlineVPN.bat file. After selecting it, Phrase Express entered #open in the “Phrase content” box. Below that box, I clicked the Ctrl and Win buttons, and selected V from the dropdown menu, and clicked ok. That was it!
All I do now is press CTRL + Windows + V, and I connect to/disconnect from my college’s VPN.