ZoomIt was designed to let a presenter zoom into a particular portion of the screen. For most presentations I don’t need a zoom, but I would like to be able to draw. Of course PowerPoint gives you drawing tools, but the menu system is a hassle. If I’m showing, say, a webpage, then the PowerPoint drawing tools are of no use.
When I press CTRL + 2, my cursor changes to a red plus sign. I click and hold to draw on the screen. When I’m done, I press ESC. It’s pretty straight forward.
After downloading ZoomIt, run it on your computer.
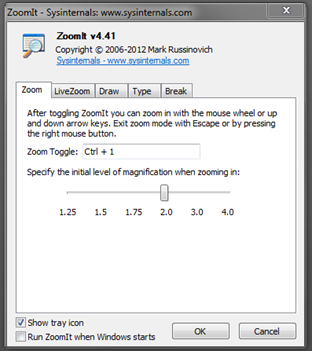
Look for the ZoomIt icon in your system tray (bottom, right corner of your screen). Right click on the icon, and select “Options”. Here you can see the instructions for the various functions. Once you’re familiar with them, press “Cancel” and use the keyboard shortcuts to do what you want to do. (Note: The keyboard shortcuts won’t work if you have the ZoomIt options screen open.)
Zooming
The first tab shows the zoom functions. The default keyboard shortcut is CTRL + 1. After pressing and holding the CTRL key, press 1. You zoom in on the screen, and moving the mouse now moves the entire screen. Use the mouse wheel or the up and down arrow keys to zoom in and out.
Click on the screen, and the cursor changes to a red plus sign. You’re now in drawing mode. Click and hold to draw. (See the “Drawing” section below for more drawing functions.)
When you’re done zooming, press ESC.

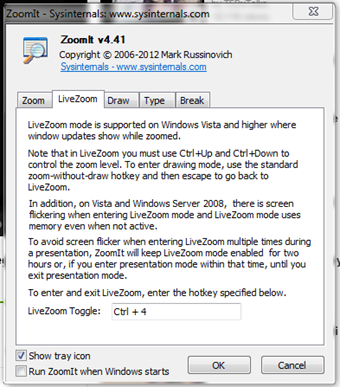
The second tab is for LiveZoom. In regular zoom, the screen will freeze while you zoom. Usually this isn’t an issue, but if you’re showing video or other dynamic content that you want to continue to run while you zoom, LiveZoom is your better option. In LiveZoom, use the up and down arrow keys to zoom in and out.
To draw in LiveZoom mode, press CTRL + 2 to enable the drawing tools. At that point, LiveZoom will act like regular zoom in that the screen will freeze. Press ESC to exit drawing, and LiveZoom will be re-enabled.
When you’re done LiveZooming, press ESC.

Drawing
You can also have just the drawing functions without the zoom.
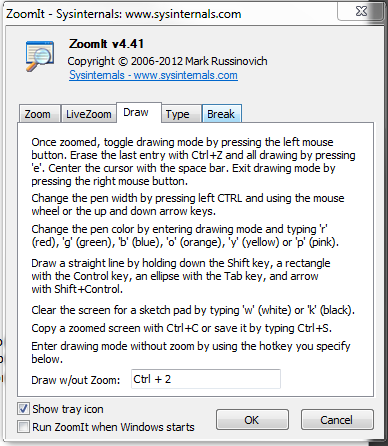
Press CTRL + 2 to enter ZoomIt’s drawing mode. The cursor changes to a red plus sign. Click, hold, and drag to draw.
Like in other Windows programs, CTRL + Z will delete what you just did, CTRL + C will capture the screen, drawings and all, and CTRL + S will save it. Want to erase everything? Type ‘e’.
Want to change the pen color? While in drawing mode, type “‘r’ (red), ‘g’ (green), ‘b’ (blue), ‘o’ (orange), ‘y’ (yellow), or ‘p’ (pink).”
Want nice clean lines? Hold down the Shift key for a straight line, CTRL for a rectangle, and Tab for an ellipse. For an arrow, hold down Shift and CTRL.
Switch to a white (‘w’) or black (‘k’) background.
Would you prefer to type? Press ‘t’. Use the up and down arrow keys to change the size of the font.
When you’re done drawing, press ESC.

It’s portable!
If you want to use it on another computer, such as a classroom computer or a conference presentation computer, copy the files onto a flash drive. On the other computer, plug in the flash drive, and run the ZoomIt program. When you’re done with your presentation, exit ZoomIt, and eject your flash drive.
Multiple monitors
ZoomIt works on multiple monitors. However you can’t just move from one to the other. If you want to use ZoomIt’s drawing tools on, say, a presentation monitor, you need to move your cursor to that monitor before pressing CTRL + 2. You will only be able to draw on that monitor. To draw on the other monitor, you need to press ESC, move your cursor to the other monitor, and press CTRL + 2 again.
Conclusion
Try it out in your office or at home. When you’re feeling comfortable (it won’t take you long!), put it on a flash drive and carry it to class.

