Have a tablet (Android or iPad)? If not, are you looking for a reason to get one? What if I told you that a tablet can be a mobile smartboard?
I’m using Splashtop’s Whiteboard. In my classroom, I hook up my laptop to the projector like I usually do, and then I open Whiteboard on my Motorola Xoom tablet. What is on my computer screen I see on my tablet. This is the remote desktop mode. I can now control my computer with my tablet or with my computer keyboard and mouse. Whatever I do on one, happens on the other. In annotation mode, I can draw on the screen.
Connecting
On my computer I installed Splashtop Streamer (free). When Streamer launches for the first time, you’re asked to create a security code. You’ll need that in order to connect your tablet to that particular computer. Streamer runs in the background. You can find its icon in the system tray (lower right corner of your computer screen). On my Motorola Xoom tablet I have installed Splashtop Whiteboard ($9.99). When I run the Whiteboard app, it automatically detects my computer. To connect I enter my computer’s security code.
There are two ways you can connect your tablet to your computer. One is if both computers are on the same wifi network. This will be the fastest connection. If that doesn’t work, the app will look for the computer on the internet. In that case, Splashtop uses your gmail username and password to connect. (In my classroom, my computer is on the LAN and my Xoom is on wifi; the network is configured in such a way that Splashtop is able to connect them without any trouble.)
Using Splashtop Whiteboard
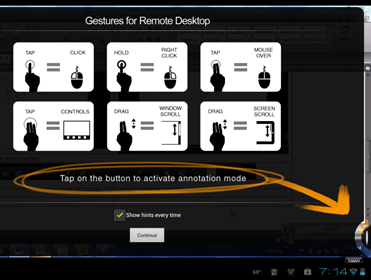
Once connected, Splashtop presents you with a handy set of instructions on your tablet. If I remember correctly, the very first time you connect, Splashtop runs you quickly through a tutorial on how to use some of these gestures. Every subsequent connection produces this reminder screen. Once you’ve internalized these gestures, uncheck “Show hints every time” at the bottom of the screen.
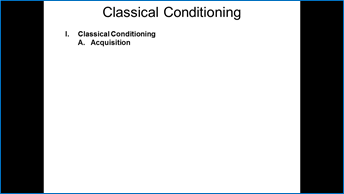
In the images below, I show what is both on my computer screen and my tablet screen. To show how this works in class, in my screenshots I’m running PowerPoint.
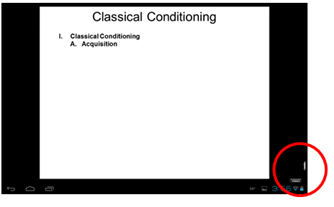
Look in the lower right corner of the tablet (right image below). The bottom icon is a keyboard that allows me to enter text, like in a web browser or in a Word document. Wherever I can type with my computer, that keyboard icon allows me to type with my tablet. The thin, vertical icon in the bottom right is a pen. Clicking that icon allows me to write on the screen – annotation mode.
These images show me in remote desktop mode.
|
Computer |
Tablet |
|
|
|
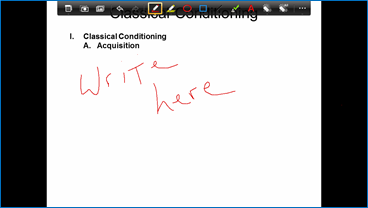
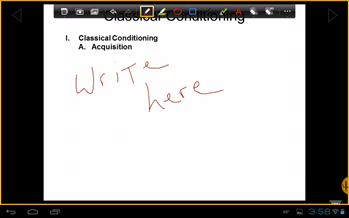
Clicking the pen icon, moving me to annotation mode, produces the toolbar at the top of the screen. The toolbar shows on the computer screen as well as the tablet, but the toolbar can only be controlled by the tablet. As you can see, I’ve used the pen tool to add ink to the screen.
|
Computer |
Tablet |
|
|
|
Let’s take a closer look at the toolbar.

Starting with the icon highlighted in yellow:
Pen (change color or thickness). While you can draw on the screen with your finger, a stylus gives you a little more control. Probably any stylus designed for “capacitive touch” will work, although some work better than others (I like this stylus a lot). With the highlighter, circle, and square, you can also change color and thickness. With the line tool, add a solid line, a line with an arrow, a line with an arrow on both ends, or a dotted line. Again, you can change color and thickness. Add a stamp (arrow, star, heart, smiley, checkmark, or X). The text tool (“A“) permits typing on the screen with the tablet’s keyboard. The eraser erases whatever it touches; erase all erases everything (lines, stamps, circles, etc.) that has been added to the screen.
The first icon is a little flipchart. Click it to get a blank screen. If you don’t want just a white screen, you can choose backgrounds like an xy graph or graph paper. Whichever you choose, scribble all over it to your heart’s content, and then, just like a paper flipchart, flip the page – in this case by use the toolbar’s right arrow. You will get a fresh screen. Want to go back to the screen with your scribbles? Tap the left arrow. Ready to go back to your slide presentation? Tap on the flipchart icon and select the first option in the row, the one with the X on it.
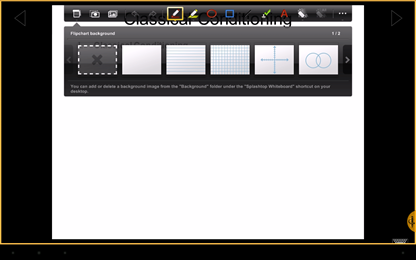
The camera icon takes a screenshot to save your brilliant explanation. The image gallery lets you call up those screenshots later to share your brilliant explanation with future classes. Or to return to it in a later class session.
If you are running PowerPoint (and this is also probably true for any presentation slide software), the arrows to the right and left of the toolbar allow you to move forward/backward through your slides. Or if you want to feel more powerful, put two fingers on the screen and slide left to advance, slide right to go back.
Don’t want the toolbar cluttering up the screen? Put two fingers on the screen, and slide up. To get the toolbar back, put two fingers on the screen, and slide down.
To exit annotation mode altogether, tap the pen icon in the bottom right corner.
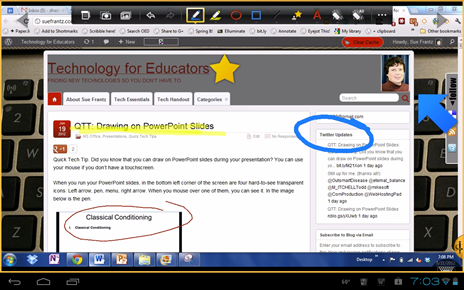
And of course there’s nothing special about PowerPoint. Anything that shows on your computer screen can be annotated. Here I’ve opened a webpage, and marked it up with the pen, highlighter, and added a couple stamps (star, arrow).
Other nifty features
Pinch to zoom. Your computer screen is going to look smaller on your tablet. Pinch to zoom in (two fingers on the screen then move them together); unpinch to zoom out (two fingers on the screen then move them apart).
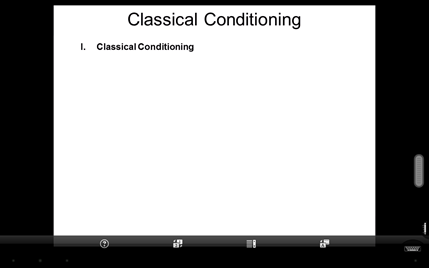
Menu items. While in remote desktop mode (pen icon is white), tap the tablet screen with three fingers to get this menu at the bottom of the screen. The question mark gives you the gesture hint screen. If you are using dual monitors the next icon allows you to switch monitors. (If you use dual monitors and are using PowerPoint’s presentation view, switching monitors allows you to see your notes and jump around in your slides. Just like in class, no one will be able to see what you’re doing. Just remember to switch back when you’re ready to write on the screen again.) The scroll icon adds a scroll tool (circled in blue); if you’re on a webpage, for example, it’s really easy to use this to scroll up and down. Just put your finger on it and slide up/down. If you use it in PowerPoint, it will cycle through your slides very quickly. It has essentially the same functionality as a scroll wheel on a mouse. The last icon toggles between sharp mode and smooth rendering video mode. If you wanted to watch a computer video from your tablet, the smooth rendering mode may make the video run more smoothly.

Conclusion
Since I record my lectures, I like having all of my writing on the screen instead of on the whiteboard.
I like the mobility – of not being stuck behind a computer monitor – or needing to frequently go behind the monitor. I’m now free to wander the classroom.


