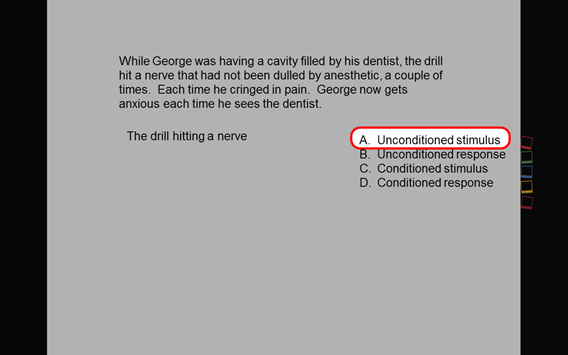
OneNote: The Note-Taking Program You Didn’t Know You Had

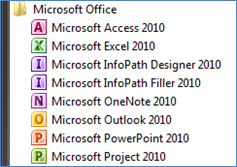
Look in your Microsoft Office folder, you know, where you go to open Word, PowerPoint, and Excel. There’s a program in there called OneNote. It’s an organization machine.
Overview
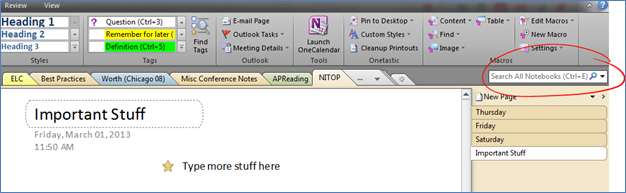
In OneNote, the notebook is the top level of organization, much like folders. In the image below you can see 6 of my notebooks on the left side of the screen: APA, Conferences, Work Notebook, STP, Technology, and Personal Notebook.
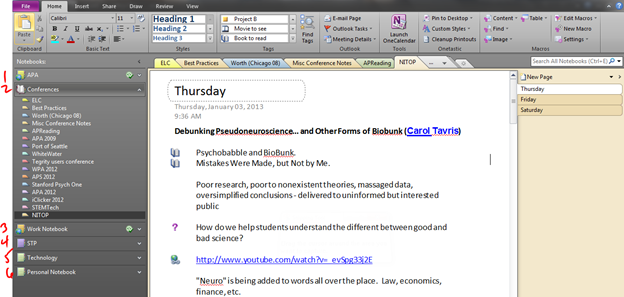
Each notebook is divided into sections. My conferences notebook has 16 sections. You can see them on the left as “subfolders” of the conferences notebook, and you can also see the first ones as tabs along the top of the screen.
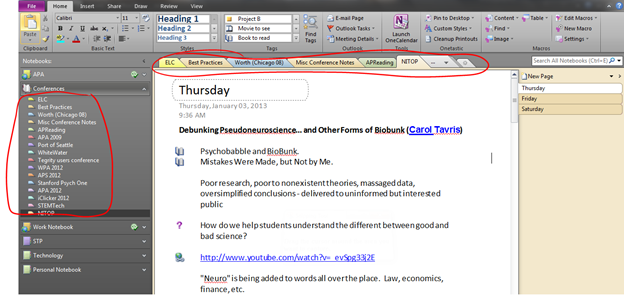
Each section has pages. In this example, I have the NITOP section selected, and the pages associated with that section appear on the right side of the screen.

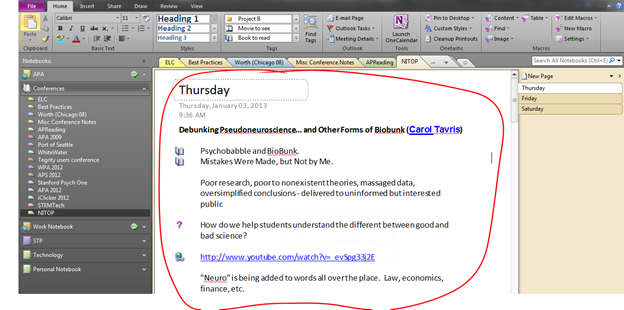
With the “Thursday” page selected, the center of the screen shows the notes I took on the Thursday of the conference.
Working with pages
I want you to get a sense that the power OneNote has.
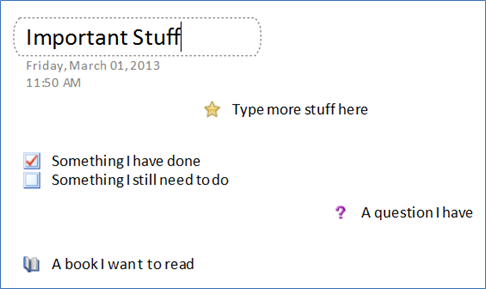
When you create a new page by clicking “new page” in the top right corner, OneNote will automatically add an “untitled page” to the bottom of your list of pages in that particular section of your notebook.
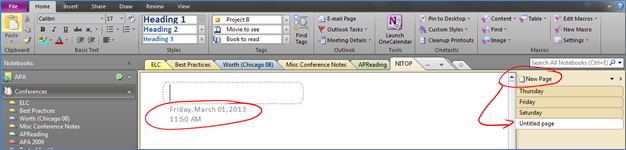
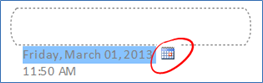
OneNote will automatically time and date stamp the page, but those can be changed. Clicking on the date will highlight it and generate a calendar icon. Click on the icon to change the date. Clicking on the time will highlight it and generate a clock icon. Click on it to change the time.
In the dotted box, type in the name of your page. OneNote automatically updates the title in the page list on the right side of the screen.

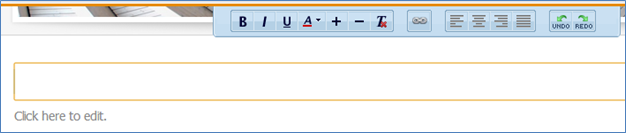
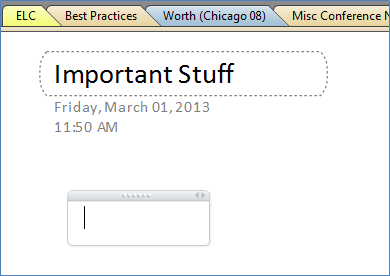
To enter your content on the page, click anywhere on the page. OneNote will generate a textbox. Just type. To move it, grab the bar at the top, and drag anywhere on the page.
You can tag anything you’d like with whatever tag you’d like. Here I’ve tagged content as important (yellow star), as a question (purple question mark), as a book I want to read (book), and check boxes for things I need to do. The first item I’ve already done, so I clicked in the box to check it off.
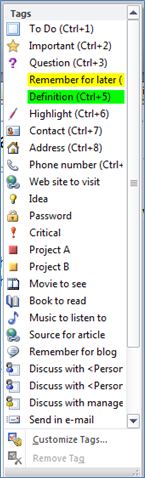
To get to the list of tags, click the little down arrow to the right of the short list of tags at the top of the OneNote screen.

Here are some of my OneNote’s tags. OneNote gives you a bunch by default, but they are fully customizable. Just right-click on one to modify it.
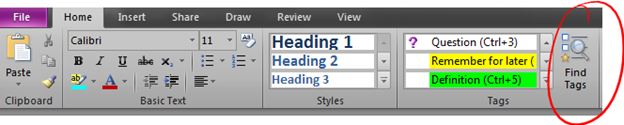
Why use tags? Because OneNote makes it easy for you to see them all in one place. Click on “Find Tags.”
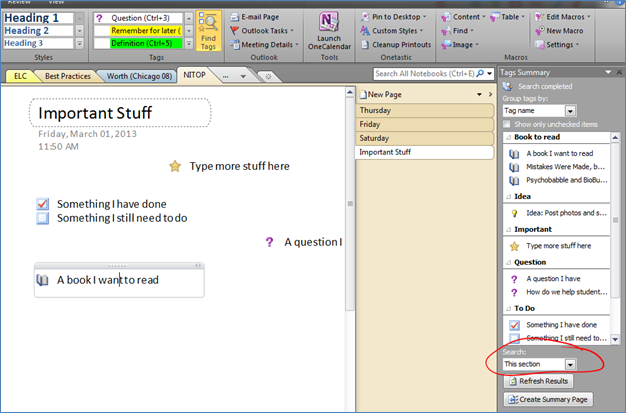
This calls up the “Tags Summary” pane. You can see it on the right side of the image below. You can see all of the tags I’ve used. Near the bottom of the pane, I can decide the location of the tags I’m interested in. In this case, I’ve only asked to see the tags in this section of this notebook.
Search
One of the more powerful features of OneNote is searching. In the top right corner, type in what you’re searching for. Search all notebooks by default, but if you click the little down arrow on the far right side of the search box, you can opt to search just this section or this page, for example.
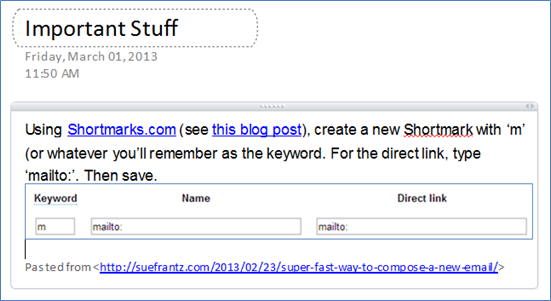
Pasting stuff from the Internet
Here I’ve copied some content from a recent blog post. OneNote automatically added the “pasted from” and link at the end; that URL is clickable. Oh, and the blue “Shortmarks.com” in the copied text? That’s a live link. In OneNote, I can click on it to go directly to that webpage. OneNote handles images just fine, too. I included the keyword/name/direct link image when I copied the text. It appeared when I pasted.
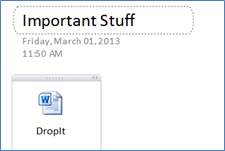
Adding files
Drag and drop a file from your desktop or any file folder onto a OneNote page. You’ll be asked how you want to attach the file to the page.

If you choose the middle option, you’ll see the file type icon with the name of the file under it. If you don’t like where OneNote put it, click and drag it anywhere you’d like.
Outlook integration
I know that some of you don’t quite know what to do with that important email you’ve been receiving around some sort of project you’re working on, so you just keep it in your mailbox’s inbox. How about you move it to someplace more useful?
Here’s an email – complete with attachment – I just received in Outlook. I’m going to copy it to a OneNote page. In the Outlook toolbar, there’s a OneNote button.
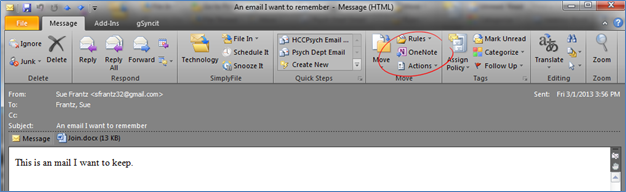
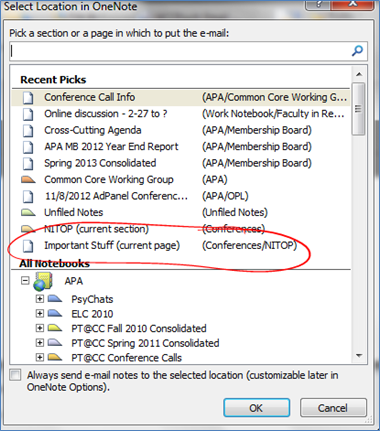
That generates this screen where OneNote asks where I’d like to put it. At the bottom of the “recent picks” section is the OneNote page that I currently have open. If I don’t like any of those options, I can navigate through my notebooks to find the spot I want.
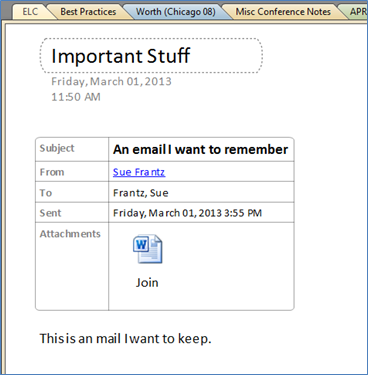
I clicked on the “Important Stuff” page and clicked “OK” to make this little piece of magic happen. And, yes, that Word icon is the file that was attached to my email. The file is named Join. Double-clicking on that will open the file in Word.
Mobile app
OneNote Mobile (free) uses SkyDrive (also free) to sync your OneNote notebooks across devices. You can find information on how to set up OneNote Mobile here.
Try it!
It’s already installed on your computer. Play with it. This post just scratched the surface of what OneNote can do. Use only as many features as make sense for you.