I’ve written before about using Tampermonkey scripts for adding functionality to Canvas. If you’re not familiar with Tampermonkey scripts for Canvas, please read that post first. I have another one for my fellow intrepid Canvas users. This one comes from Ben Fisher of Crean Lutheran High School, known as fisher1 in the Canvas Community forums. Read his post here.
What the “Set Canvas Default Due Times” script does
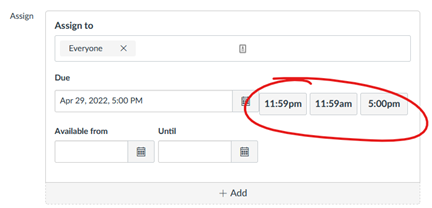
Everywhere you can add a time for when an assignment, quiz, or discussion is due, you will have time buttons to choose from. Yes, you can decide what those times are. All of my course stuff is due at 11:59pm, so that will be the only button I have. However, I’ve edited the script to show you these three times as an example.
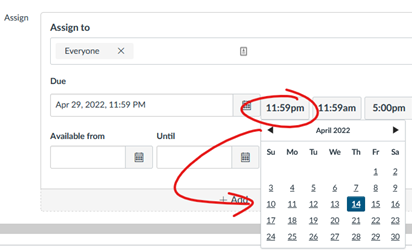
After clicking a time button, the calendar will appear with today’s date highlighted. Choose the date you want. The due date and time will be set. Click the Save button as you normally do. Done!
Get the script
If you have Tampermonkey installed, visit this website, and click the Install button. If you don’t yet have Tampermonkey, start with my initial blog post on using Tampermonkey with Canvas.
Editing the script
Let’s start by setting the times that will appear on the buttons.
Click on the Tampermonkey icon in your browser’s add-on toolbar.
Select Dashboard. From the list of scripts, select Canvas Default Due Times. (If this is the first script you’ve added, it will be the only one you see.)
In the script, look for the line that begins with “const defaultTimes” – this is the line that contains the code for the button times. Times are according to a 24-hour clock. Change the times to the ones you want. Be sure to keep the apostrophes and the commas exactly where they are. Change only the numbers.

In my courses, since everything is due at 11:59pm, this is what my line of code looks like. You do you.

There is one more thing we need to check on. [Ben Fisher, who wrote the code, amended the file to include the lines below, so need to add them. Thanks, Ben!]
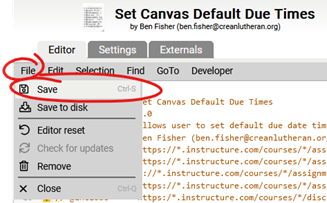
Log into Canvas and look at the url in your browser’s address bar. If it starts with <institution name>.instructure.com, you’re good to go. Just click File and Save.
If your Canvas address starts with canvas.<institution name>.edu, then we have to do one more thing.
Take a look at lines 6 through 14. When you use a Tampermonkey script, the script needs to tell Tampermonkey which websites the script applies to. The asterisk (*) means that there can be any text there. We can see that the script will run at institutions that use <institution name>.instructure.com.
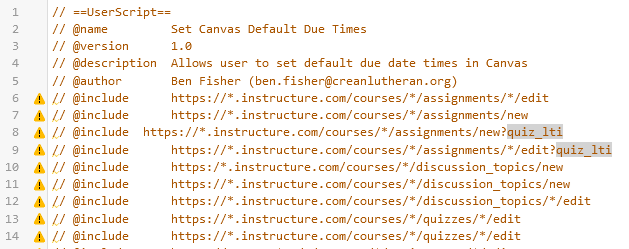
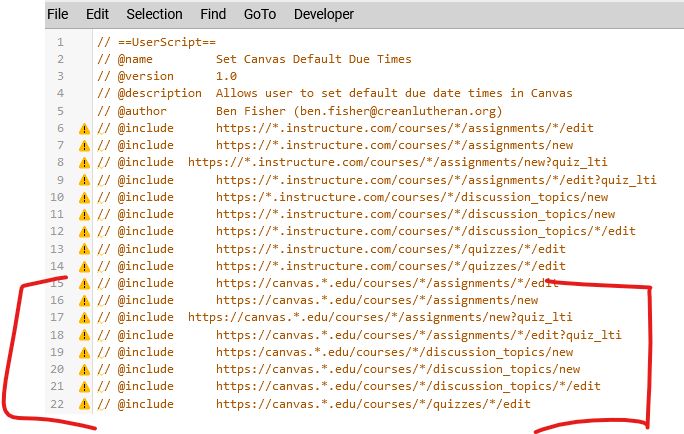
My college, though, uses this address: canvas.<institution name>.edu. The script doesn’t include that kind of address, so Tampermonkey won’t know to run, so we need to add some lines of code so that Tampermonkey runs on our Canvas pages.
Download this text file. Copy and paste the lines of code. You can either replace all of the existing instructure.com lines, or just add the canvas.*.edu lines after.
Click File and Save. Done!
Important note
Tampermonkey scripts are browser-dependent, meaning they only run in browsers where they are installed. If you use Canvas on multiple computers, you will need to install Tampermonkey and your Canvas scripts on all of those computers/browsers.
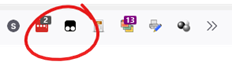
You can export all of your Tampermonkey scripts by going to the Tampermonkey Dashboard, clicking the box in the top left corner to select all, choosing Export from the dropdown menu, and clicking Start.
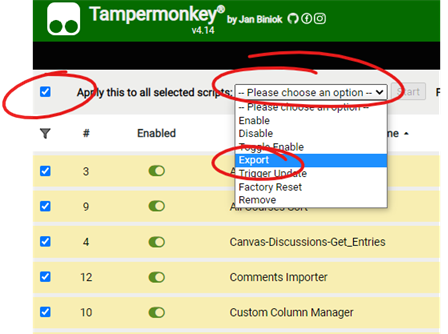
Very quickly, all of your scripts will appear in your downloads folder as a zip file.
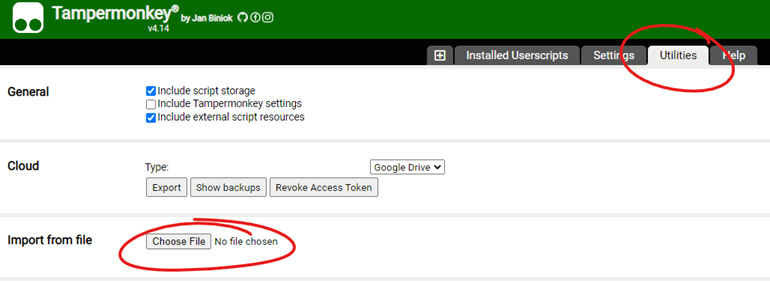
Now go to the browser—on the same computer or a different computer—where you want to run the scripts. Install Tampermonkey there if you haven’t already. Click on the Tampermonkey icon in that browser. Select the Utilities tab. In the “Import from file” section, click choose file and select your downloaded zip file. Follow any online instructions. And… done!