One of the cool features of MS Office 2007/2010 is the quick access toolbar. I have a sneaking suspicion it is underutilized. It allows you to quickly access any function, thus the name: Quick access toolbar.
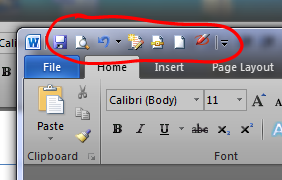
This toolbar is at the very top of the screen in all of the MS Office programs. For example, this is what mine looks like in MS Word.
A click on the appropriate icon lets me quickly do that icon’s function. Or pressing ALT on my keyboard will assign numbers to each of the icons.
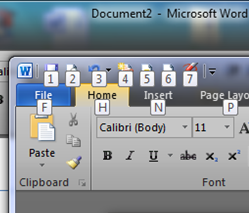
Then I just press a number that corresponds to the icon I want. For example, if I wanted print preview, I would press ALT followed by 2. That’s it.
Word comes with some default icons in the quick access toolbar, such as save (the little blue floppy disk). Its real power is that it lets you add and remove whatever functions you’d like. Since I grade papers electronically, I’m frequently accessing ‘track changes’ and ‘save as PDF.’ So, I added those functions to my quick access toolbar. ALT then 4 turns on track changes. ALT then 5 saves the file as a PDF.
I’ll walk you through how to add ‘track changes’ to your quick access toolbar.
Click the down arrow on the far right side of the quick access toolbar. It will give you this menu.

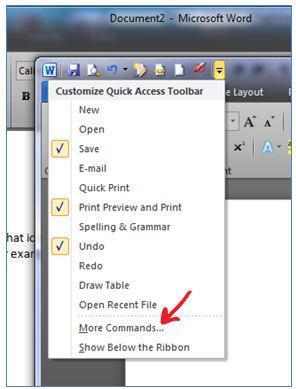
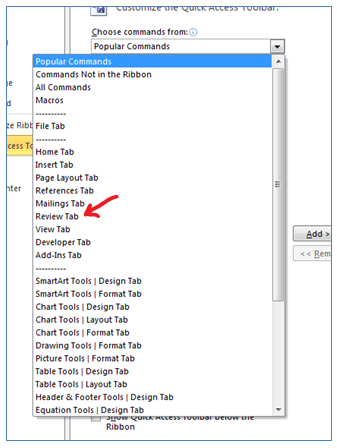
If the option you’d like is there, great! (The checkmarks show the commands that are already on my quick access toolbar.) Since we’re looking for ‘track changes,’ select ‘More Commands.’ That will generate this pop-up window.
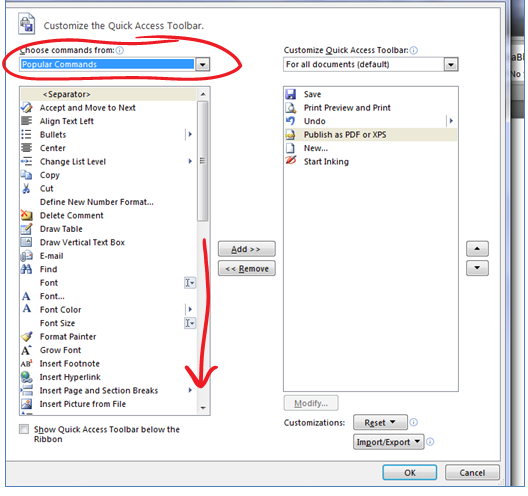

On the left side of the screen, Word gives you popular commands. Scroll to the bottom, and track changes is there. Alternatively, use the dropdown menu (where it reads ‘Popular Commands’ highlighted in blue) to select from the various tabs. Track changes is on the Review tab.
Once you find the command you’re looking for, click the ‘Add’ button in the middle of the screen. The command is now available in your quick access toolbar. Use the arrow buttons on the right to change the order of the commands.

That’s it! If you want to remove a command, select it so it’s highlighted, then click the ‘Remove’ button.
Note the commands you frequently use. Consider adding them to your quick access toolbar for easy access.
