Keeping Up with New Information: The Magic of RSS
You don’t have time to read the New York Times cover to cover or time to spend all day watching CNN. You don’t have time to visit your favorite journals in the library to see if there’s anything relevant to your teaching or research. What if you had your own news butler who would sift through the news, giving you only what you’re interested in? RSS feeds are like news tickers. RSS feed readers – aka news butlers – pick up the feeds you want and deliver them to you in an easy-to-read format for your computer or mobile device. Think of it as a newspaper customized just for you.

RSS stands for “Really Simple Syndication.” Some websites use this format to make their content easily read by programs called RSS feed readers. Anywhere you see this orange icon, the content is in an RSS format.

Feedly
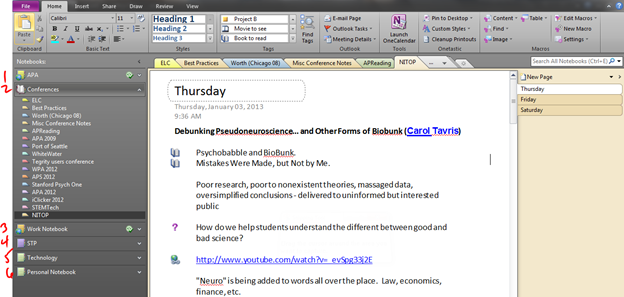
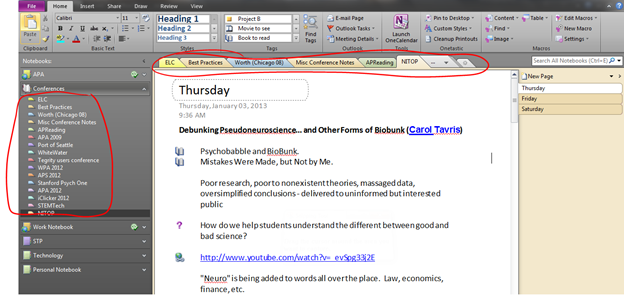
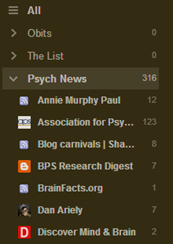
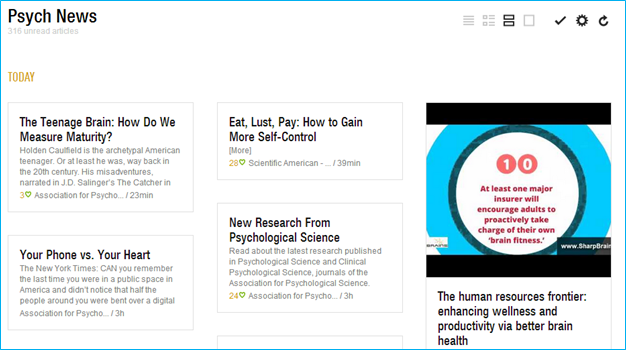
There are many different kinds of RSS feed readers out there. I’m partial to Feedly for its customization and clean layout. On the left side of the screen is my list of categories. Inside of each category are the titles of my feeds. In the “Psych News” category, I have 316 unread items. There are 12 unread items from Annie Murphy Paul’s blog, 123 unread items from the Association for Psychological Science.
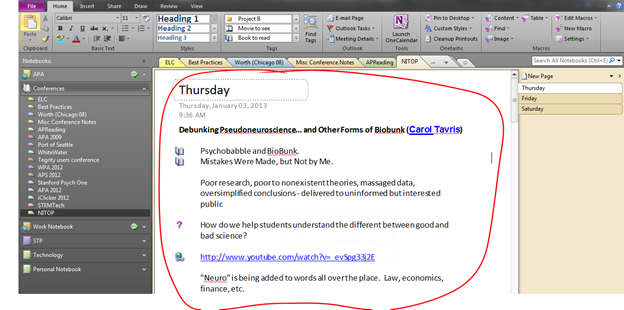
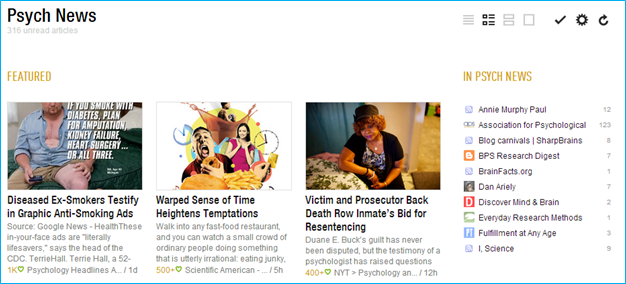
In the main window you can see the articles themselves.

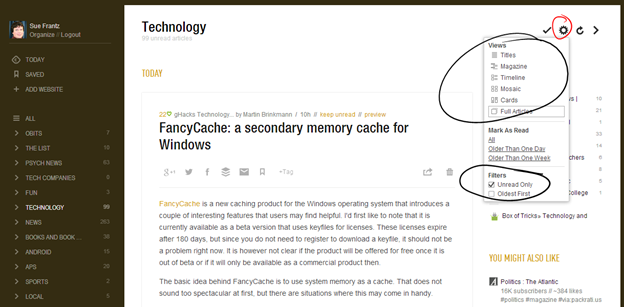
I prefer the “title only” view for the articles, but you can change this to a different kind of view using the buttons in the top right corner of the screen.
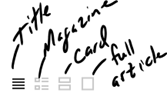
Magazine view
Card view
Full article view
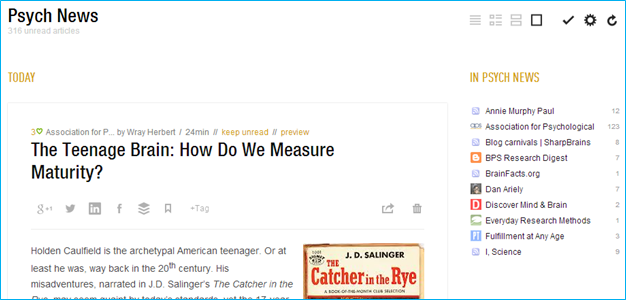
Sharing/saving articles
Connected to each article is a toolbar. Clicking the icons makes it easy to share the content using social media. The bookmark icon – “saved for later” – copies the article into the “Saved for Later” section of the left navigation pane for quick and easy access. You can also add a “tag” to any article. Any tags you create are listed at the very bottom of the left navigation pane.

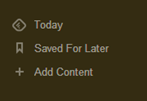
Adding news feeds
At the very top of the left navigation pane, click the “add content” link.
That will open a new window on the right. You can enter a “url, title, or #topic” in the search box or you can browse for content in the “Explore” section.
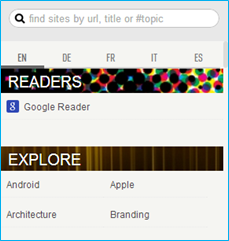
Here I’ve entered suefrantz.com, and in the “sites” section, you can see my website listed.
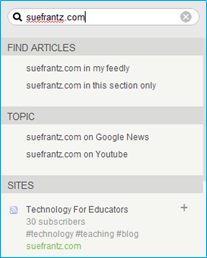
Clicking on that link, will show what the RSS feed will look like in Feedly. If you want to keep the feed, click the “add” button.
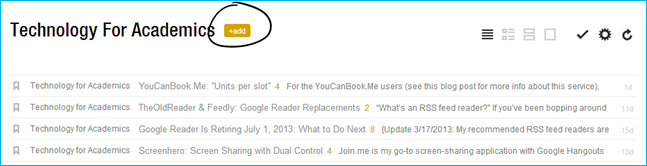
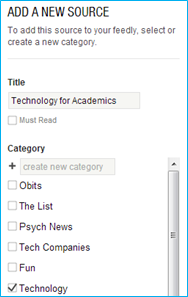
Feedly will ask you where you’d like the feed to be listed. You can add it to an existing category or create a new category.
Any time I publish new content to my blog, it will appear in your Feedly feeds. You don’t have to keep visiting my website to find it. It just appears. That’s the magic of RSS.
Finding feeds
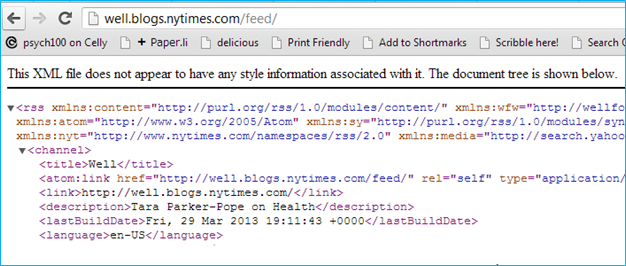
The major (and many minor) news outlets have RSS feeds. The New York Times has several. You can find your way to the New York Times RSS page from any of their pages. Scroll to the very bottom, and there’s an “RSS” link.

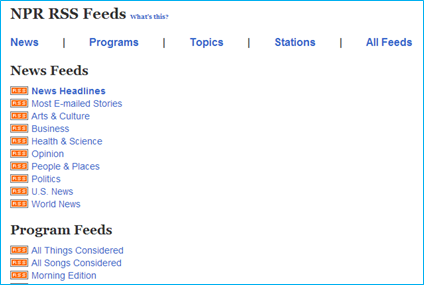
Here they are from NPR.
When you click on one of those feed links, you will get a very scary look page of code. Fortunately, you can ignore it all – except for the URL, in this case http://well.blogs.nytimes.com/feed/. That’s what you’ll copy into the “find sites” box you get when you click “Add Content” in the left navigation pane.
If you’re not sure if the website is using RSS, try the website URL in Feedly. If it doesn’t work, Feedly will let you know.
Creating a feed from a library database
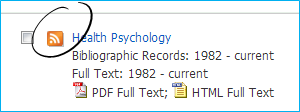
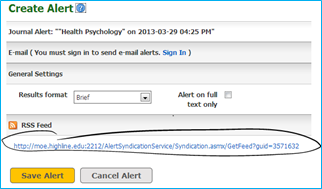
Here I’ve gone into PsycARTICLES and am looking at the list of journals. See the RSS icon?
When I click on that icon, I get this screen. This gives me the RSS feed URL that I can copy and paste into Feedly. Whenever a new issue of the journal appears in the database, the table of contents – and sometimes abstracts – will appear in Feedly.
You can also do a search in the database and then get an RSS feed for that search. Any time something new appears in the database that matches those search criteria, you’ll see it in Feedly. Contact your librarian to help you get feeds from your library’s databases.
Create a feed from a Google search[Update 7/26/2013 : Since Google Reader was killed off, Google Alerts no longer produce an RSS feed. There aren’t a lot of good alternatives out there, but it looks like TalkWalker might be the closest.]
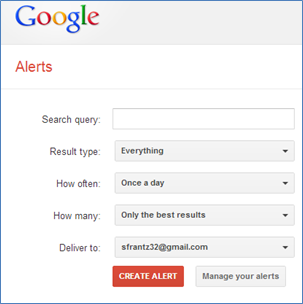
Go to Google Alerts, and enter a search query. In the panel on the right, you’ll see Google’s results. Choose the result type, here I’ve selected “News.” I’ve chosen to have the results delivered as a news feed. Then “Create Alert.”
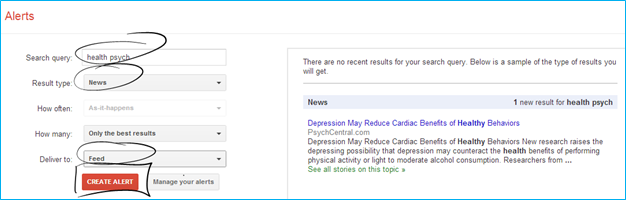
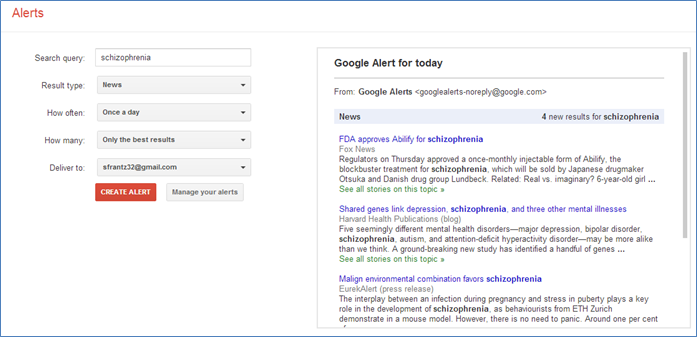
On the page that’s created, you’ll see your query. Click on the orange RSS icon to get the news feed page. Copy that URL into Feedly. Any time a news item that meets those search criteria appears in Google, you’ll get notified in Feedly.

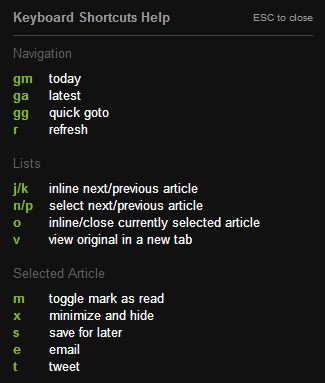
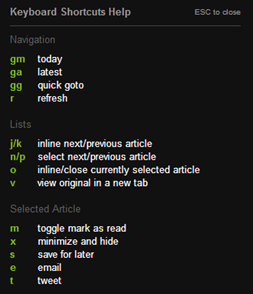
Keyboard shortcuts
Feedly has several useful keyboard shortcuts. In Feedly, click anywhere on the page, then type a question mark to get the list of shortcuts.
Mobile
Feedly has a mobile app (Android/iOS). Since Feedly is in the “cloud,” you can seamlessly move from your smartphone, to your laptop, to your tablet, to your desktop.
Important usage note
Don’t feel compelled to read everything in your news feed. I hope you don’t feel compelled to read every article in your local newspaper. Feedly is the same thing. It’s just your personal newspaper.
Special note for Chrome users
Install the RSS Subscription Extension. It will make adding RSS feeds to Feedly very easy. Once it’s installed, when you click on that orange RSS icon, it will load a page that looks like this. Just select “Feedly” and click “Subscribe Now.” No need to copy the URL into Feedly manually.
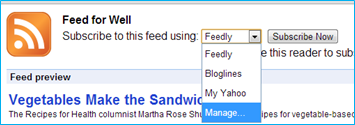
But Feedly is probably not listed in that drop down list, so let’s add it. In the drop down list, select “Manage.” Click the “Add” button. In the description box, type Feedly. For the URL, enter this: http://www.feedly.com/home#subscription/feed/%s and click “Save.”
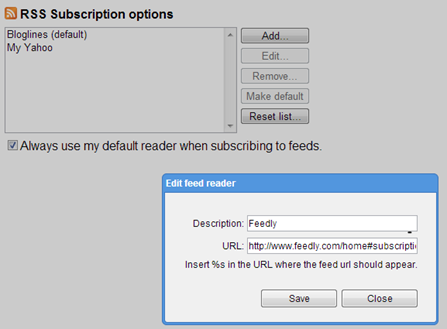
Now you’re good to go. Click on an RSS icon, the feed page will load, and click “Subscribe Now.” Feedly will launch. Confirm that you want to add that subscription, and Feedly will ask which category you’d like to put it in. Done.
Try it
If you’ve never used an RSS feed reader before, you’ll be surprised at how much more in-the-know you will be.