Bulk delete/unpublish pages in Canvas

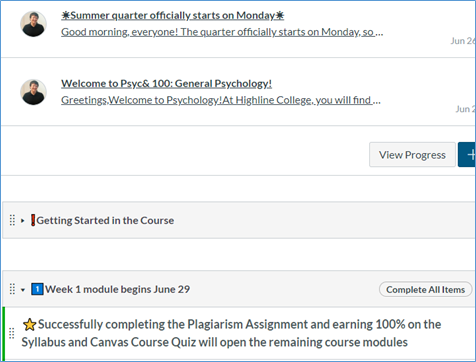
My college has been with the Canvas learning management system for a few years now. There are many things I like about it, but the cumbersome number of clicks it takes to delete a bunch of pages is not one of them. And I wanted to delete a bunch of pages.

We recently turned on “Atomic Search” within Canvas that allows instructors and students to search within a course. If a page is published, it’s fair game to be returned in search results. As I copied courses from quarter to quarter to quarter, I never had to worry about those unused pages. They weren’t linked to anything, so students had no way to get to them. But now, with search, they do. I have to delete or at least unpublish dozens and dozens of pages. Over 100 pages. Unfortunately, Canvas does not have a native bulk delete feature where you can just check boxes next to what you want to delete, and then click a button to delete them all. That would be awesome. Instead, Canvas pages can only be deleted one by one. And the last thing I want to do is delete 100+ pages one by one.

Because of how Canvas is built, however, knowledgeable individuals can build tools that will make using Canvas easier, such as using a Google spreadsheet to change assignment due dates. In this case, a shout out to James Jones for creating a way to delete or unpublish a bunch of Canvas pages in one fell swoop using Google spreadsheets.

Follow the instructions. All you need is a Google account.


Slides for Students: A Book Review

Several years ago, I moved away from using presentation slides in my courses. They just didn’t work with the interteaching model I had started using. Instead, I returned to where I started my career: writing on the board. My current board is digital (interactive short-throw projector with whiteboard software), so my “markers” never run out of ink. For my conference presentations –except for my tech talks—I still use presentation slides, specifically PowerPoint. I know some of you really love Prezi. As my colleague Steve Chew has observed, Prezi is the only presentation software that requires the audience to take Dramamine first. I’ll attend your Prezi talk, but my eyes will be closed.

Since psychologists know a lot about how we learn, I’m not sure why it has taken so long for one to compile the research and give us an evidence-based/evidence-informed book on how to create effective slide presentations. Gary Fisk, psychology professor at Georgia Southwestern State University, has given us Slides for Students: The Effective Use of Powerpoint in Education*. I confess that the title confused me a bit. I wasn’t sure if this was a book meant for students to use to help them create effective slide presentations or if it was a book meant for instructors to use in presenting content to students. It is indeed the later. In an early chapter we learn that PowerPoint was developed for sales presentations. And, indeed, taken out of the box and using the default settings, it may be effective in sales. In education, however, we are communicating a different kind of message, so a different approach to creating slides is needed.

The first chapter sets up why this book is necessary: we are not born knowing how to create effective slide presentations. Chapter two details every complaint about slide presentations and every counterargument offered in response. If you’re of a certain age and have stood in enough faculty breakrooms for enough years, you have heard it all already. You have permission to skim this chapter. If you consider yourself new to teaching, it’s worth a closer read. If you’re curmudgeonly, chapter 2 will give you some fodder. If you are anti-curmudgeonly, chapter 2 will give you an arsenal of replies.

In chapter three, Fisk summarizes some of the original research in this arena. Early studies compared lectures using presentation slides with lecture that did not—that used, say, a whiteboard instead. There were no differences in student performance on exams or in the course. With hindsight we can see that this wasn’t quite the right question to ask. Presentation slide software is just a tool. We don’t ask whether a hammer is effective. Instead, the question is what’s the best way to use the tool and under what circumstances. Using a hammer is very effective at, well, hammering. It doesn’t work very well at drilling holes. You can’t blame the hammer for that! Students like presentation slides, but they also acknowledge that there are some downsides. I’m more interested in whether presentation slides can be used in a way that actually helps students learn, not whether students think they help them learn. Fisk draws the same conclusion, “The guiding spirit [of this book] is to determine how teachers should use this medium to augment their teaching and thereby improve student learning.”

Take a minute to reflect on some of the worst presentations you have seen, whether it be as a student or at a conference.

Fisk cites survey research on what audience members hate the most about presentations. Number 1 on the list: the presenter reads the slides. I have mixed feelings about this one. As a presenter, I cannot assume that everyone in the room has the visual acuity to read my slides, no matter the size of the font or the degree of contrast. To say, “Take a minute and read this slide,” makes me worry that I have systematically excluded a chunk of my audience. Having written that, the solution is obvious. I shouldn’t put the text on the slide at all. How about I just say it? If it’s a quote, I can have the quote in my notes. The quote does not need to be on the slide. That also solves the second biggest complaint audience members have: too much text on the slide. That complaint is really about how hard it is process what’s on the slide. Fisk reports that complaints three and four are in the same vein: “small text and overly complex graphics.” Frankly, so is another problem: over-stylized presentations. While programs like PowerPoint give you the option to add all kinds of bells and whistles—PowerPoint 2019 includes new features like zoom and morph—don’t use them. They will distract more than they will add. Also, don’t go crazy with the technology. The less technology you use, the smoother your presentation will be. The more technology you use, the more things can go wrong. While you’re troubleshooting and fixing the technology, your students/audience members have lost the thread of what you were saying, and they have moved on to other things, e.g., Instagram. Fisk covers some other “presentation killers,” but most of them come down to one general presentation principle: keep it simple.

How should you structure your simple presentation? Fisk suggests appealing to emotion, although he cautions that too much emotion can overwhelm an audience. Many psychology textbooks start their chapters with a vignette, often a real one, but not always. This draws the reader in; they want to know how the story ends. A presentation is no different. Use emotion to help your audience care about what you are saying. Sprinkle emotion throughout your presentation, such as (appropriate) humor. Fisk offers several other ideas for drawing in an audience. End your presentation with a take-home message.

Through your presentation, remember that you are not locked into your slides. You control your slides; your slides do not control you. While you may have been thinking of a particular path when you created your slides, through student questions during your presentation, you may discover that a different path may be more appropriate. It’s okay to take that path. You don’t have to announce to students that you are taking a different path than the one you intended. If students are locked in to thinking that they are there to hear you deliver a fixed lecture, they may perceive such an announcement as a sign that you are going off on a tangent or being derailed by student questions. You’re not. You are flexibly responding to the learning needs of your students in that moment.

One of the benefits of having a sensation and perception expert write a book on slide presentations is that we get an explanation of how our slides should look due to the function and limitations of the human visual system. In chapter 7, Fisk makes recommendations for the best font size and background for your slides based on the lighting in your room. And he offers some caution about the use of color. Fisk gives us some concrete advice on how to design the layout of our slides. Psychologists will be interested in the rationale that’s based on Gestalt principles of organization.

Fisk nicely summarizes the relevant research on attention, cognition (such as memory), and behavior (such as notetaking and attendance). He, then, offers concrete suggestions on how to design your presentation to make best use of what we know.

In chapter 16, Fisk brings it all together by walking us through a well-designed presentation.

While Slides for Students: The Effective Use of Powerpoint in Education looks intimidating with its 300 pages of content, the large font and substantial spacing between lines makes this a quicker read than it initially appears. Having said that, you still will want to take this book one chapter at a time. In editing your current presentations, change one set of elements this term, such as reducing text or moving to more reader-friendly font, and then address another set next term. You don’t have to revise everything today!

*I received a free copy of this book in exchange for a review at the request of the publisher.


Buzz in. Live!

Some instructors and students like to use a Jeopardy! format to review course content. I’ve learned that it’s not my thing, but I’m happy to support those of you who are into it.

First, you need a Jeopardy! board. I wrote about Jeopardy Labs in 2011, and that is still a solid board creation tool.

Next, you need a way for students to buzz in. The easiest is the free BuzzIn.live website. (Shout out to the developer, Logan Sinclair!)

Visit the BuzzIn.live website and click the “Host” button.

That brings up your host dashboard. Tell your students to use their web-enabled device to visit the BuzzIn.live website. If not all of your students have a web-enabled device or if you’re over the 150-player limit, ask students to work in pairs or small groups so only one person in the group needs a device. They’ll click the “Join” button, enter the 6-digit game code, and enter their name(s) or team name. The limit in this field is 12 characters.

On your dashboard, you’ll see a list of the connected players. This will update automatically as players join. Clicking “Toggle Lock” will lock the room so no more students can join.

By default “sound” is unchecked. In your BuzzIn.live dashboard settings, you can decide whether you want students to be able to turn on their buzzer sound or not.

On your dashboard, click the settings button, then decide whether you want to give students the option to turn on their buzzer sound.

Clicking on the button will remove the buzzer sound option.

Participants who have joined your room will see a big green BUZZ button on their screens.

Ask your question, and students will hit the BUZZ button. That will turn the color of their button to red and it will now read BUZZED.

On your dashboard, you’ll see the players who buzzed in and in what order.

Ask MWashburn to answer the question. If she cannot, move on to AFreud, and so on.

When you’re ready to move to a new question, click the red “Reset ALL Buzzers” button. Everyone’s buzzer will go back to green, and you’re good to go again.

Pro-tip: Since you’ll most likely be showing the questions on your main computer screen, consider using a different device—your own laptop, tablet, phone—to run BuzzIn.live.


Choose your chart colors carefully

Each of
us
sees
color
differently.

Download the free Color Blind Pal app to your phone or tablet.

Open the app, tap “inspecting color” to change it to “filtering colors,” then tap the at the top of the screen.

If it is difficult for you to see the color differences in the pie chart below, under “color blindness type” select your form of color blindness and click the at the top of the screen. Point your camera at this pie chart to see the colors shifted making the colors easier to tell apart.


If you have typical color vision, under “color blindness type” select “simulate protanopia,” and click the at the top of the screen. Point your camera at the pie chart above to see what someone who cannot see red sees.*


* “Red? But the chart is green/orange…” Protanopia is absence of red and deuteranopia is absence of green. Our brain knows red and green are different by comparing them to each other. If one is missing, there is nothing to compare to, so they look the same.


Show Desktop: Keyboard shortcut for Windows and Mac

When someone knocks on your office door, you may have a sensitive email or student work on your screen. Rather than figuring out if what is on your screen can be safely seen, use a keyboard shortcut to minimize everything so only your desktop shows.

Windows

Windows key + D (“D” is for desktop).

When your visitor leaves, that same key combination will bring back everything where it was.

Mac

Command + F3 (“F3” is for F3).

When your visitor leaves, that same key combination or just F3 will bring back everything where it was.


Emoji menu built into Windows 10 and Macs

Windows 10* has a built-in emoji menu. Go into any program where you can type, like Word or a new email message.


Press Windows key + semicolon.

Choose an emoji from the menu.

The first page (clock icon) shows your most recently used emoji.

The magnifying glass is for search. Type what you’re looking for, like “smile.” You’ll see all of the emoji tagged with that word.

Click on the other icons to browse emoji by categories.

To close the menu, click the X in the top right corner, press the ESC key, or click anywhere that is not the menu.

Choose a skin tone

On the ‘people’ page, click on the skin tone icon in the top right corner to choose a different skin tone.

Emoji skin tone modifier screen


For Macs, Control + Command + Spacebar will call up the emoji menu.Mac keyboard, with circled keys control, command, spacebar

Choose a skin tone

Click and hold on a person icon. You’ll get a mini pop-up screen showing the person with different skin tones.

**************************

*If you have this icon in the bottom left corner of your computer screen, you have Windows 10.


Save browser bookmarks in Windows folders


Select the entire web address

Mouse fans: single click on the web address

Keyboard shortcut fans: CTRL-L

Click and drag into your Windows folder

Double-click on the bookmark in your folder to launch the page in your web browser

“Can I rename the link?”

Yes. The default name for the link is whatever that website’s webmaster called the page. Just as you can rename a file in your folder, you can rename your bookmarks. In your folder, right-click on the link, select “Rename,” and, well, rename it.

“I use Dropbox/Google Drive/OneDrive. Will my bookmark links synchronize across my devices?”

Yes.

“That means that when I go to a Dropbox/Google Drive/OneDrive folder on my phone, and tap on a bookmark link, my phone will open the webpage?”

Yes.


PhraseExpress: Are you typing the same thing over and over again?

I first wrote about PhraseExpress in 2009. My new policy: if I’m still using a particular technology 10 years later, it deserves a new blog post.

PhraseExpress is a text expander (and more) for Windows, Mac, Android, and iPhone. The reviews for the mobile versions are mixed, so I’m going to limit the post to Windows. (Mac functionality is similar, I just don’t have a Mac.) PhraseExpress is free for non-commercial use. The pay-for upgrades give you more functionality that may or may not be useful to you. They’re a one-time fee – not annual subscription – for that version. For significant version upgrades which do not happen often, you’ll need to purchase again, but you’ll get a discount as a current pay-for user. Personally, I pay for the “Standard” version not because I need the features, but because I want to support the developers who maintain I product I use daily. Hourly.

Where it works

It works at the level of the operating system. If you can type, it will work. Email. Word processing programs. Your web browser – and, yes, that includes your course management system.

What it does

A text expander, like PhraseExpress, allows you to create keyboard shortcuts for longer phrases.

I have an assignment where my students write about internal and external locus of control. As I score their assignments, I don’t want to type those words over and over again. I created two PhraseExpress shortcuts. When I type iloc, it expands to internal locus of control. When I type eloc, it expands to external locus of control.

I have another assignment on the Big Five personality traits. I don’t want to repeatedly type any of the Big Five, but especially conscientiousness. I created five PhraseExpress shortcuts. Bfc, for example, expands into conscientiousness. I bet you can guess what I use for agreeableness, openness, extraversion, and neuroticism.

I don’t type out my work email address any more. I just type @h and it expands to sfrantz@highline.edu.

When students email me for an entry code to get into my General Psychology course because the system doesn’t know they meet the prerequisite, I type #entry which expands into:

I’m glad you’re interested in taking General Psychology!


Please go to the Psyc& 100 entry in the class schedule and log in with your Highline username and password. Right above the description for the course in tiny print there is a link to “request an entry code.” Click on the link and follow the instructions. Be sure to include whatever documentation you have that shows that you meet the prerequisites for the course.


Please let me know if you have any questions!


For single words, I tend to use a few letters. For sentences and paragraph, I tend to use a word preceded by either # or !. It’s a personalized system. Use whatever makes sense for you.

How to create shortcuts

After installing and running PhraseExpress, it will always run in the background.

Type the word or words you want associated with a shortcut, like conscientiousness. Highlight it, and copy it. In your system tray (icons in the bottom left of your screen), left-click on the Phrase Express icon. If you don’t see it, click the up arrow at the left end of the list of icons to see everything in your system tray.

In the pop-up menu, you will see the last 20 things you’ve copied.

Bonus: PhraseExpress expands your clipboard from Window’s one item to twenty items. Although, as of this writing, some of you have the new Windows version (Build 1809) that comes with a much-improved clipboard manager.

At the bottom of the menu, click on “New phrase…” In the pop-up window, you’ll see whatever you copied last in the “Description” box. PhraseExpress will make the description and the content of your phrase the same. You can change the description into something else. PhraseExpress is searchable, so you may want to add certain search terms here just to make it easier for you to find later. (I don’t bother to change it.) Next, what will your shortcut be? You can choose to hold down, for example, the “Alt” key when you type your shortcut. I generally don’t use these hotkeys. Again, whatever works for you. For short phrases, I just enter in the Autotext box letter combinations I’m unlikely to type but am likely to remember. In this case, bfc for conscientiousness. Click OK.

PhraseExpress will confirm that it has saved your shortcut.

That’s it.

And if that’s all you use it for, learning this much will absolutely have been worth your time.

What else it can do

Right-click on the system tray icon, select “Open Program Window,” select the “Phrases” tab, and click the “New Phrase” icon in the top left corner.

Then click anywhere in the “Phrase Content” box on the right. Instead of using “copy” to create a new phrase, you can create one this way, instead. But that’s not what I want to show you.

You have an entire menu of options at the top of the window that will allow you to do a number of very powerful things.

As an example, click on “Date/Time,” and select “Date/Time” from the dropdown menu. In the pop-up window, use the “Presets” list to choose a date/time format. PhraseExpress will add some code to the “Format” box. Click the OK button.


This will take you back to the previous “create new phrase” window. Add a description. What PhraseExpress automatically added will be highlighted in pink. In the AutoText box, type your keyboard shortcut, like #today. Since PhraseExpress autosaves, you can just close the window.


Now when you type your autotext, in this case #today, it expands to the date format you chose (month day, year): March 4, 2019.

Explore the other functions, like “Automation.” You can create a shortcut that no matter where you type it, for example, it would open a file or a folder or a webpage or a program.

Edit your PhraseExpress phrases

Right-click on the PhraseExpress icon in your system tray. Click on “Open Program Window.” In the “Folders and phrases” pane, search using a word in the description, a word in the phrase content, or your keyboard shortcut for the item you want. Click on it. Edit what you want. Close the window. Done!

Getting started

Start with a few phrases. As you get used to using your shortcuts, expand your repertoire. For my most commonly used phrases, I don’t even think about them as shortcuts anymore — @h is my email address.

Question!

“If all you need to do is type @h to get sfrantz@highline.edu, how is it that you were able to type @h and have it not expand into your email address?”

Thanks for asking, because that made this post a little tricky to write. I had to type @.h first, and then go back and delete the period.


Using Inoreader with Trello: Plan, plan, plan

In my last post, I wrote about how I use the news feed reader Inoreader to keep up with what’s new. I promised at the end of that post to write about how I use Inoreader in combination with the free task management tool Trello to track the content I want to add to my psychology courses the following term.

This is my Trello board as it currently stands for my Psych 100: General Psychology course. (Create as many Trello boards as you have courses.) Notice that I have a list for changes I want to make to my “Syllabus and Canvas quiz” (currently empty), a list for what I want to do in our first couple days of class, and rest are lists for each chapter. Within each list are cards. Cards can be moved by clicking and dragging. Clicking on a card will turn it over, in a way. On the card’s “flip side,” you can leave comments on the card, add a checklist, add a due date, add a color-coded label, and many more things. I wrote more extensively about Trello five years ago. It looks a little different now, but the basic functionality is largely the same.

For this post, I want to focus on how I get the interesting articles from Inoreader into Trello.

After creating the Trello board, I added each of the lists you see here, plus another seven that are off the screen to the right.

Adding an Inoreader item to a Trello board using the mobile app

If you have Trello and Inoreader both installed on your mobile device, you are ready to go.

In Inoreader, tap on a story. Tap on the “Share” icon.

Inoreader will give you a lengthy list of share options. I had to swipe to the second page of icons (see the dots at the bottom) to find the “Add Card to Trello” option.

When I tap on “Add Card to Trello,” I get this pop-up. Trello remembers the last board (on the left) and list on that board (on the right) that I last saved a card to. To change those, just tap for the drop down menu. When you change the Trello board, the list options will automatically change. Inoreader will fill in a title for the card (usually the title of the webpage) and a description (most commonly includes the url for the web page). Of course you can edit these as you’d like. When the card is to your liking, tap “CREATE”.

Adding an Inoreader item to a Trello board using your computer’s web browser

Truthfully, I haven’t found a way to easily send directly from Inoreader to a Trello board. Fortunately, the alternatives are easy!

Your best option is to work through your web browser. One option is to install the Chrome “Add to Trello” extension. When you’re on a website you want to add as a card to a Trello board, click the “Add to Trello” icon. The pop-up will usually have the title of the web page as the card title and the webpage url as the description. The Trello board and the list from that board will default to the ones you used last time. Change whatever you’d like. Click “Add,” and this new card will be added to your Trello board.

Alternatively, use the Trello bookmarklet (instructions here; it’s only 3 steps. Step one is the installation by clicking and dragging a link onto your browser’s bookmarks bar. Step two is visiting a web page. Step three is clicking on the bookmarklet in your browser’s bookmarks bar to add a card to one of your Trello boards. You can handle it!)

Below you can see the “Save to Trello” bookmarklet added to my Chrome bookmarks bar. When you’re on a webpage you want to add to a Trello board as a card, click “Send to Trello”. In the pop-up, choose your Trello board. You’ll then be asked to choose a list from that board. The card will automatically be created. The information attached to the card will be more substantial than that created by the Chrome extension. Visit your Trello board to edit the card.

Try out both the Chrome extension and the bookmarklet. Use whichever one suits your needs better.


Keeping up with the news: Inoreader

In addition to keeping up with what’s new in technology, I keep an eye out for content that is particularly relevant to my psychology students. Rather than dig through the Internet for content, I have Inoreader fetch the content for me.

This is what Inoreader looks like. On the left, under “Subscriptions,” you can see some of the content I’m subscribed to. Inoreader periodically visits these websites looking for something new. When Inoreader finds new content, it drops it in here. You can see that I have a “News” folder that contains a subscription called “NYT > Most Shared.” These are articles the New York Times has identified as a “most shared” article. Right now there are 19 such articles waiting for that I have not seen yet.

In this screenshot, I have clicked on “NYT > Most Shared.” The most recent article in that list of 19 unread articles shows at the top of the main pane, “Iran’s Economic Crisis Drags Down the Middle Class Almost Overnight.”

To navigate through this list of articles, I can scroll down, or I can jump from one article to the next by using my keyboard. “J” takes me down to the next article in the list. “K” takes up to the previous article.

To read an article, I click on the article title, and my browser will open up a new tab to show me the article on its home website. In this example, I’m taken to the New York Times website to read the article.

Mobile app (Android and iOS)

The mobile app is just as easy to use, and the interface looks very similar to what you see with your computer’s web browser. Inoreader will sync across all of your devices. I usually use Inoreader on my Android tablet, but will sometimes use it on my phone. And if I’m at my computer, well, I’ll use my web browser to open Inoreader.

Subscribing to content by browsing

In the top right corner, click in the “Search or subscribe” box. Inoreader will show you a bunch of categories. Click on each category to browse.

After clicking on the “US News” category, of the 26 options Inoreader gave me, I chose “BBC News – US & Canada.” If you want to see what kind of content you’ll get, click on the name of the card, e.g. “BBC News – US & Canada.” If you like what you see, click the green “Subscribe” button at the top of the page.

Inoreader will give you a yellow bar at the top informing you that you are now subscribed. From that same yellow bar, you can choose to rename it something other than “BBC News – US & Canada,” you can add it to a folder (my “News” folder is a promising location for me; scroll down in the folder pop-up menu to find the option to create a new folder), and you can add a filter. A filter allows you to filter the articles Inoreader delivers to you by either content you do want or content you don’t want.

Subscribing to content by searching

Click on that same top-right box. This time, type what you’re interested in. As you type, you’ll see these options appear. Choose “Feeds about…”

This is the list of subscriptions relevant to my search term that Inoreader found that other Inoreader users are subscribed to.


Search using the term “Washington Post,” and you will get a list of all the types of articles the Washington Post is happy to send you.

Subscribing to blogs

Most blogs are written on a platform that allows their content to be fetched by Inoreader. Paste the url of the blog into the search box, http://suefrantz.com/. Select the “Add feeds from…” option. Choose the top one, “Technology for Academics,” to have Inoreader fetch my new blog posts.

Subscribing to journals from library database

You can subscribe to journals (or searches) using your college or university’s library database. Each database is different, so if you run into any trouble, your librarians will be able to help you out.

Here’s an example from the EBSCO database. I found one of my favorite academic journals, Teaching of Psychology. On the far right, clicking on the “Share” button tells me that I can choose between an email alert and an RSS feed.

I chose the RSS feed because this is the kind of file Inoreader needs to deliver the content to me. Although, as it turns out, it doesn’t matter if you choose email alert or RSS feed at that point, because both options will open the same pop-up. The top half is for those who want an email. The bottom half is the RSS feed. Just copy the RSS link, and then “Save Alert.”

In Inoreader’s search box, paste that url.

Your database may even happily send you not only article titles but also abstracts. Here are EBSCO’s instructions on how to do that as an example. But really, talk with your librarians. It will be faster.

How to unsubscribe

Now that you have a lot of feeds set up, you’re probably ready to get rid of some. Where they’re listed on the right side of your Inoreader screen, right-click the one you want to delete, and select “Unsubscribe.” That’s it.

Cost

Inoreader is free, but for a small annual fee, you get additional features. For most the free version will suit your needs. For me, the free version would probably be fine, but this is such a useful tool for me, I wanted to support the developers. I went two tiers up, bypassing the “Starter” level at $8.99/year and signed up for the “Plus” level at $17.99/year. This pricing is available through January 6. After that, you can expect it to return to non-sale pricing: Starter at $14.99/year, Plus at $29.99/year.

Once you create an Inoreader account and log in, click on the gear icon in the top right corner. Select “Preferences.” Choose “Billing and usage.” At the very top of this page, on the “Subscription plan” line, click on “Upgrade now.” You’re not committing to upgrade. This is just how you get to the page that shows you pricing and the features that come with each tier.

Conclusion

In my next post, I’ll tell you how I integrate Inoreader with Trello to keep track of the articles I might like to use in a future edition of my psychology courses.