
In my last post, I wrote about how I use the news feed reader Inoreader to keep up with what’s new. I promised at the end of that post to write about how I use Inoreader in combination with the free task management tool Trello to track the content I want to add to my psychology courses the following term.
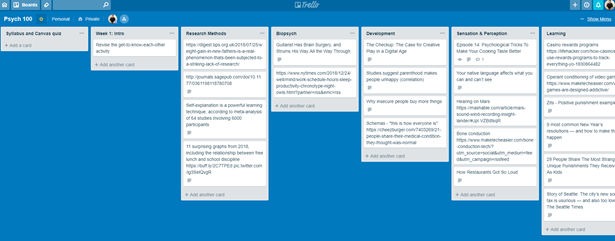
This is my Trello board as it currently stands for my Psych 100: General Psychology course. (Create as many Trello boards as you have courses.) Notice that I have a list for changes I want to make to my “Syllabus and Canvas quiz” (currently empty), a list for what I want to do in our first couple days of class, and rest are lists for each chapter. Within each list are cards. Cards can be moved by clicking and dragging. Clicking on a card will turn it over, in a way. On the card’s “flip side,” you can leave comments on the card, add a checklist, add a due date, add a color-coded label, and many more things. I wrote more extensively about Trello five years ago. It looks a little different now, but the basic functionality is largely the same.
For this post, I want to focus on how I get the interesting articles from Inoreader into Trello.
After creating the Trello board, I added each of the lists you see here, plus another seven that are off the screen to the right.
Adding an Inoreader item to a Trello board using the mobile app
If you have Trello and Inoreader both installed on your mobile device, you are ready to go.
In Inoreader, tap on a story. Tap on the “Share” icon.
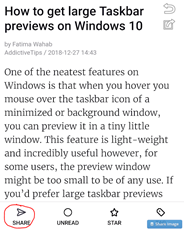
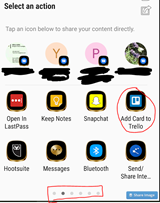
Inoreader will give you a lengthy list of share options. I had to swipe to the second page of icons (see the dots at the bottom) to find the “Add Card to Trello” option.
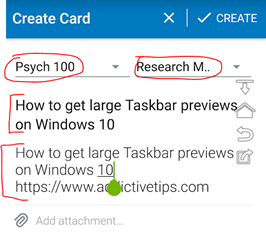
When I tap on “Add Card to Trello,” I get this pop-up. Trello remembers the last board (on the left) and list on that board (on the right) that I last saved a card to. To change those, just tap for the drop down menu. When you change the Trello board, the list options will automatically change. Inoreader will fill in a title for the card (usually the title of the webpage) and a description (most commonly includes the url for the web page). Of course you can edit these as you’d like. When the card is to your liking, tap “CREATE”.
Adding an Inoreader item to a Trello board using your computer’s web browser
Truthfully, I haven’t found a way to easily send directly from Inoreader to a Trello board. Fortunately, the alternatives are easy!
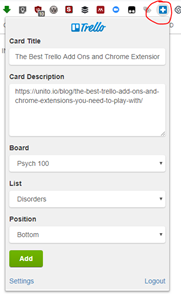
Your best option is to work through your web browser. One option is to install the Chrome “Add to Trello” extension. When you’re on a website you want to add as a card to a Trello board, click the “Add to Trello” icon. The pop-up will usually have the title of the web page as the card title and the webpage url as the description. The Trello board and the list from that board will default to the ones you used last time. Change whatever you’d like. Click “Add,” and this new card will be added to your Trello board.
Alternatively, use the Trello bookmarklet (instructions here; it’s only 3 steps. Step one is the installation by clicking and dragging a link onto your browser’s bookmarks bar. Step two is visiting a web page. Step three is clicking on the bookmarklet in your browser’s bookmarks bar to add a card to one of your Trello boards. You can handle it!)
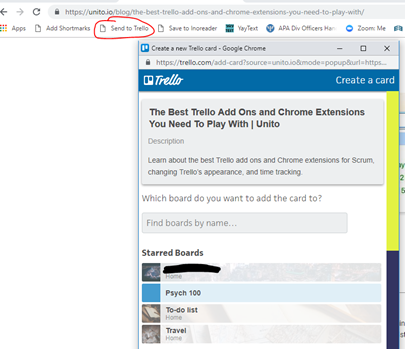
Below you can see the “Save to Trello” bookmarklet added to my Chrome bookmarks bar. When you’re on a webpage you want to add to a Trello board as a card, click “Send to Trello”. In the pop-up, choose your Trello board. You’ll then be asked to choose a list from that board. The card will automatically be created. The information attached to the card will be more substantial than that created by the Chrome extension. Visit your Trello board to edit the card.
Try out both the Chrome extension and the bookmarklet. Use whichever one suits your needs better.

