When presenting, I sometimes want to show something on my screen that is small. In Chrome, I can zoom in with CTRL + [plus sign], zoom out with CTRL + [minus sign], and return to normal with CTRL + [zero]. If it’s text I’m showing in Word, I can zoom in using the zoom slider in the bottom right corner. If I want to show, say, the Word toolbar ribbon, I have to use something else to magnify it. This is also for anyone who has said something like, “I know you can’t read what’s on this PowerPoint slide, but…”
Windows Magnifier is likely already installed on your computer – also good to know if you have to use someone else’s computer or your classroom computer. Search for Magnifier.
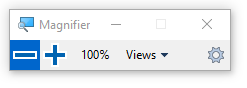
Click the plus sign to magnify. In “Views,” switch to “Preview full screen” to see your whole screen and drag the zoom area to where you’d like to zoom. Or use the “Lens view” like a magnifying glass. Drag your mouse and the “lens” will follow. To use the touch screen with the lens view, tap your screen to see shaded handles appear on the edges of the “lens.” Tap and drag those handles. If you change the lens size, however, those handles disappear; you’ll only be able to move the lens with your mouse or trackpad.
The next time you run magnifier, it will default to the last settings you used. That means that if you like the lens view and only use the lens view, the Magnifier will always start with the lens view.
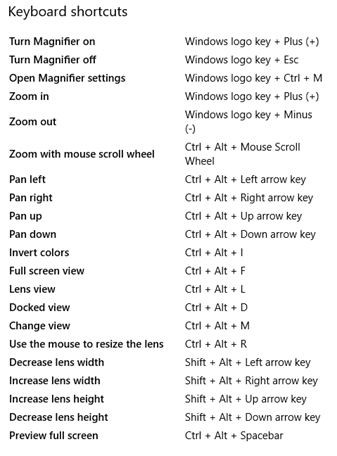
Once you’re zoomed in, it’s difficult to use the Magnifier toolbar. Decide which features you prefer to use, and memorize those keyboard shortcuts – don’t try to memorize them all; that’s not necessary. Or if you know you’re going to need this with your next tiny font PowerPoint presentation, type the keyboard shortcuts into the notes field for that tiny-font slide.
There are other magnifier programs out there. If you have one that you really like, please let me know!
