In Windows, the built-in clipboard can only hold one item. That means the next time you copy a chunk of text, the previous chunk of text that you had copied is erased. When grading assignments, I find that what I write for one student often applies to other students. I know that some of you handle this by having, say, a Word file that holds all of your common comments. But what if I told you that there is an easier (and free!) way?
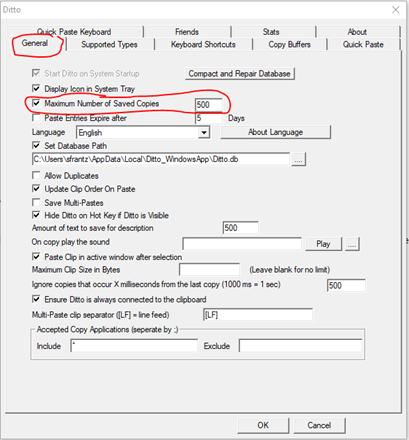
Ditto saves the last 500 (or however many you want) instances of whatever you’ve copied, such as text, images, files.
I use a keyboard shortcut (WIN + ‘) to get this pop up. Here are the 13 things I’ve copied. I can click on the one I want to paste it. Or I can use the arrow keys on my keyboard to scroll to the one I want and press enter to paste it. Or if it is one of the first ten, I can press the CONTROL key and a number on my keyboard to paste it.
The item at the top of the list is a file. I can go into any folder and paste this file. Item #9 is a graphic.
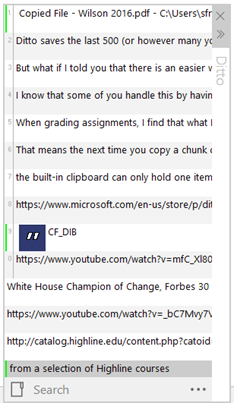
Want to see more on this screen? Mouse over the top of the pop up to get the double arrow, then click and drag.
You probably don’t want to see 500 items in this screen. Nor do you need to. The search is very fast! When the Ditto pop up screen appears, just start typing. Ditto begins a dynamic search of your clipboard items. That means that as you type, Ditto starts returning items that match your search. Here I typed “cop” and Ditto immediately gave me the 8 items out of the last 500 items I copied that contained that string of letters. Again, select the item to you want, and it will be pasted.
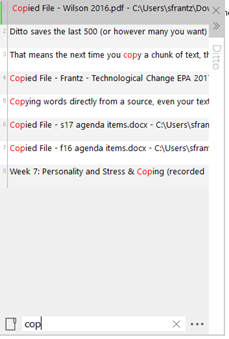
Because Ditto works at the level of the operating system, if you can type in the program, Ditto will paste in the program.
Ditto Options
To the right of the Ditto search box is the three-dot menu. Click on that to pull up your settings options.
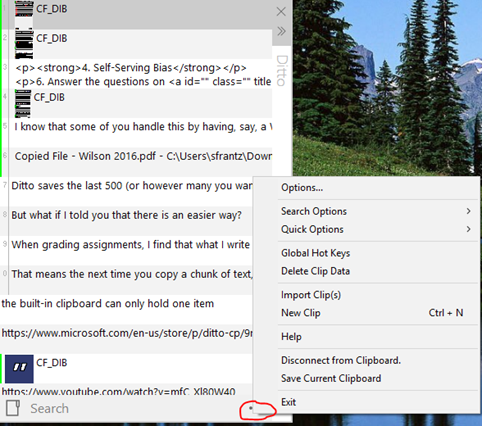
[Side note: See the CF_DIBs that have appeared at the top of the Ditto pop up? Those are the screenshots I copied from my screen capture software, Snipping Tool.]
Click “Options…” to open a 9-tab settings window.
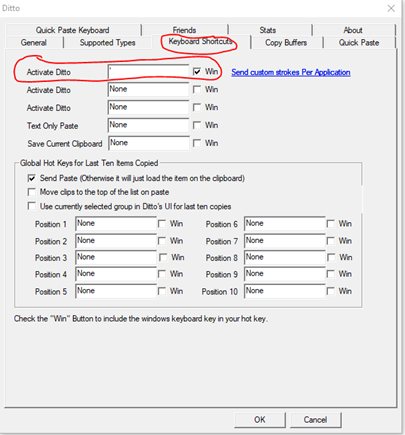
From the “Keyboard Shortcuts” tab, choose your keyboard shortcut that will launch Ditto. I chose the Windows key (checkmarked the Win box) and apostrophe. When I hold down the Windows key and press the apostrophe, the Ditto pop up appears.
From the “General” tab, you can decide how many copies you want Ditto to keep. I chose 500. And, no, I don’t have any particular rationale for choosing that number. Also on this page, you can choose to play a sound when you copy something. Personally, I’d find this annoying, but if it’s your thing. (Know what would be awesome? On copy, Ditto would release a puff of smell that matched that of the fluid from a ditto machine.)
Item Options
Right-click on any copied item in the menu to bring up the options for that individual item.
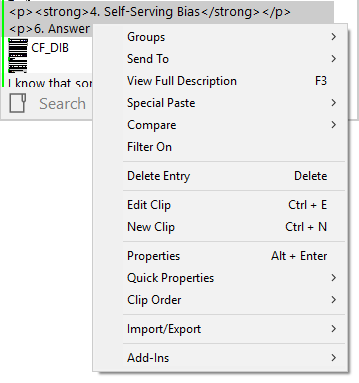
You can move clips into groups. Let’s say that you copied comments you wrote on a particular assignment. You can right-click on each item, select groups, and move the clips into a group named for that assignment. [Pro-tip: Click and hold SHIFT and use your arrow keys to select multiple copies. Then right-click to select groups and move them all in at once. Or you can click and hold CONTROL and then click on the individual copies you want to move.]
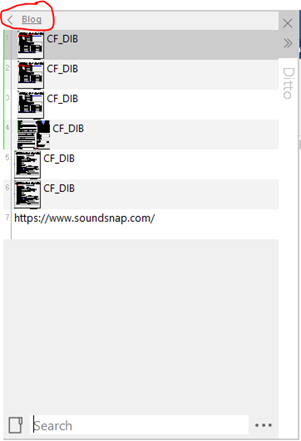
I created a group called Blog. When I type blog into Ditto’s search, I see that item 7 is a group called blog. When I select that group, Ditto shows me the items in that group. And now I can select or search just within that group.
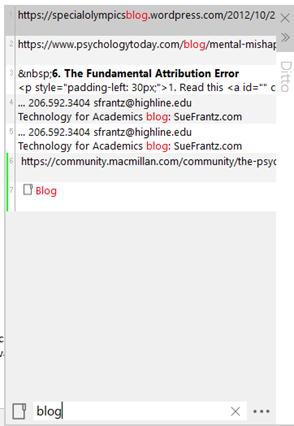
When I select that group, Ditto shows me the items in that group. Notice at the top that Ditto tells me I’m in the Blog group. And now I can select or search just within that group.
Conclusion
Ditto is packed with a lot of tweak-able features. Start with the basics. Once you get the hang of it, dive deeper into the settings. Or not. If what you’ve been using is the Windows clipboard where you get to copy and paste one item, then Ditto, out of the box, will give you exponentially more power.


