Here’s the problem I ran into. What seems like years ago, I gave up carrying my files on a flash drive from my home laptop to my work laptop to my classroom computer. Dropbox has been my go-to service for synching files across computers. Dropbox works beautifully for making sure my files are up to date on my home and work computers and for accessing those files on my mobile devices. My classroom, however, has continued to be a bit of a thorn. Yes, on my classroom computer, I can open the web browser, navigate to Dropbox.com, and download the files I want for that day’s class. But with only 7 minutes between the end of the previous class and the start of my class. With the previous occupant needing time to pack up and log off after his class I really only have about 3.5 minutes.
My college gives faculty a universal storage location accessible from anywhere on campus. If I can log into a computer on campus, including when my work laptop is connected to the campus network, I can access this space. On our campus, our IT people have named it the M drive. I don’t want to put my work laptop Dropbox folder in there; I would only have access to those Dropbox files on my work laptop while on campus. I could manually copy my course files to my space on the M drive, but then I’m pretty much back to the flash drive problem where I have to remember to copy over newly revised files. So then I thought, “There must be software that will let me automatically clone a folder, where any changes to one folder would automatically be synched to another folder.”
FolderClone (30 day free trial; $29.95 one-time fee for the standard edition; Windows7 and earlier) will do a one-way synchronization. Any changes made to the source folder will automatically be made to the target folder on whatever schedule you choose, or/and you can sync them manually.
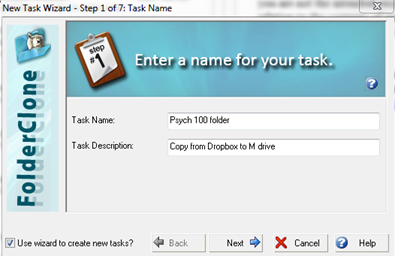
When you install FolderClone, a short tutorial appears. Feel free to go through it, but FolderClone is pretty intuitive. FolderClone calls each act of folder cloning a “task.” When you create a new task, the new task wizard will ask for a task name and description. I’ve named my task “Psych 100 folder,” and I’ve added a description.
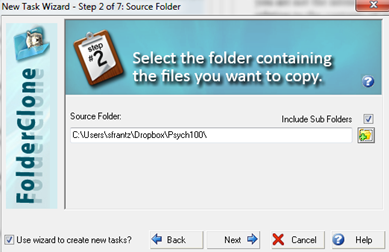
After clicking “Next” I’m asked for the location of the source folder. Just “browse” for it like you normally do. My source folder was my Psych 100 folder in Dropbox.
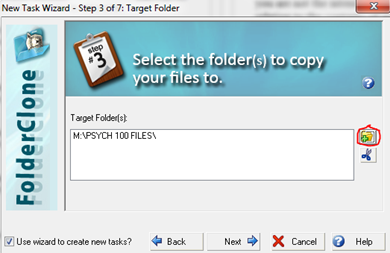
Then FolderClone asks for the location of the target folder. I decided I wanted a folder on my M drive called “Psych 100 FILES” to be the target. If there are files in the target folder, they will be erased and replaced with just the source folder content. You can note that you don’t want the target folder’s content replaced, but if I were you, I’d either remove the files from the source folder or create a new source folder. Since I’m cloning a folder, I want the content to be identical; I don’t need extra files floating around in there. See the little folder icon on the right side of the screen shot? I can add more target folders if I want, say to an external hard drive as well. For my purposes, just one copy on the M drive is good enough.
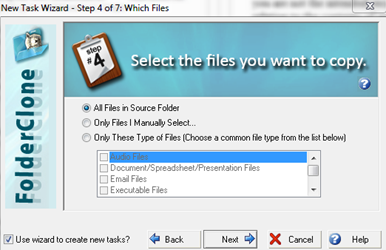
Now I get to pick which files I want to copy. Since the point is for me to have all my files at the ready, I’ve chosen “All Files in Source Folder.”
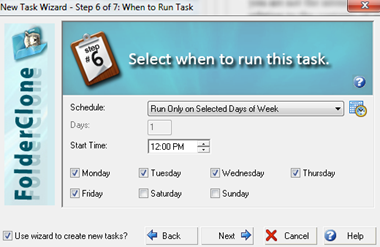
In step 6, FolderClone asks me how often I want it to compare the source and target folders. (If you’ve been paying close attention, you will have noticed that there is no step 5. I looked for it. It’s just not there. Beats me.) The default for how the sync is done is “Manual Clone.” That means files will only be copied when I tell it to. Since I want this to be automated, I chose “Run Only on Selected Days of the Week” (Monday through Friday) at noon since I’m likely to make changes to course files in the morning before my afternoon classes. In the summer, when I’m not teaching, I’ll turn FolderClone off altogether (and schedule a followup.cc reminder for the week before fall classes to tell me to turn it back on again).
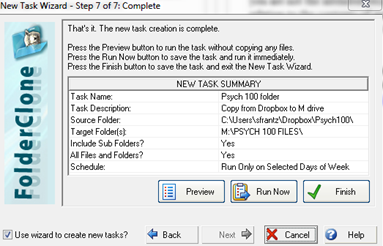
In the last step, I get a summary of what I created. Clicking “Run Now” immediately copies my Psych 100 folder in my work laptop’s Dropbox folder to my space on my college’s M drive. And it did it quickly – 822 MB of data (415 files in 30 folders) were copied in under a minute.
FolderClone will run in the background. You can find its sheep icon in your system tray.
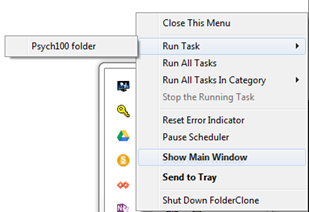
Even though I have scheduled a time for automatic synching, I can always run FolderClone manually. Right click on the sheep icon in the system tray, and then click “Run Task.” If I have more than one task, I can pick the one that I want or I can “Run All Tasks.”
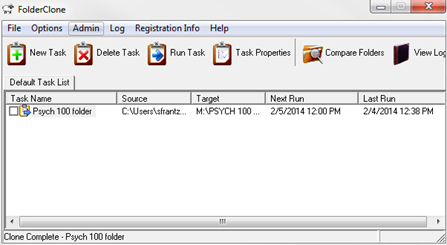
If you select “Show Main Window” you can see the tasks you have created, when those tasks last ran and when they are schedule to run again, create a new task, delete a task, manually run a task, etc.
To recap, all of my Intro Psych course files are synched across my devices using Dropbox. And now, using FolderClone, they are also synched to my college’s M drive. When I log into my classroom computer, I can open the M drive and find all of my (current!) Intro Psych course files.
Problem solved!


