Are you looking for a tool that works as a to-do list manager and a project manager? A tool that will work for your own use as well as being good for collaborative work? A tool that is as effective and easy to use as it easy pretty? A tool that works well on both your computer and on your mobile device? Trello has it all, for free. Trello Gold, $5/month or $45/year, gives you added functionality. Everything you see here is what’s available in the free version.
Do you remember the old school video games that came with a thick user’s manual that you had to read through before you could play? Then someone in the gaming world had the genius idea of building tutorials right into the game. You didn’t need to read the manual. The game taught you what you needed to know as you moved through it. Trello has taken a page out of the gaming programmer’s playbook. When you create an account in Trello, you are provided with a “Welcome Board” that shows you the ropes.
Now, if I were you, I’d take a glance at the image below, get the gist of it, and then go create a Trello account. Play around a bit, and then come back here for the specifics.
Boards and lists
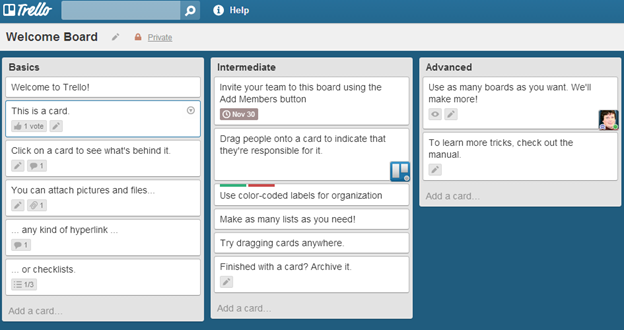
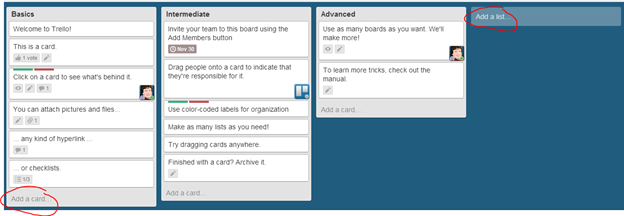
The first column introduces you to the basics. In Trello, each task is placed on a card. To view the information attached to a card, click on it. You can write a simple description, attach pictures, files, or URLs. Or build a checklist
On the intermediate list you learn about adding team members to your board, assigning team members to cards, color-coding your cards, adding lists, dragging cards, and archiving cards you’re done with.
The advanced list reminds you that you can create multiple boards. Create one for your personal to-do list and a different one for that committee you’re chairing or your research assistants. Or share a board with your classroom students so you can monitor their group projects. (For each person you get to join Trello, you get a month free of Trello Gold – up to 12 months.)
Cards and lists
Clicking on a card generates a popup window. Think of this as being the flip side of the card. In this example, I clicked on the card aptly named “Click on a card to see what’s behind it.” At the top we see both the title of the card and the list that it’s in (Basics). The card’s description is below that. The “Activity” panel shows who has done what with the card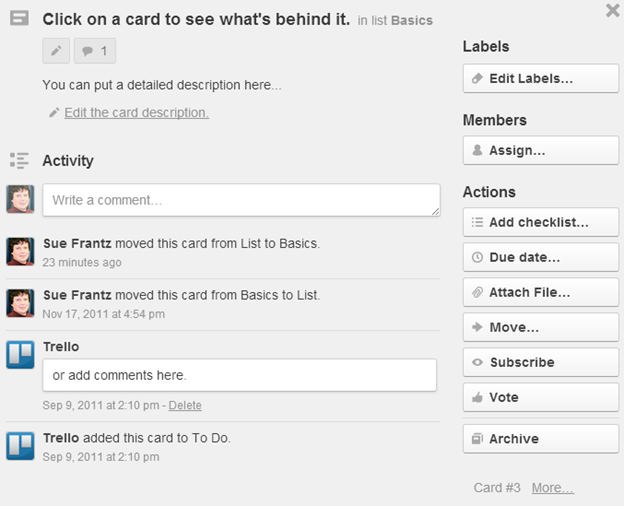
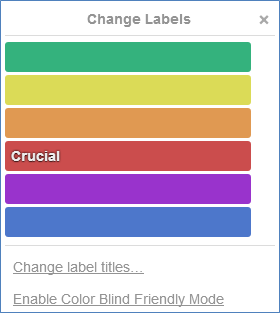
On the right side of this popup window, click “Edit Labels” to color code the card – add as many labels as you’d like. Click on the color bar to select them. Click “Change label titles” to add labels to your color coding. If you or one of the people sharing this board with you are color blind, click “Enable Color Blind Friendly Mode” to make patterns overlay the green, orange, and purple patterns.
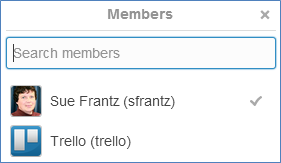
If you are sharing a board with one or more other persons, and you want to identify who is working on what, click “Assign Members,” and then click on the person or persons you want to assign to the task. The “Welcome Board” Trello starts you with, you share a board with Trello. Here I have clicked on me to assign myself to this particular card.
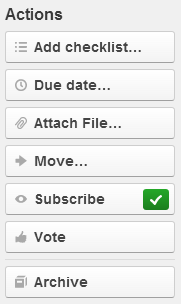
In the “Actions” section, you can add a checklist, add a due date, attach a file, move the card, subscribe to get a notification when something about the card changes, vote on the card, or, if you’re done with this particular card, archive it. Archived cards can be searched later. Later in this post you’ll see where you can find those archives and learn how to permanently delete a card.
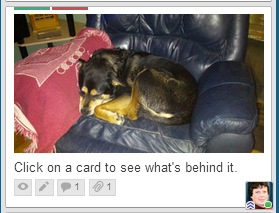
While you can attach a file using this menu, you can also just drag and drop a file onto either the front or back of a card. I’m going to drag and drop a photo of one of my dogs onto the card. After my changes, this is what the card looks like now. My image in the corner means that I’m assigned to do something with this card. The eye icon means I’m subscribed to receive change notifications, the pencil means that there is a description on the “back” of the card. The icon with the callout bubble tells me that one comment has been made on this card. The paperclip icon tells me that one attachment has been added – that would be the photo of Lucky.
To add a new card to a list, click “Add a card” at the bottom of the list. To move it to a different place in the list or even into a different list, click on it, drag it to where you want it to go, unclick. To add a new list, click “Add a list” on the far right of the board.
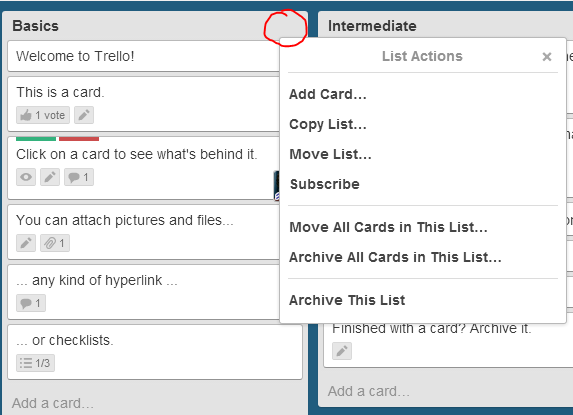
One more word about lists. Mouse over the right corner for any list title. Click on the arrow that appears. You can’t see it in this screenshot, but I circled where it would be. That gives you a popup menu for the list. This menu is all about manipulating the list: Copy it, move it, subscribe to get a notification when something on the list changes, move or archive all of the cards, or just archive the entire list.
Board menu
To the right of the board, click on “Menu.” If “Menu” isn’t there, the sidebar is hidden. Click “show sidebar.”
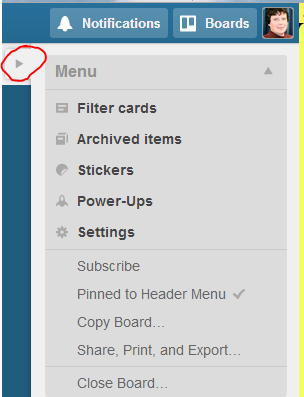
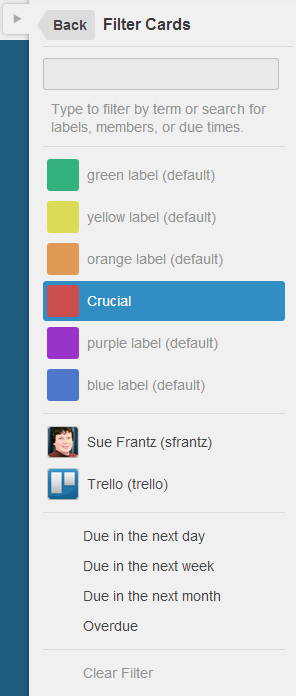
“Filter cards” lets you identify which labeled cards you’d like to see. If you only want to see the cards you’ve added red labels to, click the red label. Or maybe you want to see all the cards assigned to a particular person. Or maybe you want to see all the cards that are overdue. Or you can mix and match – you want to see all the red and green labeled cards assigned to a particular person that are either overdue or due in the next week. When done, click “Clear filter.”
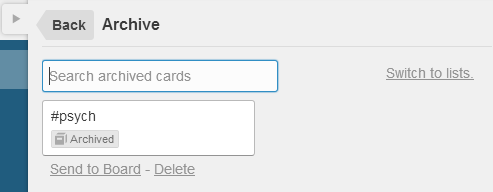
Cards and lists are not automatically deleted. They are archived. You can always go into the archive. Scroll through them. Search for them. If you truly are done with them and are ready to delete, click “Delete.”
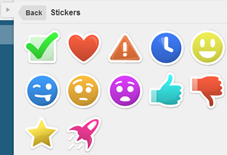
Add stickers to your cards to liven things up a bit. This is the default sticker set. Click and drag a sticker onto a card. If you go with Trello Gold ($5/month or $45/year) you will get additional sticker options.
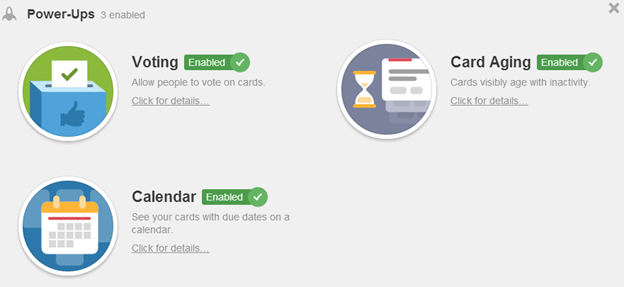
The “Welcome Board” has the voting option. When you create your own board, voting won’t be there. To activate it, go into “Power-ups” and enable it; “click for details” to decide who gets to vote. “Card Aging” will take the cards that have nothing done with them in a while, and will make them transparent. If you’re going to use this feature, “click for details” and in settings, select “Pirate Mode” to go with a yellowed, cracked paper look rather than transparency. Lastly, the “Calendar” power-up lets you see your cards with due dates in a calendar format. You’ll see a new “calendar” link at the very top right of the board in the board’s title bar.
Lastly “Settings.” You can rename your board here (or you can do that by clicking the pencil icon next to your board’s title). “Change organization” to change which organization this board is connected to. (If you’ve been paying attention, you’ll know that this is the first you’re hearing of organizations. Let me finish talking about settings, and then we’ll tackle organizations.) Use “Change Background” if you don’t like the default blue. In the free version, there are 5 other colors you can choose from. Upgrade to Trello Gold to get something spiffier like photos, patterns/textures, or create your own custom background. I can decide who gets to see this card through “Change Visibility.” By enabling “Card cover images,” you get to see my dog on the front of the card. If I uncheck this, she would only be visible by clicking on the card to see the backside – that would be the backside of the card, not the dog. If you’re sharing this board with others, you control who gets to comment on cards and who gets to invite others to the board. Use “Email settings” if you want to use email to add new cards to your board. This is a handy feature if you’re ready to stop using your email inbox as your to-do list. Forward those emails you want to do something with to your Trello board.

Back to the beginning
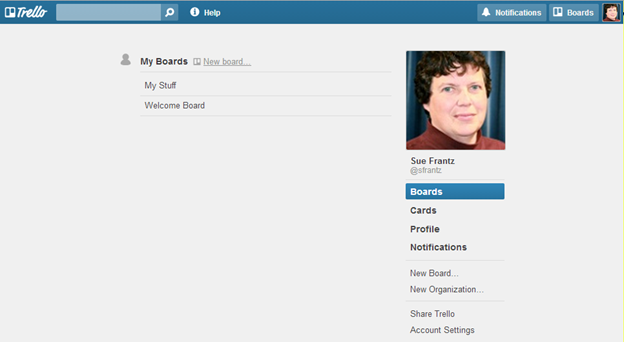
When you log into Trello, this is what you’ll see. If you’re in one of your boards, click the Trello logo in the top left corner to get back to this page. All of your boards are on the left. On the right, you can switch from the “Boards” screen to “Cards.” This will show all the cards on all of your boards to which you have been added. For boards that you are sharing, this is a quick and easy way to see what you should be working on.
Organizations
Farther down on that right-side menu is “New Organization.” Let’s say that you want to share one board with your department, one board with your research assistants, and another board with a committee you’re chairing. You can invite them all to join their own specific boards, and that’s fine. There’s nothing wrong with doing it that way. Alternatively, you can create separate “organizations,” and then add members to each organization. Let’s take your research assistants. You’re working on two projects, and each project is complicated enough that they have their own boards. Rather than having your research assistants join each board separately, you can create a “research assistants organization,” and invite them to join that. Now create your two project boards, and just add your “research assistants organization” to the board, and they now all have access. Later, when you start project #3, you can create yet another new board and add your “research assistants organization” again. This is much easier than inviting board by board.
Mobile app
The Trello mobile app works well on both my Galaxy Nexus 10 tablet and my Galaxy Nexus phone. The interface is very similar to the web-based version of Trello.
Bonus
If you’re a Gantt chart aficionado, you can turn your Trello boards into Gantt charts.
Try it out!
Dive in! Sign up for Trello, check out the welcome board, and then create your own boards. Happy organizing!


