I visit a lot of faculty offices and view a lot of computer desktops. If you pretty much only see your computer screen(s), check out this NPR story on a photographer whose chosen subject is the computer desktop. Do you use your desktop as a dumping ground for anything and everything new? Or do you only use if for what you are currently working on? Do you store files and folders there, or just program icons? Do you wish you had multiple screens, like your smartphone does?
I recently started using Fences (30-day free trial; $9.99) [for Windows; Mac users try Desktop Groups] . I should have moved to it when it first came out a couple years ago. Fences creates folders for your desktop.
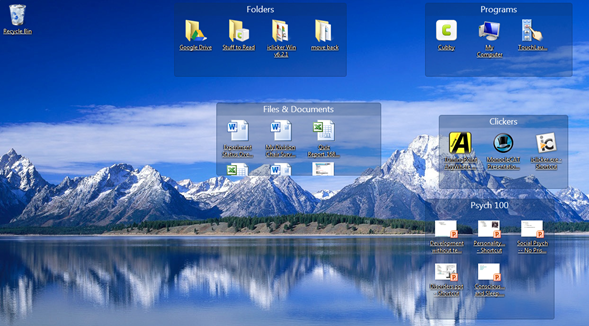
When it first runs, Fences defaults to corralling your icons into 3 fences: Folders, programs, and files & documents. In the screenshot above, you can see I have the original 3 fence types and 2 new ones I created.
Create a new fence by clicking on an empty space and dragging the cursor. You’re given the option to “Create Fence here” or “Create Folder Portal here.” In this case I created new fences. One holds the program icons for 3 clicker programs; I don’t use them all, but I will be demonstrating them soon for a conference presentation, so I wanted the icons where I could easily get at them. The other one I created for my Psych 100 course. I put in shortcuts to the PowerPoint files I’ll be using in my upcoming class sessions.
If you want to move icons to a different fence or out of a fence, just click and drag.
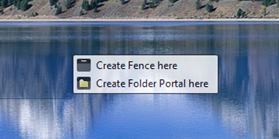
A folder portal is a quick method for displaying an existing folder on your desktop. It is just a series of shortcuts to the documents in that folder. This is a very handy feature if you’re working on a project that has you frequently dipping into one particular folder.
Multiple screens.
All of your fences don’t fit on one screen, or perhaps you just don’t want to see certain fences all the time. Click the very right edge of your desktop and drag left (or click left and drag right) to get a clean screen. Just like your smartphone. To move an existing fence to the new screen, click the top of the fence and drag it to the edge, and just like your phone, the fence moves to the new screen.
Now that you’re organized.
Don’t let your desktop fall back into chaos. Create a new fence, and click the settings menu in the top left corner. Mouse over “Organize.” Decide if you want to send all new desktop stuff into this fence, or only certain content.
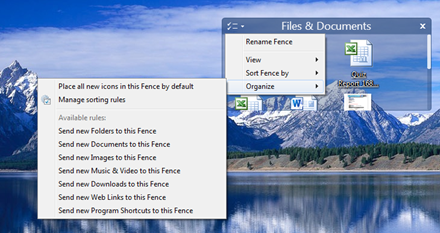
For the completely clutter-free desktop.
If you want an ultraclean workspace, double-click any empty space on the screen, and the fences and their icons will disappear. Double-click again to make them reappear. You can exclude any fence from “quick-hide” by going to that fence’s settings menu, and under “View,” selecting “Exclude this Fence from quick-hide.”
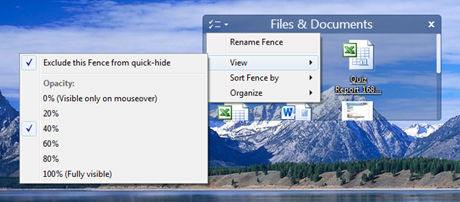
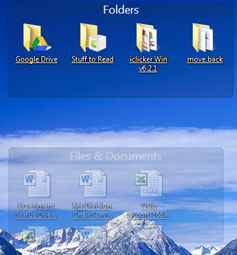
While we’re here on the view tab, notice that you can change how visible the fences are. Anything less than 100% makes them appear ghosty on the screen. Mousing over them makes them completely visible. In the screenshot below, the top fence is 100% visible. The bottom fence is set to 40%.
Further customization.
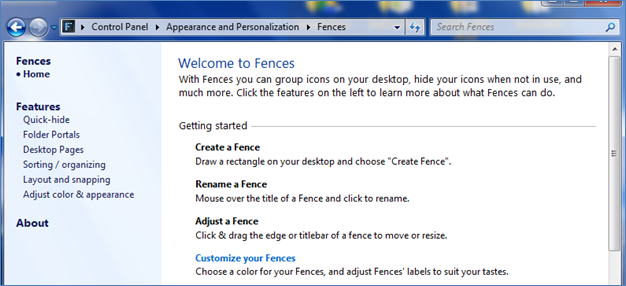
Fences adds itself to your control panel. Access it there or from your Start menu to make Fences work exactly as you would like. For example, change the color of the fences and fence titles. Change their degree of transparency. You can even see snapshots of your screen (taken daily) and restore to that earlier layout.
Ready to organize your desktop?
We really should also have a conversation about your email…

