One of the advantages of using the Canvas learning management system is that it is built on a platform that makes it easy to make it do things that its inherent programming doesn’t allow it to do.
Tampermonkey scripts
Using a web browser add-in called Tampermonkey (yes, it is called Tampermonkey; download for Chrome; download for Firefox), we can run scripts in our browser that will change how Canvas behaves. If you access Canvas from multiple computers, you will need to install Tampermonkey and its scripts on each computer’s browser.
Once you have Tampermonkey installed, download this zip file (no need to unzip it) containing all of the Canvas scripts I use. It’s not a comprehensive library of scripts, but it is a good starter package.
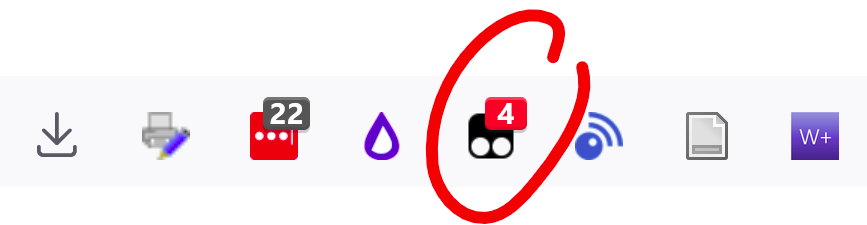
To install the scripts, click on the Tampermonkey icon in top right corner of your browser (black square with two white dots).

Select Dashboard. Click on the Utilities tab (top right corner of the dashboard). In the “Import from file” section, click Browse and find the script file you just downloaded.

Click on the Installed Userscripts tab on the Tampermonkey dashboard to see all of the cool tools you now have.
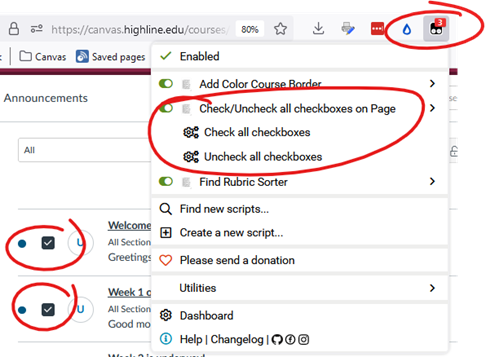
When you are a Canvas page where one or more scripts are running, you will see a red number on the Tampermonkey icon. For example, when I’m on a Canvas gradebook page, I can see that four scripts are running. Clicking on the Tampermonkey icon will show me which scripts are running on that page.
Access Report Data created by James Jones (the full manual for the script)
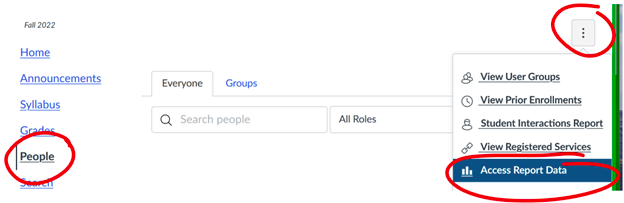
Download a spreadsheet showing what every student in your course has done. Go to People, click on the 3-dot menu icon, and select Access Report Data. A spreadsheet with all of the data will download to your computer.
Add Color Course Border created by James Jones
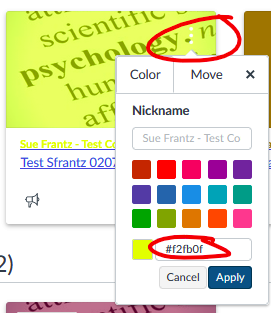
Each course on your dashboard has a color. Click on a course card’s 3-dot menu icon to see your color choices. Select from one of the colors given, or enter your own 6-character hex code. You can generate a code from the HTML Color Codes website.
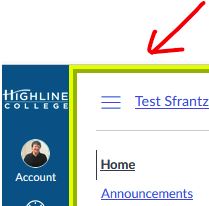
The color you choose for your dashboard course card will outline the pages of your course.
You can also change the line format and size. Click on the Tampermonkey icon in your browser. Select Dashboard. On the Installed Userscripts tab, click on Add Color Course Border. Line 4 describes your options: “Line 26 options are solid, double, dotted, dashed, groove, ridge, inset, outset. Change width of border with px.”

I have the line set to be 10 pixels wide with the “ridge” style. Would you prefer a wider solid line? Try ’13px solid’. Whatever width and style you choose will be the same for all of your courses. They will only differ in color.
All Courses Sort created by James Jones
If you have been using Canvas for a while, you may have a lot of courses on your Course list page. This script adds search fields above active enrollments, past enrollments, future enrollments and my groups. Enter search data into as many fields as you need to find the course you are looking for. Here I searched for winter 2014 using the Term field.

Check/Uncheck All Checkboxes on Page created by Dick Dickinson (maybe not their real name)
After I copy a Canvas course from one term to the next, one of the first things on my to-do list is to delete all of the announcements. Canvas does not have a “select all” button on the Announcements page. Instead, we have to check each box one by one and then click the trashcan icon. It doesn’t take many announcements to make this feel tedious.
To check all of the check boxes on your Announcements page, click on the Tampermonkey icon and select “Check all checkboxes.” If you change your mind, click on the Tampermonkey icon and select “Uncheck all checkboxes.” To delete your checked announcements, click the trashcan icon at the top of the Announcements page.
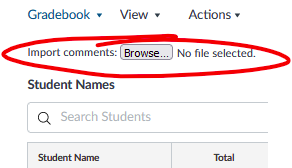
Comments Importer created by the Office of Information Technology – University of Colorado Boulder
Would you like to enter Speedgrader comments in a spreadsheet and upload them all at once? You now have the power. You’ll export your gradebook as a spreadsheet–and carefully following the instructions on the OIT-UCB website under “Comments Importer”–you’ll enter your comments into the spreadsheet. Save the file. Go back to your Canvas gradebook. Notice you’ll have an “Import comments” section. Click the Browse button and upload your spreadsheet.
Custom Column Manager created by the Office of Information Technology – University of Colorado Boulder
Canvas gives you a personal column that you can use in your gradebook called Notes. Would you like to add more columns for your personal use? Click the new +Column button to add a column. I usually add three columns: preferred name, challenges, fun facts. To delete a column you’ve added, click the Delete Column button.

Export Rubric Scores created by the Office of Information Technology – University of Colorado Boulder
Our scored rubrics contain a lot of data. Whether you want to compile the data for personal use or for an official assessment report, Canvas does not have a built-in way to download that data. With this script, we now have a button in Speedgrader–Export Rubric Scores–that will, well, export the rubric scores for that assignment as an automatically downloaded spreadsheet.

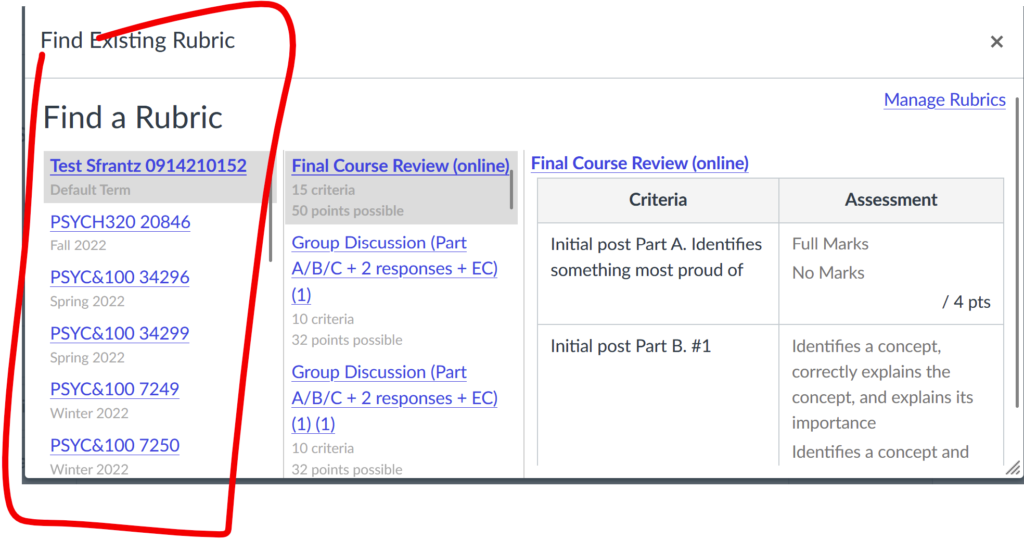
Find Rubric Sorter created by James Jones
When you’re looking for a rubric from another course, you have to wade through all of your courses. For me, that’s years and years worth of courses. This script allows you put parameters on what you see. I have it set to show me courses that have ended in the last 400 days. That gives me a little over a year’s worth of courses. Since I teach each of my courses at least once a year, I’ll only see my most recently taught courses.
This script comes with a number of variables you can change. Click on the Tampermonkey icon in your browser. Select Dashboard. On the Installed Userscripts tab, click on Find Rubric Sorter. Every line that begins with // is for your information. Here, Jones uses // to give instructions on how to change each variable that follows.
Import Rubric Scores created by the Office of Information Technology – University of Colorado Boulder
This script is for those who would prefer to enter rubric scores in a spreadsheet and then upload the spreadsheet into Speedgrader. Before scoring, click the Export Rubric Scores to get a spreadsheet in the proper format. Enter your scores in the spreadsheet, save it, then click the Import Rubric Scores button to upload.

For more information, see the instructions on the OIT-UCB website under “Import Rubric Scores”.
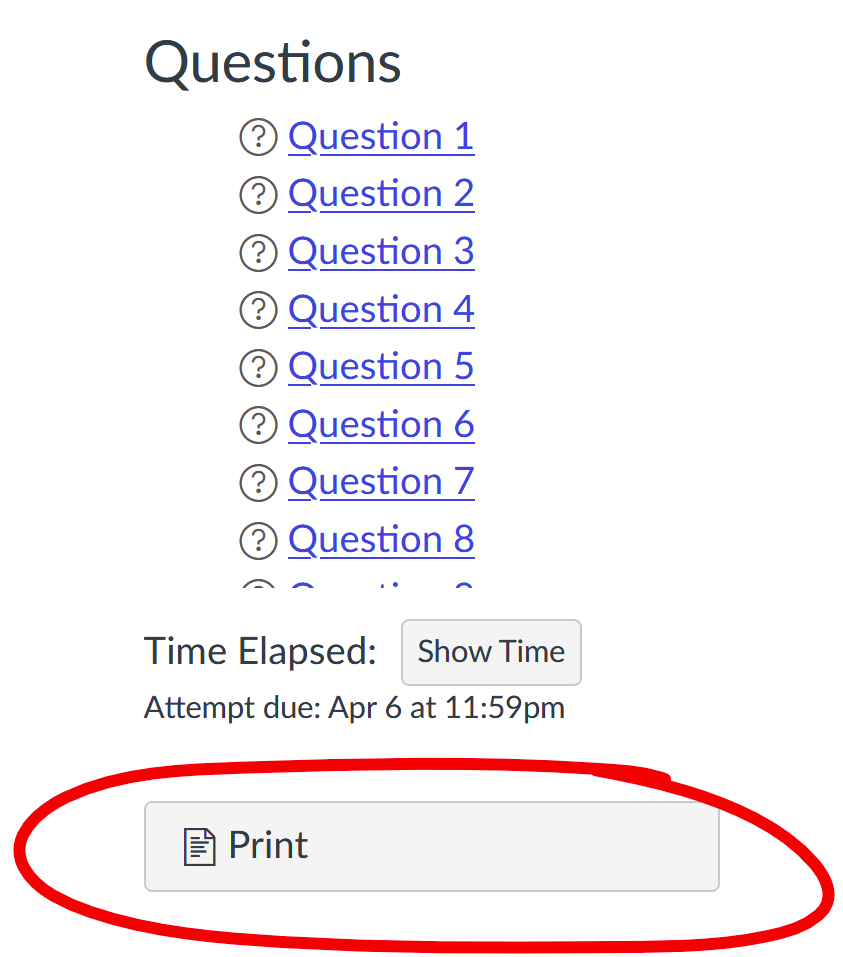
Print Canvas Quiz created by Chad Scott
On the quiz preview page, you now have a Print button. Click it to get a print friendly version of your quiz instructions and questions.
Quizwiz: Rubrics created by James Jones
This script adds a number of useful Speedgrader enhancements. See the full list on James Jones’ Github QuizWiz site; look in the section titled “Rubrics.”
Rubric Max Ratings created by James Jones
In Speedgrader, you have a green Max button in the top right corner of your rubric.

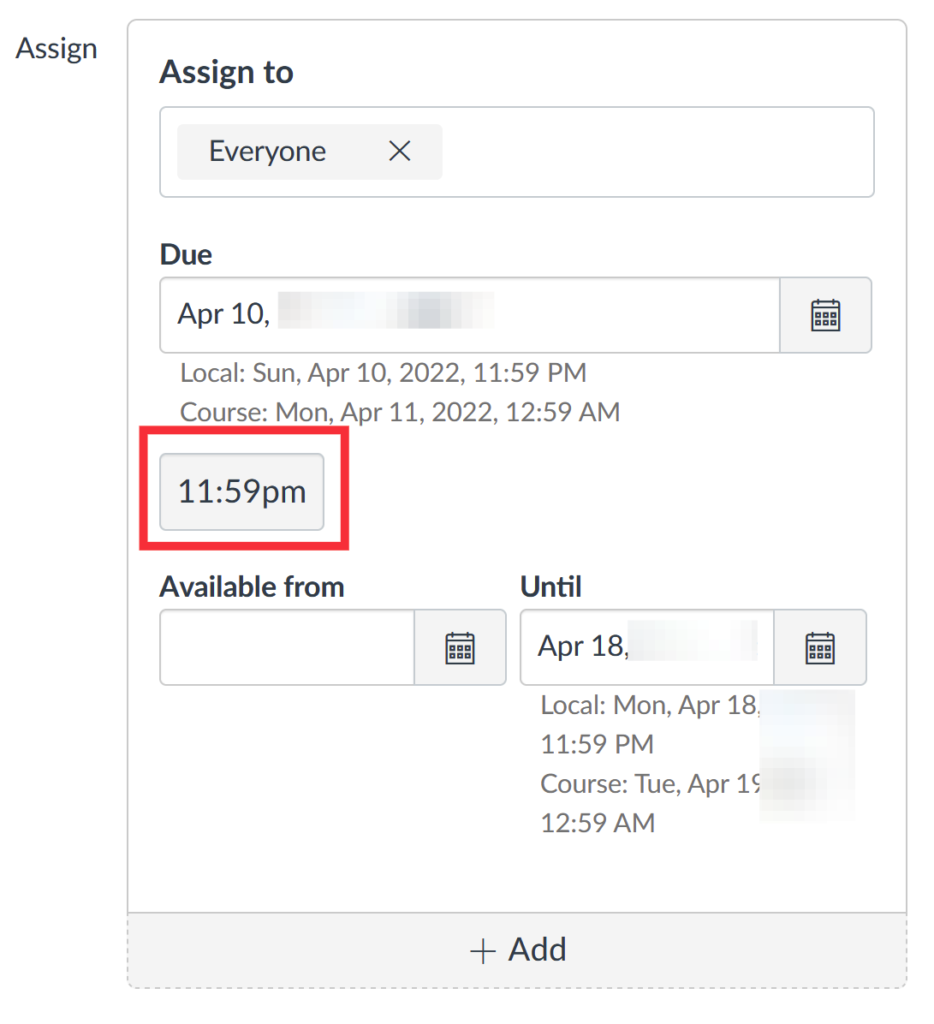
Set Canvas Default Due Times created by Ben Fisher
On any Canvas page where you can assign a due date and time, you now have a button that says 11:59pm. Click it and a calendar page will pop up. Choose the date. The deadline will be set to 11:59pm on the date you chose.
If you tend to use more than one deadline time, you can add more time buttons. Or maybe you just want to change the time from 11:59pm to whatever time you use. Click on the Tampermonkey icon in your browser. Select Dashboard. On the Installed Userscripts tab, click on Set Canvas Default Time. Use the format described on Line 37 to change the time in the brackets on Line 36. Note that the script uses the 24-hour clock.
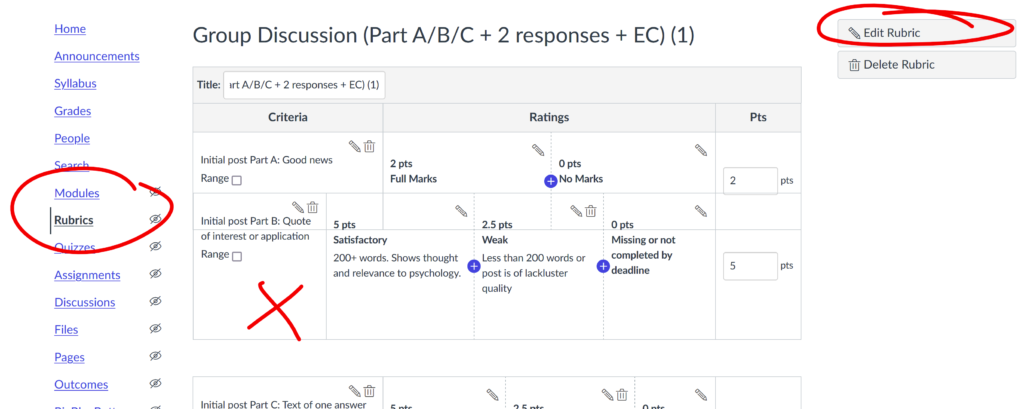
Sort a Rubric created by James Jones
After you create a rubric in Canvas, you cannot move the rows. Now you can.
Click on Rubrics, select a rubric, and click the Edit Rubric button. It looks like nothing is different, but click on an empty spot on a row you’d like to move, say, where the X is below. Click and drag the row to where you want it to go. I took the below screenshot in mid-move.
For more Canvas enhancements
Visit the OIT-UCB Canvas Enhancements website.
See a full list of James Jones’s Canvancements at Github.
Don’t like what a Tampermonkey script is doing?
Turn it off.
The easiest way is to go to a page where the script is running, and click the Tampermonkey icon. Next to the undesired script, flip the switch from green to grey.

If you change your mind, to turn it back on, go to the Tampermonkey Dashboard (click on the Tampermonkey icon, and click on Dashboard). On the Tampermonkey Userscripts tab, find the script you want to turn on, and in the Enabled column, flip the switch from grey to green.
Canvas tabbed page generator (not a Tampermonkey script)
This freely available tool will generate html from your existing Canvas pages that will create tabs you can use on any Canvas page. This screenshot shows that a user can click on a tab to show that tab’s content.
For example, my Canvas course syllabus page has five tabs.
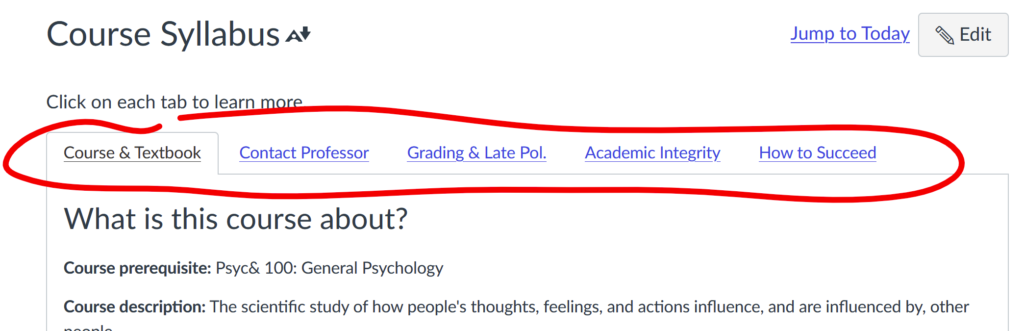
To do this, I created five pages–one for each tab–in Canvas. In each, I switched to html view; click on the </> symbol just below the bottom right corner of the editor text box. Click inside the text box, then select and copy all of the code. Go to the Canvas tabbed page generator. Enter the title of the tab in the first box. Right below, paste in the code you just copied. Repeat for up to five tabs.

After you have all of the tab titles and html code entered, click the Generate button. The generator will give you the html code you need.
Go to the Canvas page/assignment/etc. where you want the code to appear. Edit the page. Click the </> icon to switch to html. Click in the text edit box, and paste your code. Save the page. You should now see five clickable tabs.
As for the Canvas pages you used to generate the code, you can keep them or delete them. Up to you. They’ve served their purpose in generating the code, so need to keep them.
Creating classic quizzes using a spreadsheet (also not a Tampermonkey script)
You can build multiple-choice and multiple-response questions for classic questions in a spreadsheet and then import them into Canvas. It’s faster than doing all of the clicking needed to build in Canvas. Instructions here.
