Search Deflector makes Windows 10 search better

The “Type here to search” box in the lower left corner of Windows 10 is handy for searching all kinds of things. Except the Internet. Windows forces you to use their Bing search engine inside of their Edge browser. But I’d rather use Firefox as my browser and use Shortmarks (see this blog post) as my search engine.

Thanks to the $1.99 Search Deflector available from the Microsoft Store, now I can. [Shout out to Ashwin at ghacks.net!] (There is an identical free version available via GitHub, but for such a useful tool, I’m happy to pony up a couple bucks.)

After installing and running Search Deflector, set your preferred browser. These days I’m primarily using Firefox.

Next, set your preferred search engine. It comes with several common and not-so-common ones to choose from. I use Shortmarks, so I’m going to tell Search Deflector to use a “Custom Search Engine URL”: shortmarks.com/s.php?q={{query}}

After clicking “Apply,” I’m good to go.

On my keyboard, I hit WINDOWS + S (for “search”) and my cursor goes to the “Type here to search” box. Then I type “web: {search term}”. Search Deflector launches Firefox. If Firefox is already open, Search Deflector will open a new tab. The search term is sent to my preferred search engine, Shortmarks. If my search term matches a Shortmarks shortcut, the corresponding webpage will open. If my search term does not match a corresponding Shortmarks shortcut, then Shortmarks searches the web using the default search engine I have set up with Shortmarks.

Example 1. The single letter h is the Shortmarks shortcut I have for my college’s homepage: highline.edu. WINDOWS + s directs my cursor to the “Type here to search box.” I type “web: h” and press enter. Firefox opens a new tab and loads my college’s homepage.

Example 2. I want to search for Betty White’s birthday. WINDOWS + s directs my cursor to the “Type here to search box.” I type “web: betty white’s birthday” and press enter. Firefox opens a new tab where Google, in large font, tells me that Ms. White’s birthday is January 17, 1922.

Happy searching!


Be kind to your eyes, find your phone, see and boost your wifi signal strength, delete whole words at a time, & a monitor recommendation

This is a mishmash of stuff that I’ve been collecting. Enjoy!

Be kind to your eyes: 20-20-20. We are all spending way more time in front of our computers than we did, say, in February 2020. I’ve heard from colleagues who have been struggling with eye strain, so I know I’m not alone. Be kind to your eyes and follow the ophthalmologist-recommended 20-20-20 rule. Every 20 minutes look at something 20+ feet away for 20+ seconds. The trick is in remembering to look away every 20 minutes. I use the “Tomato Clock” browser extension (Chrome/Firefox). Barring that, you know how to set an alarm on your phone. While you’re taking a break, might as well stretch and maybe even get in some reps with your resistance bands.

Be kind to your eyes: pointer & cursor. For those of us with aging eyes, it is sometimes hard to find the cursor or pointer on our screens. If you have to rely on movement to find your cursor/pointer, it’s time to blow them up. In Windows 10, in the bottom left search box, enter “Cursor.” In the search results, select “change cursor thickness.” Use the sliders to change the size of your pointer and your cursor. Change the pointer/cursor colors, too, if you’d like. (Instructions for Mac users.) (Shout out to my wife for this tip!)

Find your phone. For Android phones, on your Internet-connected computer, go to Google.com. In the search box, type “find my phone.” (If Google is your browser’s default search engine, just type “find my phone” in your browser’s address bar.) In the bottom right corner just below the generated map, click “Ring,” and your Android phone—even if set to silent—will ring. If your battery is dead, well, you’re out of luck. (iPhone users, check out the Find My iPhone app.)

Check wifi signal strength. Working from home and have a Zoom meeting starting soon? You may want to connect from a location in your home that has a solid wifi signal. For Android, I recommend the app WiFi Signal Strength Meter. (iPhone users, check out Wi-Fi SweetSpots.) In the interest of full disclosure, my computer is hard-wired into the router that resides in my home office, although on a sunny day like this, connecting to a meeting from our backyard is not a bad idea. I just checked, and the wifi signal strength from my hammock is 99%.

Boosting wifi signal strength. If you have wifi dead spots in your home, consider installing a mesh network—which sounds way more intimidating than it actually is. You attach one wifi point to your router, and then space as many other wifi points throughout your home as you need. Our router is at the east end of our house, so the first wifi point is there. We have a second wifi point in the center of our house. A third wifi point is at the west end. The first one sends the wifi signal to the second which then sends to the third. For our mesh network, we use Google’s Nest Wifi. I’m a fan.

You know that you can delete individual characters by hitting the backspace key on your keyboard. Did you know that Windows users can delete whole words by holding down the CTRL key while hitting Backspace and Mac users can do the same by holding down the Control key while hitting Delete?

Lastly, while I don’t do a whole lot of hardware endorsements in this blog, I’m going to recommend a monitor—especially for those of you who are trying to teach from home using one monitor. If you have the space—and I know not everyone does—consider the Dell 24 Touch Monitor (P2418HT). Not only is it a touchscreen—which makes using LMS rubrics much easier—but it drops down to a 60-degree angle (bottom of the screen will rest on your desk) making it easy to write on. While you can write on the screen with your finger, I recommend the Mixoo stylus. The stylus has fiber mesh on one end and a disc on the other; I’m a fan of the disc, but use the end you’re most comfortable with.

That’s it. You know everything I know. For now.


Managing work/life balance teaching from home

I taught my first online course in the late 1990s. I had done my homework, reading up on everything I could find about teaching online, attending conference sessions about teaching online. While the Internet was out of its infancy, it was still in toddlerhood, so there wasn’t a ton of information out there about teaching online. For that matter, there wasn’t a ton of information about the Internet itself. Some time in the mid-1990s, my wife, who was a reference librarian at the time, had a file folder labeled “Internet.” That pretty much sums up how little information there was.

Anyway, I learned everything I could about teaching online, and then I did it. I taught fully online. The one thing that no one warned me about was the exhaustion. I felt like I was teaching all the time. Why was that?

For a face-to-face class—and by face-to-face I mean in a physical, three dimensional classroom—we mentally gear up to go in. We review what we’re going to cover, we put on our game face, don our teaching persona, step to the front of the classroom, and go. Teaching is a performance, and just like an actor or musician, you have to enter that space ready to go. And then we’re “on” for whatever length of time our class or classes are scheduled for. Growing up working class, I defined “work” as physical labor. When I started teaching, it took me a bit to figure out that teaching was also work. While it wasn’t physically taxing, it was mentally draining. Don’t worry. I have since amended my definition of “work.”

When we teach face-to-face, we know that we’re on from, say 9am to 12pm. Shortly before class, during class, shortly after class, students are asking us questions—questions about the material, questions about assignments, questions about course policies. And when we answer those questions, other students usually hear those answers, too. It’s a pretty efficient system. One student in a class of 50 asks about a course concept, and all 50 students—or at least the ones paying attention—hear the answer.

After that, we still have plenty of work to do—email, grading, reading, writing, committee work—but it’s qualitatively different work from the teaching performance. It doesn’t require the need to be “on.”

When teaching online, the primary way students get their questions answered is through email. What would have been a quick, after-class question takes three times as long – to read the email, to respond to the email with a clarifying question, to read the clarified email, to write the email, to edit the email (don’t let your exasperation show; yes, we know it’s in the syllabus), and then to read the student’s follow-up question, and repeat. And, of course, this is all interspersed with other tasks. And it takes time and energy to switch from one task to another (see this blog post for a demo).

Tips to help you feel like you’re not working all the time

  1. Create a designated workspace. If you’re lucky, you have a home office. Use that space only for work. Do not work anywhere else in your home. When I’m in my home office, I’m working. When I’m in my living room, I’m not working. And for the love of God, do not work in bed. If you’re not lucky enough to have a home office, set aside one corner of your couch or one side of your table as your designated workspace. Relaxation happens on the other side of the couch. For meals, sit on a different side of your table. Designated physical spaces can help you separate “work” from “home.”
  2. Set designated work hours. I work from about 8am to 3:30pm for two reasons. One, I’m a morning person; when my circadian rhythm dips mid-afternoon, my brain turns to sludge. And two, in the summer, my home office turns into a sauna about mid-afternoon. Whatever your work hours, don’t work before your workday starts, and don’t work after your workday ends. There’s nothing in your email that can’t wait. Designated hours can help you separate “work time” from “home time.”
  3. Add transition time. I didn’t realize how much I needed transition time from teaching to being home until I started teaching via Zoom. The first day I did it, I ended class and walked out of my home office. And, BAM! I was home. It’s the closest I’ll probably ever come to feeling like a time traveler. Now when class ends, I stay in my home office for 15 to 30 minutes—tending to email, making notes about changes I want to make to what I just covered in class, reading an article or two. By doing that, I give my brain time to slide out work mode and into home mode.
  4. Clean up your email. What’s in your email inbox should only be what you’re dealing with today. In this blog post, I walk your through how to get your email under control and how to keep it under control. Having pages and pages of messages in your inbox can make you feel like you’ll never get caught up. And, frankly, it’s easier for important messages to get lost. If you lose that message from a student or a colleague, they will write you back, but then you’ll have read their questions twice. There’s no reason to do double the work.
  5. Take your work email off your mobile devices. If you’re sitting in your living room watching Apollo 13, and you pick up your phone to find out how old Tom Hanks was when the movie was filmed, we both know that if there’s a work email notification, you’re going to click on it. And just like that, you’re working again.
  6. Note common student questions and address them with the class. If a few of your students have asked the same question, it’s time for a course announcement. If it’s a question answered in your syllabus, consider adding a question to your beginning-of-term syllabus quiz. If you don’t have a beginning-of-term syllabus quiz, consider creating one. In my courses, students have to earn 100% on the quiz to open the rest of the modules in the course. Since my students can take it multiple times, I’ve discovered that some of my students—without reading the syllabus—take their best guesses at the questions. And then retake the quiz, making different guesses. Next term I’m adding a few points extra credit for getting all of the answers right on the first try.


Faculty development: Available for remote presentations

I have been getting inquiries regarding my availability to present to faculty remotely. I am very happy to do this.

Most commonly, I have given presentations on using the tech tools and tips covered in this blog to make your life as an academic easier. For example, if you’re not using a clipboard manager (e.g., Ditto for Windows, Copy Less 2 for Mac) and a text expander (e.g., PhraseExpress for both Windows and Mac), then your assignment grading is more time-consuming than it needs to be.

I have also given presentations on interteaching. This teaching method works well for online, hybrid, virtual, and face-to-face courses. And for those of you who are going flex—where some of your students may be participating in the class synchronously and other asynchronously—interteaching would work for you, too. Interteaching is scalable—use it for one week, a few weeks, or all term. Keep your exams or ditch your exams. Use it however you feel most comfortable. Read more on how I use interteaching in my synchronous and asynchronous classes.

If either of these topics sound like they would be useful for your faculty, please contact me at sue@suefrantz.com to discuss what we can do within your budget.


Clear cache for one—and only one—webpage

Faculty who have been around learning management systems (LMSs) for any amount of time know that sometimes gunk builds up in the browser cogs resulting in some page in the LMS not working as expected. If it’s something that worked before but is suddenly not working now, the first thing tech support will tell you to do is clear your browser’s cache.

But why clear the cache for every website you’ve ever visited when it’s just this one particular LMS page that’s giving you fits?

You can clear the cache of one Chrome or Firefox webpage with a keyboard shortcut. Windows and Linux users: CTRL+F5. Mac users: CMD+SHIFT+R.

Test out your new-found powers here.


PowerPoint presenter view in Zoom—with one monitor

Are you teaching remotely using Zoom? And you only have one monitor? Do you miss using PowerPoint presenter view in your classroom?

PowerPoint presenter view

This is what presenter view looks like. When you have a computer screen and a projector (or a second monitor), this is the view on your computer screen, and the slide alone shows on the projector (or second monitor). In this presenter view screen, you can see your next slide on the right, and right below that are any notes you’ve entered for the slide your audience is currently viewing. Under the currently-viewing slide are a few tools: pen/pointer, see all of the slides in your presentation (handy for jumping around your slides), magnifying glass for zooming in on a part of your slide, and black out the slide you are showing. Click the 3-dot icon for a few more options.

While you have all of those nifty tools at your disposable, this is what your audience sees projected on the screen.

To get presenter view, edit your PowerPoint, click the Slide Show tab, then check the “Use Presenter View” box.

If you have one monitor, however, and run your slide show, you will just see the slide like your audience would. To get the presenter view, right-click on the slide and select presenter view.

Using single-monitor PowerPoint presenter view with Zoom

To use presenter view with Zoom, it’s easy with two monitors. All you need to do is share the screen with the slide on it.

However, if you only have one monitor, you probably don’t want to share your entire presenter view screen. Good news. You don’t have to. You can choose to share only the slide portion of your presenter view screen.

In Zoom, click on Share Screen, then select the Advanced tab.

Then click Portion of Screen, and click the Share button.

A green box will appear. Whatever is in the green box is what your Zoom audience will see. Click and drag the bar at the top of the box to move it. Click and drag the sides/bottom/corners to resize it.

Zoom will remember the box size and location from session to session.

Remember

Before closing your PowerPoint presentation, stop sharing. If you don’t, when you close your PowerPoint, whatever is inside that green box will appear to your Zoom audience. When I closed my PowerPoint just now without stopping my Zoom screen share, my email was inside the green box – viewable to everyone who was in my Zoom room. Fortunately, I was the only one in my Zoom room, so no harm done. When you are done sharing, always stop sharing before doing anything else. As an added precaution, close all programs you are not going to be using before starting your Zoom session.


Jazz up your LMS with emoji

Is all of that bland text in your LMS starting to get to you? Do you wish you could jazz it up a bit? As far as web browsers are concerned, emojis and Unicode symbols are the same as text.

This is module view in one of my Canvas courses. I put suns on either end of an announcement title, a red exclamation point and a blue-boxed 1 in the titles of modules, and a gold star in a text header.

Once you fine Unicode/emojis you like, copy the image. Go to your LMS. Edit the text, and paste the image. Save. Done! Be aware, though, that the image may look different depending on what device or browser your students are using. The graphics I used look much better on the Canvas Android app than they do in Chrome or Firefox, for example.

Here are a few websites to get you started. Yes, these are rabbit holes. Set an alarm if you don’t want to spend an entire afternoon here.

  • List of Unicode symbols: arrows, Greek characters, dingbats, musical symbols, etc.
  • Emojipedia has a pretty robust search engine that shows what the emojis look like on different platforms; click on an image of a person, and then scroll to the bottom to see the image with different skin tones or as a different gender (woman health worker, for example)
  • The Unicode.org’s emoji list also shows you what the emojis look like when viewed in different platforms


Bone conduction headphones

If you’re teaching and attending committee meetings remotely, you’re spending some serious quality time with your headphones. I had never found earbuds that didn’t irritate my ears after an hour or so. Over-the-ear headphones make my ears hot, and the pressure on my head bugs me. A year ago, I bought bone conduction headphones, and I am thrilled with them.

Bone conduction headphones sit in front of your ears and transmit sound, not through your ear canal, but through the bones of your skull. Here’s a blog post I wrote in a different forum on how bone conduction headphones work. They take a little bit to get used to. The best way to describe the sensation is “weird.” I predict you’ll adapt quickly, though.

Because they sit outside your ear canal, you can still hear ambient sound. Of course, given how attention works, you can only pay attention to one sound: the sound from your headphones or the ambient sound. If someone is talking to me, I have to take off my headphones to pay attention to what they are saying. When I put in earplugs, however, I can’t hear anything but the sound from the headphones. I find that the bone conduction headphones/earplug combination works better at blocking out external sound than noise-canceling headphones do.

If your current headphones aren’t working for you, give bone conduction a try. You can get them wired or Bluetooth wireless. This April 23, 2020 MakeUseOf.com article identifies “The 5 Best Bone Conduction Headphones.” For what it’s worth, I have the AfterShokz Trekz Air headphones (and as far as you know, I look exactly like their model when I wear them).


Send texts via email

Faculty seem to always be thinking about the best way to communicate with our students. While most academics still live inside of our email, most of our students do not. Some instructors use Remind or Slack to message their students, and both are good solutions. Both also require students to install an app on their device, and then a bit of instruction on how to use it.

As we’re about to start a new quarter here in the Pacific Northwest—a quarter that will be entirely online—the question of how best to contact students has risen to greater importance. A special shout out to my colleague Janet House who teaches students who don’t have strong tech skills for prompting me to spend some time thinking about this question: How can an instructor text, say, 30 students at once—without sharing one’s own cellphone number in the process?

The solution

Send text messages via email.

Every cellphone number automatically comes with an email address. It is the phone number followed by the carrier’s email extension.

If you have any kind of communication with your students now, whether it be through email or your course management system, ask your students that if they are willing to give you permission to text them important reminders about the course to please send you the name of their cellphone carrier and their cellphone number. Use this handy table listing 13 carriers and their extensions provided by Simon Hill at Digital Trends.

Alternatively, if your institution makes student phone numbers available to instructors, use the Free Carrier Lookup to find the carrier for each student’s phone number.

Whichever way you go, in your first message, always ask for the student’s first and last name to confirm that they give you permission to text them regarding the course. Also, since the address you sent to and the address that comes back will likely be different addresses, you won’t know which address is attached to which student. As names and addresses come in, update your list of names, addresses, and phone numbers.

Try it yourself

Send a message from your email to your cellphone number to see what it looks like.

I sent a message to <mycellphonenumber>@vtext.com (@vtext.com is the email extension for my carrier, Verizon) using my work email account. The text that came to my cellphone was from Sue Frantz (the name associated with my work email account). I replied to the text. The address that came into my email from my texted reply was <first part of old email address>@vtext.com. What Verizon used to create this address was undoubtedly from the email address I used when I first signed up with them years ago. While I sent a message to a phone number, the reply came from something that was not a phone number.

With your students, keep a table or spreadsheet of their names, their phone numbers, and their non-phone number carrier email addresses. (I’m certain carriers have a name for these. Surely, they don’t call them “non-phone number carrier email addresses.”)

Use your email’s bcc field

If you’re messaging more than one student at a time, be certain to type the addresses in the bcc field. You don’t want to give away student phone numbers to other students!

Message length is limited to 160 characters

Use the SMS address from the Digital Trends table or Free Carrier Lookup and keep your message to 160 characters. Remember, you’re texting. (The MMS address is for longer messages, but all of your students may not have the ability to receive MMS messages. Stick to SMS.)

Type your message in your email program (delete your signature!), and check your character count, including spaces.

Desktop Outlook

Click the Review tab, click on Word Count and look for the “Characters (with spaces)” count.

Office 365 Outlook, Gmail, and other web-based email programs

Install Word Counter Plus in Chrome or Word Count in Firefox. (See this blog post.) Once installed, highlight all of the text in your message, right-click and select Word Counter Plus/Word Count. In the pop-up, look for the character count. Both will include spaces in their count. That’s good, because the carriers include spaces in their 160-character limits.

How can students text you?

In their text messaging app, where students would enter a phone number, have them enter your email address. Their text message will go to your email. When you reply, delete everything in the message except for your 160-character-max return message.

Conclusion

Students can use text to email you, and you can use email to text students. Just get their permission.


Email management tips

As my colleagues at semester institutions are trying to finish out their terms and those of us on quarters are gearing up for the start of the spring term during this time of coronavirus online education, email management is more important than ever.

Much more of our communication with colleagues will be through email. And, more importantly, the primary way—or, in some cases, the only way—students will have to contact us, their professors, is through email.

That means that it is more important than ever that we practice good email hygiene: responding to what needs responses, deleting what needs deleted, filing what needs filing, and tucking away for later what needs tucking away.

The typical email strategy and why it’s not the best strategy

In working with faculty, I have seen a lot of email inboxes. It’s not a pretty sight. Thousands of messages in the inbox. Too many messages have been left to linger, and when they drop below the visible screen, they seemingly no longer exist. A lot of those messages were mentally delegated to the deal-with-later box, but you’ve never gotten around to dealing with them. Now your inbox is just one giant shoebox filled with paper.

My friend, it’s time for an intervention. It’s time to deal with those messages.

Your inbox should just contain messages that you need to deal with soon. It should not be a repository of every message you have ever received.

Where to start

In your email program, create two folders. Name one “Move Back to Inbox” and the other one “Archive.”

Highlight the top-most 40 emails, then click and drag them into the Move Back to Inbox folder.

For the remaining emails, select them all. How to do that will vary by email program.

In gmail, click on the box near the top of the page.

Then click on “Select all [x number] conversations in Primary.

Finally, click and drag into your Archive folder.

In the desktop version of Outlook and Office 365 Outlook, press CTRL-A. Click and drag to your Archive folder.

Dealing with the top 40

Now, take the 40 messages that are in your Move Back to Inbox folder and move them back to your inbox.

With the weight of your inbox reduced to 40, it’s time to deal with each message, one by one.

For each message, you have five options.

  1. Delete it

    If this is something you know you don’t need, just delete it.

  2. Archive it

    If you think you might need it later—or if you’re just afraid to throw stuff away—move it to your Archive folder. If your inner librarian needs to file messages according to type of content, then create subfolders in the Archive folder. The search function in today’s email programs is much better than it used to be, but if using subfolders is easier on your brain, it’s okay to do that. I use subfolders.

  3. Respond now

    If you’re going to respond now, respond now. Go ahead. I’ll wait for you here.

  4. Respond later today

    If you really think you’ll respond later today, it’s okay to skip the message. For now. If you get to the end of the day, and that email is still sitting in your inbox, see the next point, #5.

  5. Maybe respond/do something with at some future point

    These are the messages that are most likely cluttering up your inbox. You don’t want to file them or delete them because you might want them. But, dang, you’re just not sure. Maybe you want to attend that webinar, but maybe you don’t.

    For all of these messages, I recommend using Nudgemail. It’s free. Forward the message—along with anything else you’d like to add, such as, “Do I want to attend this webinar?”—to, say, Monday@nudgemail.com. On the next Monday that rolls around, that message will arrive in your inbox. If you’ve decided to attend the webinar, then go sign up for it. If you’ve decided not to, delete the message. If you’re still not sure, in the message will be a snooze option. To give yourself three more days to think about it, click on the 3d link. A new email message will be generated, and just click Send.

    In three days, your webinar email will appear in your inbox again. Sign up for it, delete it, or snooze it again. If you need to, keep snoozing the email until the date of the webinar has passed.

    To get started with Nudgemail, just send a message to any Nudgemail email address. Send a message to 12pm@nudgemail.com, for example. Nudgemail will immediately send you a welcome-to-Nudgemail message—and at the next noon, you’ll get your message back. It does take some time for Nudgemail to process your message, so if you sent your 12pm@nudgemail.com message at 11:56am, it probably won’t arrive by noon.

    Here’s a cheat sheet for Nudgemail commands, such as specific dates, specific times, and recurring Nudgemails.

    For those “respond later today” messages that you didn’t get to, forward them all to tomorrow@nudgemail.com. Your inbox will now be empty, and you can start again tomorrow.

    A note about privacy. All email messages are essentially public. They’re more like postcards than letters. Anyone who has access to an email server can read your email. Additionally, if you are a government employee—as I am, an employee of a state community college—your emails are subject to disclosure through a public records request. I believe that the good folks at Nudgemail.com are not reading my email messages; they have enough of their own emails to read. This is just a reminder that your emails are already pretty public—or could be. Now, if you want to encrypt your email, that’s a whole other ballgame.

Order inbox with oldest first

Now that every message in your inbox has been dealt with, change the order in which your emails appear so that the oldest ones are at the top and the newest ones are at the bottom. This will encourage you to deal with the oldest ones first—which will keep them from piling up.

In gmail, at the top of the page where you see the number of message, click the right-most arrow.

In desktop Outlook, click the arrow to change from newest first to oldest first.

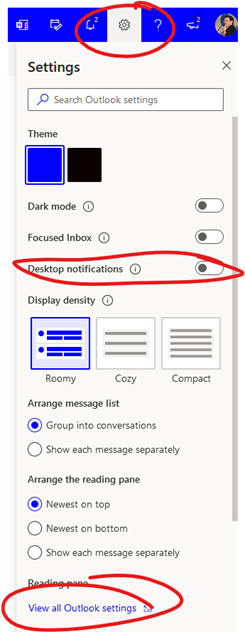
In Office 365 Outlook, click on Filter, select Sort, and then check “Oldest on top.”

Conclusion

Take a few minutes to reset your email inbox. You may be surprised at how much lighter you feel. And, just as importantly, your students and your colleagues will appreciate your quicker email responses.