Whatever your motivation, switching from grading by hand to grading electronically may take a little extra time until you get down a system that works for you, but it’s worth it. Students use less paper. I write more comments since they’re not constrained by margin size, and my comments are legible. Having electronic copies of student work is handy when a year or two later a student asks for a letter of recommendation.
Students submit assignments.
Decide if you want files sent in a particular file format. MS Word can handle most formats, but if you want to be cautious accept just doc, docx, and rtf formats.
If you don’t use a course management system), there are two main ways students can submit their assignments.
Via email. When students submit assignments, immediately respond with a “got it” message. Consider using a program like PhraseExpress to quickly type the response email.
Create an email folder called “Grade these.” Move the student’s email to that folder. That keeps those emails from getting lost in your inbox.
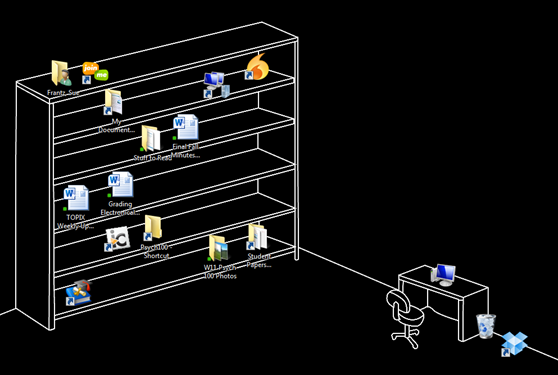
When you’re ready to grade, open your “Grade these” folder, and pull the attachments off into a “Student papers” folder on your desktop, in Dropbox, in My Documents, or wherever you’d like to save them. If you use Outlook, EZDetach is a program that will pull all of the files from email messages in the same folder all at once, adding the sender’s name, email address, and most anything else you’d like to the attachment’s filename and drop them into whatever folder you’d like, in this case, your “Student papers” folder.
File location tip: If you want to be able to grade from home or work, create your “Student papers” folder inside of Dropbox. Wherever you have Dropbox, you’ll have all of your papers you need to grade.
Via Dropbox. If you use Dropbox, then I recommend using DropItToMe. Students visit a website, and with a password you provide, students upload their files to a folder called “DropItToMe” located in your “My Dropbox” folder. Since DropItToMe sends you an email to let you know when new content has been added, you can keep track of when assignments were submitted.
As due dates pass, move files from your DropItToMe folder to your “Student papers” folder on your desktop, in Dropbox, in My Documents, or wherever you’d like to save them. This keeps newer assignments separate from older assignments.
DropItToMe tip. Ask your students to name their files in some standardized way, such as lastname firstname time assignment, e.g., Garcia Juan 230 paper 1. That way you know what exactly what the file is just by looking at the filename.
Late assignment tip: If you want to keep track of assignments that are sent late, add “LATE” to the end of the filename.
Deadline tip: Since assignments are being sent online, you can make your assignments due any time. Mine are due at 11:59pm. If it came in yesterday, it was on time. If it came in today, it’s late.
Use MS Word’s track changes.
 retaining the original. For example I’ve added ‘add’ and ‘remove’ while deleting ‘delete.’

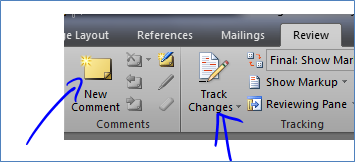
Both of these functions can be found on the Review tab.
For common comments, try PhraseExpress. For example, many of my students will start a sentence with a number. Rather than type out the same comment each time, I have programmed PhraseExpress so that when I type “#num” PhraseExpress replaces that with “Write out numbers that begin sentences.” Very handy!
I recommend saving the file as a PDF to send back to the student. This serves two purposes. 1.) It doesn’t matter what program the student used to write the paper. You can use Word’s functionality to grade it and send back all the changes and comments in a form that most everyone can read. 2.) If you want the student to continue to work on the paper and submit future drafts, the student has to go into their document and make the changes. If sent back in Word, the student could simply “accept changes,” and all of the editing you did on the paper would immediately become part of the paper without the student even needing to read through the changes you made.
Keyboard shortcuts. Instead of going through the ribbons to turn on track changes or add a comment, use your keyboard.
Turn on/off track changes = CTRL-SHIFT-E
Insert a comment = Highlight the text you want to comment on, then CTRL-ALT-M
Here’s a PDF of the Word 2010 keyboard shortcuts if you’d like to learn others. There are 11 pages of them. Just pick out a couple to add to your repertoire. Once you have those down, move on to others.
If you don’t want to remember the keyboard shortcuts, add “track changes,” “insert comment,” and “save to PDF” to the quick access toolbar. The quick access toolbar is the row of icons at the very top of MS Office programs. You can add just about anything to it. Instead of clicking through ribbons, you can just click the icon. To add or remove shortcut icons, click the down arrow on the far right of the icon row. That will give you this menu. Select “More Commands…” at the very bottom.
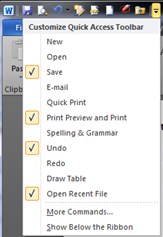
That will generate this popup. Click the down arrow under “Choose commands from,” and select “Review Tab.” From the options listed, click on “New Comment” to highlight it, click the “Add” button. Then repeat for “Track Changes” which you can find further down the list.

Finally, from the “Choose commands from” menu, select “File Tab.” Scroll down to “Publish as PDF,” and add it.
Using the quick access toolbar. You can either click on the appropriate icon with your mouse or you can use an easy keyboard shortcut. Open Word and hit the ALT key on your keyboard. Notice how each icon on the quick access toolbar has a number? Just hit that number to launch that function. For me, ALT-5 saves my file as a PDF; ALT-8 opens the menu of my most recently used files.

Want to change the order of the icons on your quick access toolbar? Go back into your toolbar customization area. Highlight the icon you’d like to move, and click the appropriate button to move it up or down in the list.

Return assignments to students.
Now that you’ve graded the assignment, it’s time to return it to your student. If you use a course management system, you can upload it to the student there.
I email them. I put my students’ email addresses next to their names in the Excel spreadsheet where I keep their grades. Excel will automatically make the email address a hot link. Just click the address, and Outlook launches a new email message. To attach the file, open the folder that contains the assignment, and drag it over to the body of the email. Outlook will automatically attach it.
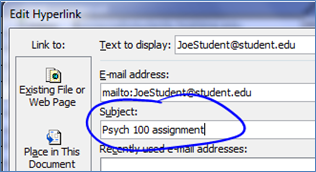
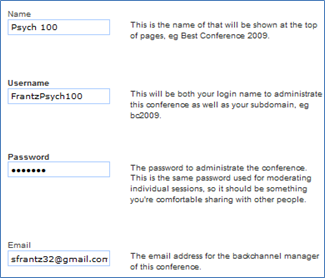
Email tip. In your Excel file, right click on the student’s email address and “edit hyperlink.” That will generate this window. In the subject box I have “Psych 100 assignment” so that every time I click on the student’s email address, the new mail message that pops up has the student’s email address in the “to” line and “Psych 100 assignment” in the subject line.
File management tips. Inside my “Student papers” folder I have a “Graded” folder. Once I’ve graded a few assignments I move them into the “Graded” folder. The assignments are easy to identify because there’s both the original document and the PDF. Inside my “Graded” folder is a “Sent” folder. Once I have a bunch graded, I open my Excel spreadsheet and email my students their graded assignments. Once they’ve been mailed, I move the files to the “Sent”
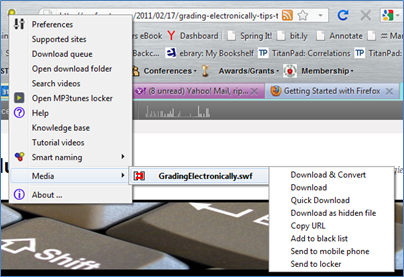
Video. If you’d like to see this in action, this video walks you through how I receive, grade, and return a student paper.
[swfobj src=”http://suefrantz.com/MediaFiles/GradingElectronically.swf” width=”600″ height=”400″]
What tips, tricks, and shortcuts do you have for grading electronically?


