Screencast-o-Matic: Easy Screen Recorder
If you have Tegrity, Camtasia, or Camtasia’s lightweight little brother Jing, and you’re comfortable with those, no need to venture into new territory. Unless of course you are looking for a quick screen recorder without the bells and whistles with a 15 min. recording limit. (The Pro version gives you much more power at $15 per year.)
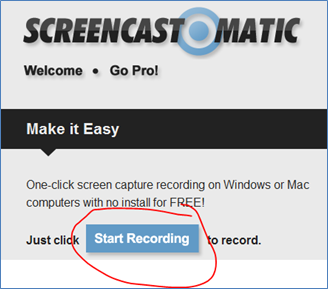
Make sure your microphone is ready to go, then visit Screencast-o-Matic, and click “start recording.” No login needed. Say yes to any dialog boxes that might pop up. And then you will get this dotted box.

Anything that is inside the box screencast-o-matic will record. To resize the box, click and drag any of the little squares.
Check the volume on your microphone by looking at the meter on the toolbar. Click the down arrow next to the meter to choose a different microphone.

Click the WebCam icon to choose your WebCam and turn it on.

Your WebCam video will appear in the bottom right corner of the screen. Even though it is outside of the recording area as designated by the dotted box, the WebCam will still be recorded.
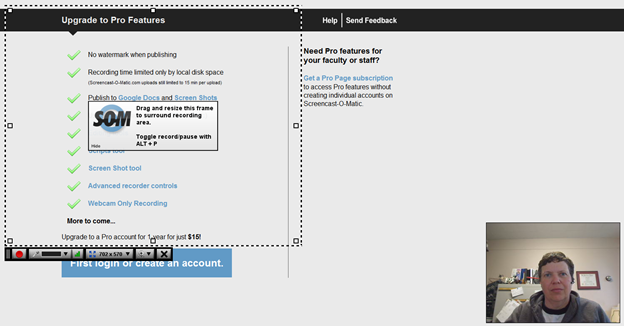
Click the record button (red circle). When you’re done recording, you can grab the red triangle at the bottom of the WebCam window to resize it. Click and grab the WebCam video to move it where you want it to appear in your screencast.

Now choose where you want to publish it.
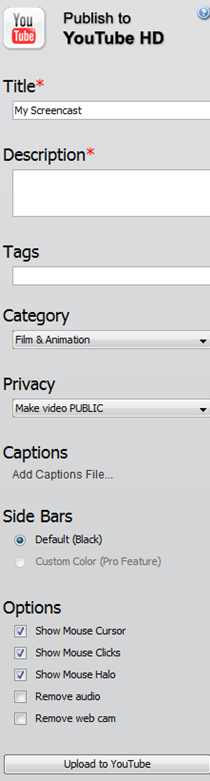
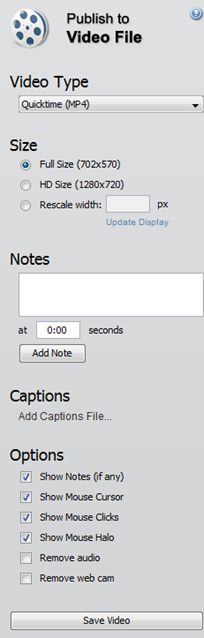
| If you publish to Screencast-O-Matic, you will need to register. You only need an e-mail address and a password. Add a title and description, add any notes you would like, add captions, and choose your options. | If you publish to YouTube, add a title, description, tags, choose whether your video will be public or private, add captions, and choose your options. | If you publish to “video file” the video will be downloaded to your computer in one of four file types: MP4, AVI, FLV, or GIF. Add notes, captions, and choose from the remaining options. |
|
|
|
|
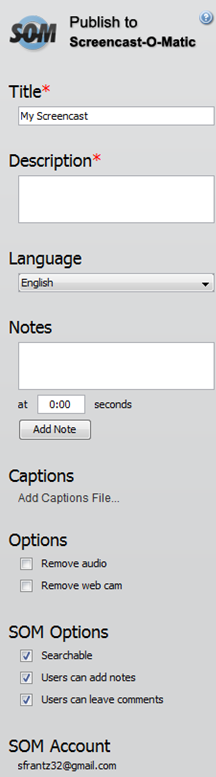
I opted to publish my video (titled Screencast of Screencast-o-Matic) to the Screencast-o-Matic website.

Once available on the Screencast-o-Matic website, visitors can add additional notes, make comments, download the video, or get an embed code.
Here’s a video I just recorded, placed here using the embed code.