SubToMe: Subscribe to RSS Feeds Easily

So now you’re using an RSS feed reader, such as Feedly, to keep up with what’s new, right? (If not, see this blog post.) SubToMe is a browser tool that will make subscribing to new feeds a breeze. With a few mouse clicks, you can start getting content sent to you from your new source.
On the SubToMe webpage, click on “Settings”.

There are two ways you can use SubToMe to subscribe to a new feed. 1.) Drag the “Subscribe” button to your browser’s bookmark bar. Any time you want to start getting content from a site you’re visiting, click the button in your bookmark bar.

Or 2.) Install the SubToMe browser extension. For Chrome, I visited the Chrome Store, and searched for SubToMe. Once installed, the green SubToMe icon appears next to the rest of my browser extensions in the top right corner of my browser. (Go directly to the extension in the Chrome Store.) To add a new feed from the webpage I’m visiting, I just click the icon.

Connecting SubToMe to your RSS reader

On the settings page, click on “suggested apps”.

Here are the RSS readers they support (as of this writing). Since I just use Feedly, I clicked “Install” to, well, install it.

Ready to roll!

That’s it. To subscribe to a site – such as this one, just to pick one at random – click the SubToMe button. You’ll see this little popup. Click “Feedly” – or whatever RSS feed reader you chose.

Your RSS feed reader will load giving you a preview of what the feed will look like. If you want to subscribe, in Feedly’s case, click “+add to my feedly”.

Feedly then asks where you’d like to put the new feed. Click the appropriate box or boxes – or create a new category. Click the “Add” button at the bottom.

Done!

Remember, your RSS feed reader, e.g., Feedly, is creating a personalized newspaper for you. Just like any other newspaper, don’t feel compelled to read everything. Some of my categories have content that are weeks old. I’ll read the newest content, and then for the rest “mark as read.”


LastPass: The Last Password You Will Ever Need

I have been a LastPass advocate for some time, however I’ve been remiss in not dedicating an entire blog post to it. It’s time to remedy that. I have usernames and passwords to over 400 websites. Each of those passwords should be complex and unique. How often do you reuse your passwords?
LastPass is a password manager – and a vault for saving other kinds of data, like credit card information. Use it for free, or pay them $12 a year for the mobile app; if you have a smartphone, it’s well worth the price. By letting LastPass manage your passwords, you can get rid of all of your sticky notes/little black book – and stop letting your browser save your passwords. Let LastPass generate random passwords for you. Share your passwords with trusted LastPass users, like your spouse; if one of you changes a shared password, it’s automatically changed for the other person. Store your credit card information in LastPass.

What it can do.

When I visit a website where I need to enter my username and password, LastPass automatically enters it for me. I have LastPass installed on the three major browsers I use (Chrome, Firefox, Internet Explorer), so my passwords seamlessly follow me regardless of which browser I’m using.

When you first install LastPass, the program will pull your usernames and logins from your browser. Anything you have saved there will automatically be moved into LastPass.

This is the menu from the LastPass web browser extension. From here I can go to my “vault” which holds all of the data I have saved in LastPass. “Recently Used” gives me a list of websites LastPass has recently accessed. Clicking on the links takes me to those sites. “Sites” gives me clickable links to all of the websites I have LastPass passwords for arranged by categories (folders) I’ve created. “Secure Notes” lets me save any kind of text I’d like, like my home WiFi access code. “Fill Forms” has my saved personal data, like phone number, address, and credit cards. I have different form profiles for my address, such as one with my home contact information and another with my work contact information. I have different form profiles for each of my credit cards. That means that when I’m ordering something online, I don’t have to search for my wallet. I just select the credit card I want to use, and, BAM, the information is entered.

Because I have LastPass installed on my laptop, in “Preferences” I have chosen to have LastPass “logoff when all browsers are closed and Chrome has been closed for” 10 minutes. Honestly, if my computer were stolen, the very first thing I would do is hop on the internet, say, with my smartphone, and change my LastPass password. If I’m traveling where the risk of losing my computer is greater (although I’ve never lost one yet!), I turn on multifactor authentication. (See below for more on this!)

When you need to create a new password, use “Generate Secure Password.” You decide the parameters, and LastPass will generate a password. If the bar is in the green, you have a strong password. LastPass will automatically paste it into the web form you’re using, and it will automatically save the password.

When I’m away from my computer, I can access all of my LastPass data through the LastPass mobile app or by logging into my account at LastPass.com.

Now you’re getting nervous, right?

“That’s a lot of private data you’re giving them. Do you really trust them?” Yes, yes I do. Because LastPass doesn’t actually have my data. They don’t even have my LastPass master password – if I forget my password, they can send me the hint I used when I created my account, but they can’t send me my master password because they don’t have it.

The short version. LastPass encrypts all of the data you have stored in LastPass on your local machine. Your LastPass master password is the key to decryption. If someone were to break into the LastPass servers, all they would get is gibberish. They can’t decrypt your passwords without your master password.

You can read more about LastPass security. Want to learn even more? Here is what Steve Gibson had to say about LastPass in 2010 on the Security Now podcast (watch below).

For those who want extra security, enable LastPass’ multifactor authentication. With this, you need two keys – one key is something you know (your master password) and the other is something you have (e.g., your smartphone). I use Google Authenticator, but there are others. On my phone I installed the Google Authenticator app. When I log into LastPass, I enter my password, and then I’m prompted to enter a code. I run the Google Authenticator app on my phone, and there will be a code for LastPass. The code is only good for 30 seconds, and then a new code will appear. Once I enter the correct code, then I will be logged into LastPass. Even if someone did get my master password, they would need to have my phone, too, to get into my secure data.

Now think about how many usernames and passwords you have saved in your browser. All someone has to do is open your browser…


Stuff to Try in July

It’s July!

Remember how you said back in January that you wanted to try out some new things when you finally had the time for it?

Your challenge for the month of July: Pick two of these to try out. The first of your picks is #1; we’re not even going to debate that. Your second pick is your choice.

  1. Stop talking on your phone while driving. This one is the easiest since it’s about not doing something instead of doing something. Watch this 55-min video of David Strayer from the University of Utah discussing his researching on multitasking while driving. This was a talk he gave earlier this year at the Association for Psychological Science convention.
  2. LastPass. This is a password manager. Remember one password and have access to all of your passwords – even on your smartphone. LastPass will generate random passwords for you – and remember them for you. You can even share a password with someone else, say, the person you share a bank account with. If you are already using a password manager and are happy with it, by all means keep using it.
  3. Cel.ly. Text all of your students at once or just texts individuals without getting their phone numbers or revealing yours. Send out a multiple choice question, and Cel.ly will tally the results for you. Read more here.
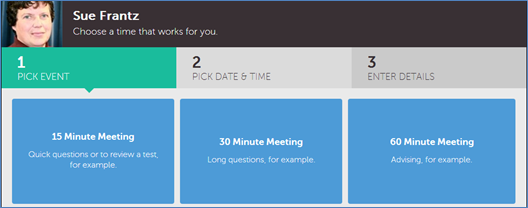
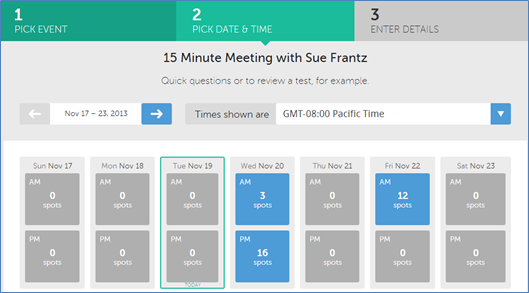
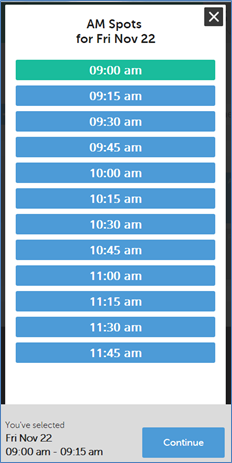
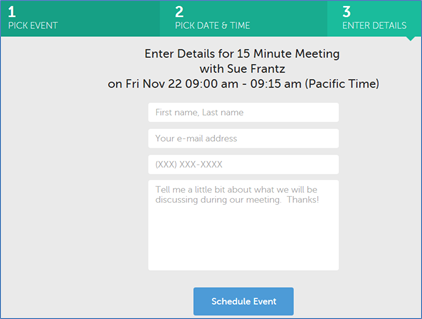
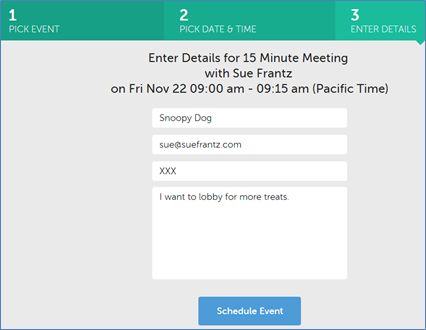
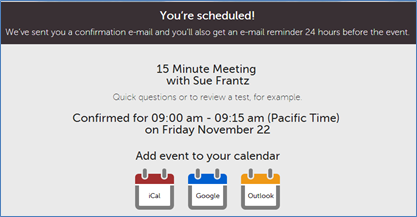
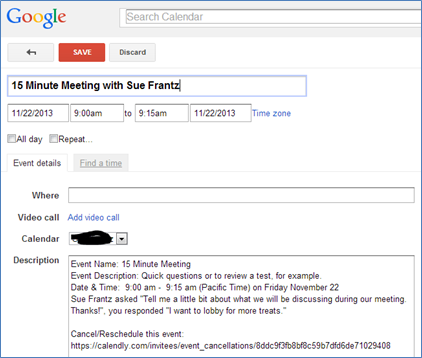
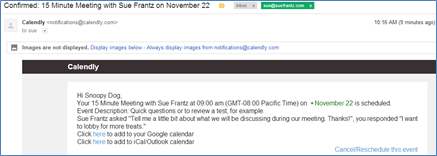
  4. YouCanBook.Me. Let others schedule themselves into your Google Calendar – and automatically send them a reminder notice. Read more here.
  5. Feedly. Create your own personalized newspaper courtesy of the internet. When new information is posted to sources you’re interested in, that information will come to you. Ask your favorite librarian about how to get information from the library databases (search results, tables of contents) sent to your newspaper. Feedly is one of many tools in the RSS feed reader genre, but it’s a good one to start with. Read more here.
  6. OneNote. You have this on your computer now. Look in your Microsoft Office folder. In there you’ll find OneNote, an incredibly useful note-taking/organization/task management program. It’s even more useful now that they have a nice mobile app. Read more here.
  7. Akindi. Print test bubble sheets instead of purchasing them. Scan the answer sheet and the student exams into one big pdf, then upload to Akindi. The tests are graded automatically, and all of the data pulled into a spreadsheet. If you attach your student learning outcomes to each of your questions, you have yourself a very easy and very powerful assessment tool. Download the scored tests for printing or sending electronically to your students. Read more here.

  8. IFTTT. “Automatically have your gmail attachments saved to Dropbox. Tweet Feedly articles you’ve tagged. Text new appointments to Google calendar. Making these kinds of automated connections is the power of today’s internet. And you know what? It’s ridiculously easy to do.” Read more here.


Epic Pen: Write on Your Screen [Windows]

You’re in class (or creating a video for your class), and you want to write on the screen to bring attention to some important point. Sometimes you’re in PowerPoint. Sometimes you’re showing a PDF. Sometimes you’re on a website. Epic Pen will write on your Windows screen (XP and later), regardless of what program you happen to be running.  Use your mouse to draw, or if you have a touch screen PC, your stylus.

Here I’ve written on a webpage.

This is the Epic Pen toolbar.

Using Epic Pen is just like writing on a transparency. Even when the content underneath changes, the transparency is still there. Here I minimized my browser, but the marks I made on the screen haven’t gone away.

As you move from window to window, remember to erase your “transparency” by clicking on the icon on the bottom right of the Epic Pen toolbar – or use the keyboard short, CTRL+6.


IFTTT: “Put the internet to work for you”

Automatically have your Gmail attachments saved to Dropbox. Tweet Feedly articles you’ve tagged. Text new appointments to Google calendar. Making these kinds of automated connections is the power of today’s internet. And you know what? It’s ridiculously easy to do.

IFTTT stands for “If This Then That.” You can connect any one of 65 “channels” to any other one of their “channels.” A channel is web service, such as Dropbox, Gmail, Google Calendar, LinkedIn, Facebook, SkyDrive, Instapaper, Feedly, and Pocket. It includes being able to use text messaging or even phone calls. For the channels you want to use, “recipes” are the connections you make between those services. There are plenty of recipes that you can browse through, or you can create your own.

One recipe I found will let you automatically save all of your Gmail attachments to Dropbox.

Overview of how IFTTT works

Services that operate via the web can choose to have an API (Application Programming Interface). Any service that has this code can be connected to any other service that uses that code. If you have services connected to Facebook or your Google account, those services are using an API. With IFTTT, you give them permission to access certain aspects of whichever services you’d like.

A specific example

After setting up an account at IFTTT, click on “Browse” then in the search box, enter Gmail as a search term. The recipe we’re interested in is fourth on the list.

Clicking on “Save all your Gmail Attachments to Dropbox” generates this page.

Since I haven’t given IFTTT permission to use my Gmail and Dropbox accounts, I need to do that first. When I click the “Activate” button under “Gmail Channel,” I’m directed to Google where I’m asked if I want to grant access to IFTTT. Since I do, I click the “Grant Access” button. And then I repeat the process for Dropbox.

Now I need to decide where in Dropbox I want to save the attachments coming in from Gmail. With the default, IFTTT will create a folder called IFTTT, and within that it will create another folder called Gmail Attachments. I’m good with that, so I just click the big blue “Use Recipe” button.

At the very top of the page click “My Recipes.” You’ll see that it’s been added.

I told you it was ridiculously easy.

Use the icons to the right of the recipe the turn it off, delete it altogether, share it, or edit it.

[Updated 7/2/2013: Recipes run every 15 minutes, unless they have a lightning bolt. Lightning bolt recipes don’t have this wait time.  If you want to check a recipe without waiting, click the edit icon next to the recipe.  On the resulting screen, click “Check.”  The recipe will run immediately.  How do you get a lightning bolt?  Only some channels have lightning bolt capability, like email and Google.  IFTTT reports that they’re working on rolling this out to other channels.]

Creating a new recipe

Let’s create a new recipe where we have any Gmail messages labeled Dropbox saved in a Dropbox folder called “Important Messages.”

Click “Create” in the top menu bar. On the new screen, click the “this” link to tell IFTTT what you want the trigger to be.

For step 1, you are asked what you want the trigger channel to be. Click on Gmail.

In step 2, choose a trigger. Choose “New email labeled.”

Step 3, enter dropbox as the label, and click “Create Trigger.”


With the “this” portion done, we’re ready for the “that.”

In step 4, you’re given that same list of channels. This time, choose Dropbox.

Step 5, tell IFTTT what you want it to do with Dropbox. Let’s go with “Create a text file.”

In step 6, IFTTT said that it would create a folder called IFTTT (if one doesn’t already exist by that name), and then it would put my Gmail messages in a subfolder called “Gmail.” I’m okay with the IFTTT folder, but I want the subfolder called “Important Messages,” so I typed that it.

Next, we need to decide what we want the filename called. IFTTT defaults to what you see here, but we can change this to whatever we’d like using the “ingredients” list given.

I decided that I want the filename to be the sender’s email address – subject line from the message – date the email was received.

When it looks good, click the big blue “Create Action” button.

Last step, add a short description.

Click “Create Recipe.”

Now, let’s test it!

In Gmail, choose a message; right above the message is an icon menu. Click on the label icon, and type in dropbox. Gmail will ask if you want to create that as a new label. Assure it that that is indeed what you want to do.

Give it a few minutes, then check your Dropbox folder. There will be a new folder called “IFTTT”, and within that folder is one called “Important Messages.”

Now do a celebratory dance!

What to do next

Browse the recipes others have created. Take a look at the list of channels to see what services you’re currently using and how you might want to connect them. For the services you’re unfamiliar with, check them out.

Happy cooking!


Feedly: Prepared to Disconnect from Google Reader?

Earlier this year Google announced it was pulling the plug on Google Reader July 1, 2013. I recommended trying Old Reader or Feedly. Personally, I’ve settled on Feedly; their responsiveness to the demand following Google’s announcement and to the feature requests coming from their new clients has been admirable.

Feedly was originally built to use Google Reader in the backend, repackaging the content into a different format. Short version: Feedly said we’ll make some changes so we don’t need to rely on Google Reader. The day is here. They’re calling it the Feedly Cloud.

If you are using Feedly, follow the easy-to-follow directions on their blog to make sure that all of your feeds really are coming through Feedly, not Google Reader.


Displaying the time during tests

A year ago, I wrote about how the ability to tell time on an analog clock was going the way of the slide rule. Watches, digital and analog, have largely disappeared. Why wear one when you have a cell phone to tell you the time? While watches do seem to be making a comeback as a fashion accessory, that particular trend hasn’t hit my campus yet judging by my students’ bare wrists.

For a student who doesn’t have a watch and can’t tell time using the analog clock in the back of my classroom, pacing oneself during a test in my classroom is a tricky business.

I project the time using my classroom’s computer.

After much looking around, I’ve settled on time.is as my time website of choice. This is what it looks like to my students.

The screenshot below is what Time.is looks like when I first visit the site. It correctly identifies my location as the Seattle area. The information provides is a little much for displaying during a test. Most of my students don’t use a 24-hour clock. Displaying the seconds might actually increase anxiety (“Oh no! Time is going really fast!”). My students don’t need to know that my computer’s time is exact (but good for my computer!). They also, while taking a test, don’t need to know the time in Beijing.

Let’s customize.

First, clicking on the time strips away everything except for the “Time.is” logo in the top left corner and the big bold time in the center; you get a screen that looks like the screenshot that led off this blog post. Click on the time again to go back to the default view that shows all the extras.

Let’s change the display to a 12-hour clock and ditch the seconds.

At the very top of the Time.is screen, click “more.” Then select “customize.”

That generates this customization screen. Uncheck “24 hours” and “show seconds.” Then click “Back to the front page.”

Ta da! You now have a 12-hour clock and the seconds are gone.

Click on the time to show just the time. Done!


Inserting a YouTube Video in Word Document

One of my colleagues asked how to insert a video into a Word document. Here are excellent instructions for inserting a YouTube video. If his instructions for getting the “Developer” tab don’t work for you, see these instructions.


Cel.ly: Text Message Your Classes for Free

In March 2012 I wrote about SendHub, a platform for texting a group of people all at once. Cel.ly is a similar service with a free space for educators. Unlike SendHub, with Cel.ly, students do not see my phone number and I do not see their phone numbers.

When I started texting students en masse – first with SendHub, now with Cel.ly – I wasn’t sure what to think of it. Should I insist that the only acceptable means for electronic communication between students and me be email? Well, why? There are certain communications where email is appropriate, but sometimes a quick question/answer is better handled via text. Last week after class, I emailed my students a questionnaire that I wanted them to fill out and bring with them to class. I texted my students to tell them to check their email. At the same time I scheduled another text to go out a few days later asking if they had completed the questionnaire yet, and I scheduled another one to go out the morning of class reminding them to bring the completed questionnaire with them to class. This is more hands-on than I generally am with my students, but it was really important to me that they bring the completed questionnaire to class because of what I wanted to do during class time – and I didn’t want to spend class time waiting for students to complete the questionnaire.

I have to tell you, it’s a pretty powerful feeling to know that when I hit send on a text message to my class all of my students will likely be reading that message within seconds. Granted, may be doing it during class with one of my colleagues. In that case, Me: 1, Colleague: 0.

You could make use of the testing effect by periodically texting students questions relevant to your course material. Attach points to it or not. All correct responses received within 60 minutes earn one point with five points going to the best answer. Schedule the questions to go out at different times of the day so that students aren’t disadvantaged because you’re sending out questions when they’re always in Chemistry or, worse yet, driving home.

Let’s take a look at Cel.ly

While I wish that the Cel.ly interface looked a little more like it was for grown-ups, it is possible to do everything you need to do via text message (or the smartphone app) and never visit the website. If you use the website or the app, it’s intuitive. If you want to manage it all from your phone, you’ll need this list of commands. Of course you can mix and match. Use Cel.ly when you’re at your computer, but use the Cel.ly app or your text messaging app when you’re on the go.

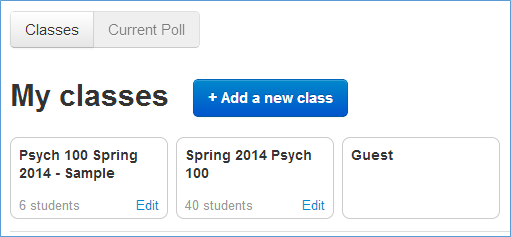
In Cel.ly, you create different “cells.” You may have a cell, for example, for each of your classes, a cell for the club you advise, and a cell for your department.

Creating a cell

After creating a Cel.ly account, click on “cells” at the top of the screen. Click “start cell.”


In step one, choose a cell name.


In step 2 decide who can join. If you choose “restricted,” you can decide what sort of information you want the person to provide, such as a username or short bio. Or you can enter a password, so that only those with the password can join. My class cells are open. Who wants to get announcements for my class if they’re not actually in the class? Of course as the cell administrator, I can kick out whomever I’d like.


In step three decide how you want to manage texts that are coming and going. If you are using this for your class, curated chat is the safest bet. This is the setting I use for my classes. When students reply, the messages come to me privately. I can choose to respond to just that student or to the entire class.


In step four provide some information about your newly created cell.


How others can join your cell

Now when you click the “cells” link at the top of the page, you will see a link to your cell. This is the page for my new cell. In the share box on the right, you can see there are a couple ways people can join this cell. You can just give people the public link, in this case http://cy.tl/13wbDkr. Or you can give them the texting instructions below that. For my class cells, I put the texting directions on my syllabus. (You are welcome to join this cell to see how it works from a student perspective. It is easy to leave the cell when you are ready. Just reply to a text from the cell with the word stop in the body of the message.)


Receiving messages

In the top right corner, you see two orange buttons: “email on” and “sms on.” Every time a text is sent to this cell, you will get both an email message and text message (sms) by default. If you don’t want text messages sent to your email, click the “email on” button, and it will turn to “email off.” If you choose to not get messages to either email or text message, you’ll need to use the smartphone app or the web interface.


Sending messages

Messages can be sent from the Cel.ly web interface just by entering your message in the message box. Or you can send them from either the Cel.ly app or from your text messaging app. In the latter case, I would send a text message to 23559 with @SueFrantz in the message, and that message will be sent out to everyone in the cell. If I just wanted to send to one person, I would enter there Cel.ly @username.

Sending a poll

Clicking “send poll” in the web interface gives you this screen. Here I have the question set to close in 30 minutes or “when all members vote”.

This is a question I sent out to my students.

This is what it looked like in the Cel.ly app on my phone after two answers arrived.

This is what the final poll results looked like on the web interface.

When the poll closed, the results were automatically texted to everyone in the cell. This is what they looked like in text form.

Hashlinks

If you have separate cells for each of your courses, you might want to create a hashlink so you can communicate with both classes with one message. For example, if you have two sections of a course, and you have information you want to share with both sections, you can create a hashlink so any time you include that hashlink in the message, it will shared with students in both sections.

This “hashtag & links” box is on the right side of your cell’s page.

Click the “add hashlink” button to get this screen. Choose what other cell you want to link to your current cell. And then choose a hashtag. Let’s say that I had two cells, one for each section of a course. Let’s say that they are named @psycha and @psychb. I can create a hashtag, say #psy that will allow me to post to both cells with just one text message.


Receptors

You can add an RSS or Twitter feed, so that new content from that feed is texted to everyone in your cell. Here I’ve add my twitter feed so that any tweet I send out will automatically sent as a text message to everyone in the cell. Instead of sending out all tweets, I can add a “search filter,” like a twitter hashtag, so that only tweets from me that contain that hashtag will be sent out to everyone in the cell. (If you decide to join this cell just to see what it’s like, know that I’ve deleted this “receptor” – you won’t get a text message every time I tweet!)

Conclusion

Try it out. Encourage your students to join your class cell. You may discover all kinds of uses for it. Just don’t get too carried away with your new-found power!


CleanPrint: Print/Save Only What You Want

CleanPrint gives you the power to print or save only the content you want from a webpage. Add a note if you’d like. Add CleanPrint as an extension to your browser.  What’s especially cool is that multi-page articles are automatically combined into one.

With this NYTimes article, you can see the CleanPrint toolbar on the left. The top half gives you several places where you can print or save the webpage.

You can choose which of these print/save options you’d like to display by making changes to the browser extension. In your browser, go to where you can see your extensions. Look for the extension under “Print or PDF with CleanPrint”. Once you find it, select “options” to see this screen.

But before printing or saving, I want to edit the page. There is a lot of content on this page I don’t want. CleanPrint is also telling me that the page will print 5.45 pieces of paper. Let’s see about reducing the amount of paper I’ll need.

The top of the page is all other headlines. I don’t want that. Mousing over it selects that area turning it green.

Clicking on the green area makes it disappear. With that section gone, the new estimate is 5.25 pages.

Let’s take a look at the bottom half of the CleanPrint toolbar.

Clicking “remove images” removes images. And clicking the small A button reduces the font size. After clicking that button a few times, I’m down to 2.68 pages.

Before saving or printing the page, I can add a note by clicking the “add a note” button. A note, at this writing, can only be added in this location in the page but it seems like a feature that could be expanded by allowing additional notes and an option to change the note’s color.

Check out the final PDF.

The “less ink” button grays the font so that, well, you use less ink when printing this document.

If you’re interested in this kind of service, also check out my blog post about PrintFriendly.