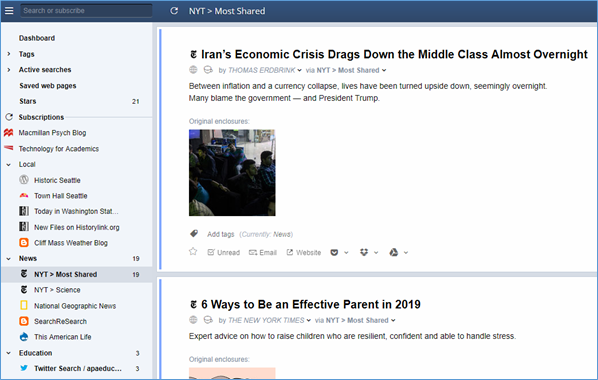
Cropping Images in MS Office: Are You Doing It Right?

Did you know that when you crop images in MS Word, PowerPoint, etc., the full image is still there? Anyone who has a copy of your file can restore the image back to the original.

This is especially problematic if you frequently crop after doing a print-screen. Do you remember what was in the background that you just cropped? A sensitive email? Student grades? Your credit card information?

Fortunately, you can ask MS Office to delete the cropped areas of your images, but you do have to ask. For each image. In, for example, a Word file, click on the image, select the Format tab, click the “Compress Pictures” icon. In the pop-up window, make sure the “Delete cropped areas of pictures” box is checked. Click Ok.


Why doesn’t MS Office automatically do this? I guess because they want to make it easy for you to restore the image back to the original in case you didn’t like your cropping job. Fair enough. But a warning somewhere that says that the part of your image that you can’t see is really still there in the background would be nice.


YouTube Playback Keyboard Shortcuts


For the frequent users of YouTube, here are a handful of useful keyboard shortcuts.


Shout out to this MakeUseOf article for this set of tips.


Up-Goer Five Text Editor: Can your students explain difficult concepts in simple language?

We want students to understand our course content, obviously. The better students know something, the better they can explain it using simple language.

Send your students to the Up-Goer Five Text Editor, and ask students to type in their explanation of that particular concept, such as poverty, classical conditioning, or Hamlet’s motivation.

Here I’ve pasted in the classical conditioning definition from Wikipedia. The words with a red underline are not included in the 1,000 most used words. Students need to edit their explanation so that all red-lined words are removed. If you’d like to grade it, have students send you a screenshot of their non-red-lined explanation.

Special thank you to Lynn Davey of DaveyStrategies.com for introducing me to this tool


Dropbox: Save Bookmarks

Over the summer, Dropbox added a nifty new feature.

Save bookmarks from your web browser in any Dropbox folder.

Highlight the URL in your web browser, left click on the highlighted URL, and drag it into your chosen Dropbox folder. Notice that the file “type” is Internet Shortcut.

Like filenames, you can rename your URLs by right-clicking on the filename and selecting rename.

Yes, if you share a Dropbox folder (read/write privileges for your share-ees) or share a link to a Dropbox folder (read-only for your share-ees), the links are also shared.


ParticiPoll: Poll Your Students during Class

I’ve written before about polling options like Socrative and Plickers. ParticiPoll is for those who like to have polls embedded in PowerPoint (works in Office 2010 and higher for Windows; Office 2016 for Mac as of 9/30/2016) but don’t like the cumbersomeness or participant limitations of PollEverywhere.

During your presentation, your participants will use a designated URL to access the polling buttons through any web-enabled device they have, such as a laptop, tablet, or smartphone.

NOTE: ParticiPoll has moved to a pay model. As of March 5, 2020, the lowest plan is $199/year for an individual presenter.

With ParticiPoll, you download and install the PowerPoint add-in to your computer. If you don’t have the ability to add software to the computer you use in your classroom and your IT staff won’t install it, ParticiPoll provides a work-around that you need to do each time you want to use it.

When you sign up for a free ParticiPoll account, you will be asked to create the URL your participants will visit. I chose sfrantz, so the URL my participants use is sfrantz.participoll.com.

Since ParticiPoll is a PowerPoint add-in, everything you need to use it is in PowerPoint. Open your presentation and create your question just like you add any other content. In this case I used text boxes. With a question created, you’re ready to add the magic.

Select the ParticiPoll tab. Click “Insert Poll” to add the polling graph to the slide. You will be asked how many answer choices you want; you can have up to six (A-F). The graph will appear at the bottom right corner of the slide by default. You can change its location by selecting all of the graph elements and moving them wherever you’d like. ParticiPoll does not recommend resizing them though; unpredictable things can happen when the votes come in.

Click “Start Polling” to activate the poll.

Run your slideshow.

What your participants see when they visit your polling URL in their device’s web browser

All six answer options will appear as lettered, colorful buttons. The participant just taps or clicks on their answer choice. As long as the question is still open, participants can answer or change their answers.

In the free version, the participants will see ads at the bottom of their screens, although I only saw ads when voting with my mobile device not with my laptop.

Participants will also see a box that encourages them to “Ask the presenter something.” If you are using the free version, the box is there and participants can indeed submit something. However, free-version-account-holders can’t see what was written. You will get an email from ParticiPoll telling you that something was written, though, for what that is worth.

Showing the results

The graph at the bottom of your slide has a counter on the far right to tell you how many votes have been recorded.

When you are ready to reveal the results, advance your slide. Be patient! It can take a few seconds for the results to appear. The slower your internet connection, the more time it will take for the results to appear. When you advance your slide again, all of the results will disappear. Going back to the slide will reveal a reset poll, and your participants will have to re-vote.

How many poll questions and how many participants?

You can have as many poll questions as you would like. Since it’s essentially the same poll interface over and over again, it doesn’t matter to ParticiPoll how many questions you ask. The only limitation is that each poll question needs to be on its own PowerPoint slide.

The number of participants is also unlimited. This is welcome news for those of you with large classes.

What does the paid service get me?

ParticiPoll does have a referral program. After creating an account and logging in, visit their “refer” page to get your referral link. When 5 or more people register through your link, you get one year of the pro version for free. Each person who registered gets one month of the pro version free. [Full disclosure: All of the ParticiPoll links in this blog post are my referral link.]


Dropbox: File Requests

Dropbox logoOnce upon a time, there was a third party service for Dropbox called DropItToMe. It allowed others to upload files to your Dropbox account. That service went extinct some time ago, but the programmers at Dropbox have been working on creating that functionality inside of Dropbox itself. And it is now available. The feature is called “File requests”. Give people a URL, and when they visit that URL, they will be able to upload a file as big as 2 GB (I think) to your Dropbox account. How cool is that? And, of course, once the file arrives is uploaded to Dropbox.com, Dropbox will sync it with all of your devices where you have Dropbox installed.

Dropbox left navigation menuTo access this feature, log into your Dropbox.com account via your web browser. On the left, click on “File requests”. Click the big blue button “Create file request”.

The pop-up window asks where you want the files to go. Dropbox will create a new folder aptly-named “File requests” in your root Dropbox folder. When yDropbox File Requests Windowou write something in the required “What are you requesting” field, like “Assignment 1”, Dropbox will create a new subfolder called “Assignment 1” that will reside inside of the “File requests” folder. If you already have a Dropbox folder location in mind, say, in an assignment subfolder that resides in your course folder that resides in your academic year folder, you can click “change folder”, and Dropbox will show you all of your folders. Pick the once you want.

Click “Next” to get the link. You can either just copy the link or you can enter email addresses of those you want to receive the link and let Dropbox contact them.

Now when you click on “File requests” you will see your open and closed file requests. Clicking on “Assignment 1” opens my “Assignment 1” folder in Dropbox. Mousing over it gives me two options. I can edit it, which essentially takes me back to the “Create file request” pop-up window where I can change the folder, although there is one additional option on this screen now; I can also close the link. Closing the link means that even when someone visits the URL, they will not be able to upload a file. The second mouse-over option allows me to add more people; this takes me back to the second pop-up where I got the link allowing me to copy the link again or enter more email addresses for Dropbox to send the link to.

Dropbox screen for managing all of your file requests

Click “Request files” if you want to create more. If you have different courses or sections with different assignments, create a file request for each one. If you’re picturing having to move files once they’ve been uploaded, set things up on the front-end so that Dropbox does the sorting for you.

What does the person who visits your file request URL experience?

They will be asked to navigate through their computer’s file structure to identify the file they want to upload. And then they will be asked for their first name, last name, and email address. They can even add more files to upload. Dropbox will append the person’s name to the beginning of the filename. Let’s say that Charlie Brown uploads a file he named “Assignment 1.docx”. The file will be renamed “Charlie Brown – Assignment 1.docx”.

What happens to the email address the person entered when uploading? Dropbox uses it to send the person a message saying that their file has indeed been uploaded.

And you, as the person requesting files, will receive an email informing you that a file has been uploaded along with the name of the file and a link to access the file on the Dropbox website.

Quick recap of Dropbox download/upload features

Two-way street (download and upload). If you share a folder with someone, both you and that someone can manipulate the files in that folder; what’s yours is theirs and what is theirs is yours.

One-way street toward downtown (download only). If you create a link to a folder or file, anyone who has the link URL can download the files in the folder or that individual file; they cannot make changes to your folder or file that resides in Dropbox.

One-way street toward uptown (upload only). If you create a file request, anyone who has the URL can upload files to the Dropbox folder you designate; they cannot see or download any of your Dropbox files.

Conclusion

If the occasional person emails you a file, then there’s no need to use this feature. If you have a bunch of people emailing you files that you’re just going to add to Dropbox anyway, why not skip the email middle-man and just have them add their file directly to your Dropbox account?


Mobile Accessories

I’m on the road, taking a bit of a mini-vacation during spring break. Looking at my electronics and electronic-related gear I packed for this road trip, I am reminded of a question I was recently asked. What mobile accessories do I recommend? (Shout-out to Lisa at Xavier University of Louisiana!)

Bluetooth keyboard, backup batteries, cord wrangler, and laptop lock.


Rechargeable back-up battery

If your mobile devices are aging, as mine are, the battery life just isn’t what it used to be. This isn’t a problem when stationary because you can plug into an outlet. This also isn’t a problem when traveling by car, train, or, increasingly, by plane because you can plug into the vehicle’s power source. But when traveling by foot as I have done for much of this trip, I have been very thankful for my back-up batteries.

IntoCircuit Power Mini (pictured) (currently $12.99 at Amazon) was the first one I bought. It will give me two or so full charges to my phone battery. Connect one end of a USB cable into the battery and the other end to your mobile device. When you want to charge your back-up battery, plug it into an outlet or your computer. Oh. And it also works as a flashlight.

After a recent trip, I couldn’t find my IntoCircuit battery thus thought I had lost it, so when I saw the RandomOrder Power Bank (pictured) on a recent Costco run, I picked it up; they were packaged in pairs. This battery and the IntoCircuit battery use identical cases, although the IntoCircuit battery carries a bit more oomph under the hood. Unfortunately I promptly dropped one of the two RandomOrder batteries rendering it inoperable. But then my IntoCircuit battery magically reappeared in my backpack. I just checked the Costco website, and I’m not seeing it in stock there. You can, however, purchase the 2-pack from Amazon for $19.99.

Cord wranglers

If you’re charging your mobile devices, you have USB cables. I use two different cord wranglers.

For my longer cables, I use the medium Bobino cord wrap (pictured). You can get a 3-pack for $7.95.

For my shorter cables, I use Nite Ize 3-inch gear ties, available in a 4-pack from Amazon for $2.98. (Not pictured because I was out Geocaching, and I lost the only one I had with me. I have more at home, though. Or if I go buy more, it will apparently reappear.) Your hardware store probably also carries them. Look wherever they display the bungee cords.

Laptop lock

When I have to hole up in a coffee shop or some other public space, I don’t want to have pack up all my stuff just to get a coffee refill or run to the restroom. (Which of these I do, of course, depends on where I am in the input/output cycle.) I use a Targus Defcon CL laptop cable, available for various prices at Amazon (pictured). Also check out this review of laptop locks. It’s a couple years old, but the information is still good.

The cables all work pretty much the same way. Put the cable around a table support or some other immovable or not-easily-movable structure. Thread the lock through the loop (and your backpack and anything else you don’t want to walk off) and attach the lock to the back of your laptop. I wouldn’t leave my stuff for hours this way, but it’s unlikely that someone will, while you’re in the restroom, run into the coffee shop with cable cutters.

Keyboard

On a trip a couple years ago, as I was walking to the departure gate of my hometown airport, it occurred to me that my backpack felt suspiciously light. Upon inspection I discovered that I had managed to pack my laptop charging cord but not the laptop itself. I did have my tablet (and phone) so I had ready access to all of my files (let’s pause a moment to appreciate how cloud storage has changed our lives), but I wasn’t looking forward to spending two days in meetings without a keyboard. I don’t mind swiping the on-screen keyboard for a quick email, text, or search. But for extensive document editing? No thank you. Typically I do extensive research on a product before I purchase it. In this case, my research consisted of finding an electronics store in my connection airport that had a Bluetooth keyboard. Fortunately it was Minneapolis, which is one big mall that happens to have airline service. My only option was Belkin; you can get it for under $50. I couldn’t, but you can. I like that the keyboard is free-standing so I can position it wherever I’d like in relation to my tablet. That’s especially nice in cramped spaces.

Stylus

I had been using a cheap rubber-tipped stylus on my tablet (3 for a dollar, or some such thing) that worked well once it was nice and broken in. When it was just plain broken (the rubber tip developed a tear), I pulled out its sister stylus from the pack. I was surprised by its stiffness and how hard I had to work to get it to work. I was not prepared to put in the hours that were evidently necessary to break it in. Besides, it’s been a couple years, surely there is something better out there.

Musemee Notier stylus

This is the Musemee Notier stylus (pictured), available from Amazon for $16.99. My tablet is very responsive to the clear rubber disk. The stylus produces a harder sound when tapping the tablet surface than did my well-worn rubber-tipped stylus, but I suspect that has more to do with me than the stylus. I was accustomed to a firmer touch, so I’m still getting used to not having to tap so hard.

More suggestions

If you’re looking for more things you didn’t know that you absolutely needed, search LifeHacker for go bag. Start with this article.

What I wish I had but don’t

A Grid It organizer. It’s just a firm backing with interwoven elastic bands. Tuck your gear under the bands and toss it in your bag. It will keep things like back up batteries from getting lost and USB cables from getting tangled.

What’s in your go bag?


Automatic Audio Tones to Start and End Class: Android

Mick MacLean (Buffalo State) emailed me with an interesting problem. When you’re teaching in a classroom without an easily visible clock or an easily visible but inaccurate clock, getting class started and ended on time is a challenge. He thought this might be a problem technology could fix. He wanted an alarm of some kind to sound at the beginning class, with five minutes left, and then at the end of class. Ideally this would happen all on its own without his having to remember to set alarms.

Here’s the solution for Android users.

We’re going to have your Android device read your Google Calendar. When your Google Calendar says that it is time for Psych 100 to start or end, the device will emit a sound and then turn off on its own.

From Google Play, download Automagic to your phone or tablet.

Try the free version first or just pony up the $4.  This website explains how Automagic works: http://automagic4android.com/en/

Here are instructions on how to set a “begin class” and a “2-minute warning” alarm.

When you run Automagic on your mobile device, tap the three-dot menu icon. Select “New Flow”. Flow is the term Automagic uses for these little programs that you can create to make your Android device do just about anything you want short of washing your underwear.

A box will appear. Tap the box, then tap the lined-paper icon that will appear above it.

Select “new” at the bottom of the screen. This will create a new trigger.


 Since we want our Android device to do something in response to a calendar event, scroll down, and choose “Calendar Event.”


 We can see that Automagic has already entered the Trigger Type as “Calendar Event.” Leave the Default Name the same. Once Automagic creates a particular trigger, it will save it so that you can use it in future flows if you’d like; you’ll be able to select it using that name. Under “Trigger at event start” choose, say, 0m (as in zero minutes) before. This will be when the “class is starting” alarm sounds. Under “Trigger at event end” select 2m before. This will be your two-minute warning to wrap it up. Since you don’t want this signal for every event you have in all of your calendars, check the Calendars box, and then tap the “…” to the right to select the calendar you want to use. Because you don’t want the alarm to sound with every event in that calendar, check the box under “Titles.”  Enter whatever you have named your class time in your calendar.  If each class entry in your calendar is different, such as “Psych 100: Chapter 1” and “Psych 100: Chapter 2,” use Psych 100*. The asterisk at the end is a wildcard. It says that this trigger will apply to any calendar entry that begins with Psych 100. If you scroll down this Automagic screen, you will see that you can use words in the description or the location you have listed in the calendar event. If you always teach in the same classroom, you can create an alarm based just on that location, provided you put that location in your calendar. If you always teach in the same two classrooms, you can enter them both on this line; just use a comma to separate them. (For more options, tap the question mark icon to the right of the “Trigger Type” line in Automagic.)


Let’s do a quick recap. I have created a trigger. When Automagic sees that it is zero minutes before an event called Psych 100 in my Sue Frantz Google Calendar or 2 minutes before the end of that event, Automagic will… do something. I haven’t told it what yet.

Tap “Save” at the top of the Automagic screen.

This takes you back to the flow screen. Tap and drag the plus sign icon down and release it. Select “Action”.


 Tap “New…”


 Scroll way down. And I mean way down. As you scroll take a look at some of the actions Automagic can do. Select “Sound”.


Under “Sound Type,” select “Built-in sound.”  Later you can change this to “File” if there is a specific file on your Android device you want it to play. (Are you thinking of a snippet from your favorite classic rock band?)  Directly under that, choose the sound you want by tapping the three dots to the right of “Sound.”  I selected “Alarm” and chose Platinum.  Tap “Save.”  (With “alarm” I know that the sound will play even if my phone is silenced.  I don’t know if that is true with other types of sounds. This is especially important for me because I have a flow that silences my phone ten minutes before events where my calendar is marked as “busy” and turns the ringer on again ten minutes after the event. Alternatively, I could create a flow that sends my phone into airplane mode while I’m in class. That way the sound could still be on since there would be no danger of phone calls or texts. Mick tried the alarm, but it just kept ringing, so he switched to a “Notification” sound. Try out different ones until you find one that works for you and your device.)


Tap “Save.”  You’re back on the main flow page.

 Let’s rename this something more descriptive. Tap the three-dot menu in the top right corner. Select “Rename Flow.”


 I chose “Begin and end class alarm.” If the on/off switch is set to off, slide it to on.


Try it out by setting a calendar event with the appropriate title just a few minutes from now. Leave at least two minutes between when you set the calendar event and when you expect the phone’s alarm to go off.

Of course this flow will sound the same alarm at the start of class and again with two minutes left. If you want a different sound for the beginning and the two-minute warning, or if you want another sound for the very end of class, create additional flows.

If your classroom is big and there is a setup for laptops, you can plug the audio cable designed for laptops into your phone’s headphone jack.  When your phone plays, the sound will go through the classroom’s speakers.  Just make sure the speakers are turned up.

Other favorite flows

I don’t even think about the flows I have any more. I mentioned above that when my calendar says I’m busy, my phone is set to silent. When the “busy” event it over, the ringer comes back on.

In that same vein, my phone is automatically silenced at 9pm and the ringer comes back on at 8am.

When I am at home or at work (by GPS location), my phone’s wifi is turned on. When I leave, my phone’s wifi is turned off.

Anything you ask your Android device to do on a routine basis can be automated.


Scantron Alternative: Akindi 2.0

I first wrote about Akindi in 2013 (see this post), and boy has it undergone some amazing changes in 2014. With this first post of 2015, I hope to convince you to give it a try this term.

With Akindi, you print out bubble sheets for a test. Students take the test in class. You run the filled-in bubble sheets plus an answer key through a scanner to create a pdf. Upload the pdf to Akindi, and Akindi grades your test. And gives you all the statistics on that test and its questions you could want. Want to give the corrected bubble sheets back to your students? Just download the pdf and print.

This is what the dashboard looks like. I’m inside a course called “Psych 100 Fall 2014.” In the top right corner you can see that I had 62 students in that course. This particular assessment was called “Final.” Using the buttons at the bottom, I can edit the bubble sheet template, download those bubble sheets for printing, upload a pdf of the scanned completed bubble sheets, and, finally, view the results.

Let’s start near the beginning.

Creating a template

As of this writing, you have two template options. “Template A” is 100 questions; “Template B” is 50 questions. Since this was my comprehensive final, I used the 100-question template. I can just print blank sheets and let my students fill in their names and student ID numbers, or I can go prefilled. Personally, I like prefilled; there are fewer mistakes that way. (Although, if I had 100 students…) I entered my students’ names into my “Class Roster” for this Akindi course; okay, I confess, I pasted their names in a csv file and uploaded their names into this Akindi course. Rather than use my students’ actual student ID numbers, I allowed Akindi to assign them random numbers. Since I’m not connecting Akindi to my course management system*, what number is used doesn’t matter. Akindi just needs a number to connect the student’s bubble sheet to their name on the Akindi website. When you choose prefilled, Akindi pulls the names and student IDs from this class roster and enters them on the bubble sheets for each student. In “Header Info” I also ask Akindi to put the student name at the top of the bubble sheet to make it easier for me to distribute them in class.

[*Side note about course management systems. I believe this option is only available when institutions adopt Akindi, not individual instructors.]


Download blank bubble sheets and upload completed bubble sheets

Once you have your bubble sheets created, download them. If you went prefilled, the answer key ID number (0000) is also prefilled. There is nothing for you to bubble in but the answers. Print out the bubble sheets. Akindi will even add a few blank ones in case you need them, say, if a student spills coffee on their bubble sheet – and both of their neighbors’ bubble sheets. [Pro tip: If your printer is set to auto-duplex, turn it off. Otherwise you will have two students bubbling in different sides of the same sheet. Awkward.]

After students have taken the test, collect the bubble sheets and your answer key, and run them through a scanner to create a pdf. Our building’s copier will also scan to pdf, and let me email the file. I have two choices. I can email the pdf to myself, save it to my computer, and then click the “upload responses” button you see in the image above. Or I can just email the file to Akindi directly using the special email address Akindi created. The email address is given in the light blue highlighted text in the screen above, and, very thoughtfully, given on the first page of the bubble sheet pdf. If I choose to have my copier email the pdf to Akindi, the test will be graded before I get to my office. And my office is not that far away.

The results

This is where you see the magic.

Results are divided into three screens. “Overview” which you see here, “Graphs,” and “Responses.” If Akindi isn’t sure of a student’s response, another option will appear here, “Exceptions.”

In “Overview,” we see the class average on the left with the high score and low score noted. And then we see the three easiest questions and three most difficult questions. When I moused over “Question 24” the graph on the right changed to show me the data for question 24.

Scrolling down the “Overview” page, I can see the discrimination scores for the test as a whole (.30 in this case; it’s in the blue, so it’s acceptable) and for six of my questions: “Best constructed questions,” “Questions which could be improved,” and the diplomatically-worded “Questions which require intervention,” i.e. these questions suck. Akindi looks at the top third of performers on this test and sees how they answered this question and then looks at the bottom third of performers on this test and sees how they answered this question. For a strong question, we expect that the top performers would answer it correctly and the bottom performers would answer it incorrectly. A high discrimination score indicates that exactly that has happened. For my best-constructed test items, the discrimination scores are .54, .55, and .58. My could-be-improved questions have discrimination scores of .01, .05, and .06. My require intervention questions have discrimination scores of -.10, -.10. and -.05. A negative score means that the top test performers did the worst on the question and the bottom test performers did the best on the question; not a good thing.

The graphs really help me see what is going on. As above, I can mouse over each question to change the graph to that question.

Let’s take a closer look. This is the graph for question 51, discrimination score of .54. I can see that most of the students who got this question right (blue) were the highest performers on the test (right side of the graph), and that most of the students who got this wrong (orange) were the lowest performers on the test (left side of the graph). Akindi even tells me a bit more about what was going on in the “Insight” text below the graph.


This is the graph for question 54, discrimination score of -.05. The highest performing students got it wrong, and of everybody else, about half got it wrong (dark purple – that’s blue and orange overlapping) and about half got it right. Given that so many (9) of the best-performing students got this question wrong means that I really need to look at this question.

If I switch to the graphs screen, clicking on “Point Biserial” at the bottom shows me the discrimination scores for all of my questions. Here I’ve scrolled over so you can see problematic question 54 in orange, a string of yellows that are worth a closer look, and beautiful question 70. If I mouse over a bar, I see the actual score for that item.

On the “Responses” screen, I see the data for each student: Student ID number, name, grade (percent), mark (number of questions correct out of total possible), scan (clicking on the magnifying glass opens a new page in my browser where I can see that student’s scanned bubble sheet), and responses to each question (questions in orange boxes are incorrect). All of the columns are sortable. I can click on the heading to sort by that column. Clicking on “Grade” will sort by grade high to low, click again to sort low to high.

If Akindi runs into trouble deciphering a student’s response, you will see “Exceptions.” Clicking on that link calls up the exceptions screen. Unlike optical scanners like Scantron, Akindi doesn’t care what writing utensil a student bubbles with. In this case, a student used a pen and, of course, had no way to erase. Akindi just saw that two answers had been bubbled in, and so flagged them as “exceptions.” Akindi just shows me the relevant questions from the student’s scanned sheet and asks me to manually select an answer. Akindi then automatically adjusts all of the data accordingly.

The “Actions” button

In the top right corner of any Akindi screen related to a particular assessment, you will see the “Actions” button. It’s sort of a quick access button.

Of particular note are the four middle download options.

“Download CSV” will download all of the data from the “Responses” screen to a spreadsheet.

“Download corrected PDF (answers)” will give you essentially the same scanned set of bubble sheets that you uploaded, except that a test score will be printed on them, and a green checkmark will appear next to the questions students got right and a red letter representing the correct answer will appear next to the questions students got wrong. Good for printing.

“Download corrected PDF (no answers)” is the same as above, except that the right/wrong answers are not marked. Good for printing.

“Download corrected ZIP” is the same as “Download corrected PDF (answers)” except that the student bubble sheets aren’t in one big pdf; when you unzip the file, each student’s test is a separate pdf. Good for, say, distributing to each student individually through your course management system.

How I use the data

I primarily use the data to improve my test items for the next term. The first thing I do is look at the questions with the lowest point biserial scores. If I decide it’s a bad question, I may just toss it completely. If I think it can be salvaged, I will reword the stem or the possible answers.

For questions that have A, B, C, D options, if no student chose, say, option D, I may just go with options A, B, and C the next time I use the question. There is nothing magical about four or five answer choices. If one is clearly not being chosen, there’s probably no good reason for it to be there other than to give students something more to read. When I’ve shortened questions this way, I have seen no difference in exam scores. Nor should I. The question option is doing nothing.

Having this kind of data available makes it easier to see what concepts students are getting and what concepts students are struggling with. The most difficult question in the test I used for this blog post was question 12. That question, I see, had a point biserial of .22, which isn’t too bad. What was question 12 about? It was addressing the correlation-does-not-equal-causation concept, a difficult one for students to get. The next thing I need to do is look back at the first exam and see if students got that concept there. If not, then I need to spend more time on it up front, perhaps adding in an assignment to give students practice with it. If students got it on the first test, but not on the final, then they lost it along the way. In that case, I need to embed more practice with it throughout the course.

What’s next?

Akindi continues to develop this product. Look for some additional, and very helpful, functionality in 2015. Including the ability to have multiple versions of a test.


Flashcard Machine

I’m not a big fan of flashcards, although I have found an interesting use for them. Flashcards take the material you’re learning out of context making it harder to learn, but easier to memorize. Students can use flashcards, for example, to memorize the bones in the body. They will be able to remember that the ulna is in the arm, but without context, they won’t know the ulna’s relationship to, say, the humerus. Having said that, the sheer memorization that flashcards afford does have a place. If you want to just learn new vocabulary words, flashcards can certainly help.

Having said that, I have a colleague (shout out to Liz Hammer at Xavier University of Louisiana!) who suggests having students create application cards. For each concept in a course, ask students to generate an example of that concept from their lives or from other sources such as news media. Students write the concept on one side of the card. On the other side, students provide an example of the concept. Now picture these as virtual cards where all students have access to the card deck… on a website or on their mobile device. The exercise’s greatest power comes from generating examples, but students being able to see an example, and then trying to figure out what it is an example of makes use of the testing effect where the act of retrieval strengthens memory.

There are a bunch of flashcard makers out there, but I’m particularly enamored with Flashcard Machine. Creating flashcards is easy through both the web interface (free) and the mobile app (iOS and Android for a small fee). A group of students, or an entire class, can share flashcard sets.

On the mobile device, students will see the “definition,” in our case an example, come up. Tapping the bottom of the screen will reveal the term that goes with the example.

In one chapter of the textbook I use, I count about 30 terms. If, say, 30 students each generated one example for each of those terms, that would be 900 flashcards – just for that one chapter. Perhaps students could be in groups of 5. That would be 150 flashcards per set. It would require some background work, but students could have editing power for their own group’s flashcards but be able to see and use the flashcards of other groups. Want to increase accountability or grade individually? Have each student initial their cards. Or perhaps each student makes their own set of (gradable) cards but then makes them available for their group members to use. Or each group member could choose their best cards, and copy those cards into the group set that each group member could use for studying.

Creating flashcard sets

After creating an account, click on “New Flashcard Set.”

Enter the “General Set Details,” including a short title and description. Leave the “Flashcard Library” disabled if you don’t want the set to be publicly available. Enable “Private Sharing” so you can give the url to other students in the course allowing them to use the flashcards without the power to edit them. Enable “Collaborative Editing” to invite students to add flashcards.

After saving the set, you will see the editor tool bar. Click “Quick Editor.”

In the Quick Editor, add the term in the first box, add the example in the second box. Then click “+Add Another” to add another new card.

Studying

Students click on the flashcard set they want to study, and then click “Start Study Session.”

On the “Configure Study Session” page, students should select “Definition then Term” since, for our students, examples have been entered on the definition side of the card. When given an example, can students identify the term?

Conclusion

If your students try Flashcard Machine, I would love to hear what they think of it! More importantly, when your students create examples and work with examples created by others, do you see an improvement in exam scores?