Have you had this experience? You’re reading a student’s paper, and your internal plagiarism detector starts setting off alarms. The prose sounds different than anything else the student has written. You start googling phrases – and nothing comes up. Using Turnitin? That probably won’t catch it either (Rogerson & McCarthy, 2017).
Your student may have used one of the many freely available “paraphrasing tools.”
Here is the first paragraph from a recent issue of Psychological Science in the Public Interest (Castles, Rastle, & Nation, 2018).
Learning to read transforms lives. Reading is the basis for the acquisition of knowledge, for cultural engagement, for democracy, and for success in the workplace. Illiteracy costs the global economy more than $1 trillion (U.S. dollars) annually in direct costs alone (World Literacy Foundation, 2015). The indirect costs are far greater because the failure to attain satisfactory literacy blocks people from acquiring basic knowledge, such as understanding information about hygiene, diet, or safety. Consequently, low literacy is a major contributor to inequality and increases the likelihood of poor physical and mental health, workplace accidents, misuse of medication, participation in crime, and welfare dependency, all of which also have substantial additional social and economic costs (World Literacy Foundation, 2015). Low literacy presents a critical and persistent challenge around the world: Even in developed countries, it is estimated that approximately 20% of 15-year-olds do not attain a level of reading performance that allows them to participate effectively in life (Organisation for Economic Cooperation and Development, 2016).
Let’s see what some of the paraphrasing tools do with this text.
Paraphrasing-tool.com
Figuring out how to peruse changes lives. Perusing is the reason for the securing of learning, for social commitment, for majority rule government, and for accomplishment in the work environment. Absence of education costs the worldwide economy more than $1 trillion (U.S. dollars) every year in coordinate costs alone (World Literacy Foundation, 2015). The roundabout expenses are far more noteworthy in light of the fact that the inability to accomplish agreeable proficiency squares individuals from gaining essential learning, for example, understanding data about cleanliness, eating regimen, or wellbeing. Subsequently, low proficiency is a noteworthy supporter of disparity and improves the probability of poor physical and emotional wellness, work environment mishaps, abuse of drug, investment in wrongdoing, and welfare reliance, all of which likewise have significant extra social and financial costs (World Literacy Foundation, 2015). Low education exhibits a basic and determined test the world over: Even in created nations, it is assessed that around 20% of 15-year-olds don’t accomplish a level of perusing execution that enables them to take part adequately throughout everyday life (Organization for Economic Cooperation and Development, 2016).
Prepostseo.com helpfully identifies the changed words with a different color font. (This is the same as paraphrasing-tool.org, paraphrasing-tool.net, and paraphrasing-tool.org.)
Learning to scan transforms lives. Reading is that the basis for the acquisition of data, for cultural engagement, for democracy, and for achievement within the geographical point. Illiteracy prices the world economy over $1 trillion (U.S. dollars) annually in direct prices alone (World acquirement Foundation, 2015). The indirect prices ar way biggeras a result of the failure to achieve satisfactory acquirement blocks folks from exploit basic information, appreciate understanding data regarding hygiene, diet, or safety. Consequently, low acquirement could be a major contributor to difference and will increase the chance of poor physical and psychological state, geographical pointaccidents, misuse of medication, participation in crime, and welfare dependency, all of that even have substantial further social and economic prices (World acquirementFoundation, 2015). Low acquirement presents a essential and chronic challenge round the world: Even in developed countries, it’s calculable that more or less two hundredthof 15-year-olds don’t attain A level of reading performance that permits them to participate effectively in life (Organisation for Economic Cooperation and Development, 2016).
Rewriter Tools also identifies the changed words, except when the words it identifies as different are actually the same, e.g., “read” in the first sentence.
Learning to read transforms lives. Reading is the groundwork for the acquisition of knowledge, for cultural engagement, for democracy, and for success in the workplace. Illiteracy prices the international economic system more than $1 trillion (U.S. dollars) annually in direct prices by myself (World Literacy Foundation, 2015). The indirect fees are a waysgreater because the failure to attain best literacy blocks people from acquiring basic knowledge, such as appreciation facts about hygiene, diet, or safety. Consequently, low literacy is a predominant contributor to inequality and will increase the probability of terrible bodily and intellectual health, administrative center accidents, misuse of medication, participation in crime, and welfare dependency, all of which additionallyhave vast additional social and economic fees (World Literacy Foundation, 2015). Low literacy presents a fundamental and continual undertakinground the world: Even in developed countries, it is estimated that about20% of 15-year-olds do not obtain a degree of studying performance that allows them to participate correctly in life (Organisation for Economic Cooperation and Development, 2016).
Paraphrasingonline.com doesn’t make a lot of changes. And the changes it does make are creative. I especially like “clam” in place of “dollars” and “15-twelvemonth-olds” for “15-year-olds”
Learning to read transforms lives. Reading is the basis for the acquisition of knowledge, knowledge , for cultural engagement, for democracy, commonwealth , and for success in the workplace. work . Illiteracy costs the global economy more than $1 trillion (U.S. dollars) clam ) annually in direct costs alone (World (Humanity Literacy Foundation, 2015). The indirect costs are far greater because the failure to attain satisfactory literacy blocks people city block mass from acquiring basic knowledge, such as understanding information about hygiene, diet,dieting , or safety. safety . Consequently, low literacy is a major contributor to inequality and increases the likelihood of poor physical and mental health, workplace accidents, misuse of medication, medicament , participation in crime, and welfare dependency, eudaemonia dependence , all of which also have substantial additional social mixer and economic costs (World Literacy Foundation, 2015). Sir David Low literacy presents a critical and persistent challenge around the world: Even in developed countries, it is estimated that approximately 20% of 15-year-olds 15-twelvemonth -olds do not attain a level of reading interpretation performance that allows them to participate effectively in life (Organisation for Economic Cooperation and Development,Evolution , 2016).
Goparaphrase.com yields a lot of gibberish. “Costochondritis”?
Taking in will read transforms exists. Perusing may be those premise to those securing from claiming knowledge, to social engagement, for democracy, Also to achievement in the working environment. Absence of education costochondritis the worldwide economy more than $1 trillion (U. Encountered with urban decay because of deindustrialization, engineering imagined, government lodgin. Dollars) yearly On immediate fetches alone (World ability Foundation, 2015). The backhanded expenses would a wide margin more terrific on account of the disappointment to accomplish palatable ability obstructs individuals starting with procuring essential knowledge, for example, Comprehension majority of the data something like hygiene, diet, or wellbeing. Consequently, low ability will be An significant donor should imbalance and expands the probability for poor physical Furthermore mental health, work environment accidents, abuse from claiming medication, support On crime, Furthermore welfare dependency, the greater part about which also bring generous extra social Also monetary fetches (World ability Foundation, 2015). Low education displays a basic What’s more constant test around those world: Significantly over formed countries, it will be evaluated that pretty nearly 20% for 15-year-olds don’t accomplish a level from claiming perusing execution that permits them on take an interest viably to term (Organisation for monetary collaboration and Development, 2016).
Plagiarisma.net is also firmly in the gibberish arena. “Kinsmen immigrant possessions”?
Sense of values to offer transforms lives. Portent is the build for the fulfilment of associate, for cultural exercise, for democracy, and for fulfilling in the aid. Illiteracy skimp the widespread second-rate thither over than $1 trillion (U.S. dollars) annual in artless retrench just (mould Literacy Foundation, 2015). The redundant scrimp are prevalent more intelligent to the foundering to swing adequate literacy blocks kinsmen immigrant possessions basic knowledge, such as understanding information about hygiene, diet, or safety. Consider, shoddy literacy is a pre-eminent backer to discrepancy and increases the possibility of vile quick and absurd well-being, responsibility accidents, decry of remedy, sophistication in outrage, and open-handedness dominion, all of which also have substantial additional social and economic costs (World Literacy Foundation, 2015). Common literacy endowments a stabbing and continuing bloke all over the world: Down in qualified countries, it is approximate rove to 20% of 15-year-olds reach keen cut a residue of sign step focus allows them to participate effectively in life (Organisation for Economic Cooperation and Development, 2016).
Articlerewritertool.com does a reasonably good job – especially if students take the time to edit.
Making sense of how to examine changes lives. Scrutinizing is the purpose behind the anchoring of learning, for social responsibility, for larger part lead government, and for achievement in the workplace. Nonattendance of instruction costs the overall economy more than $1 trillion (U.S. dollars) consistently in arrange costs alone (World Literacy Foundation, 2015). The circuitous costs are unmistakably critical in light of the way that the failure to achieve pleasing capability squares people from increasing fundamental learning, for instance, understanding information about tidiness, eating regimen, or prosperity. In this manner, low capability is an imperative supporter of dissimilarity and enhances the likelihood of poor physical and passionate health, workplace setbacks, manhandle of medication, interest in bad behavior, and welfare dependence, all of which moreover have critical additional social and budgetary costs (World Literacy Foundation, 2015). Low training displays a fundamental and decided test the world over: Even in made countries, it is surveyed that around 20% of 15-year-olds don’t achieve a level of examining execution that empowers them to participate sufficiently for the duration of regular day to day existence (Organization for Economic Cooperation and Development, 2016).
However, quality is on the rise
Quillbot is still in beta testing, so the non-sign-up version gives you a 180-character limit, but it is the best of the paraphrasing tools. I entered this: “The indirect costs are far greater because the failure to attain satisfactory literacy blocks people from acquiring basic knowledge” and Quillbot returned “The indirect costs are much higher because the lack of sufficient literacy prevents people from learning the basics.” Don’t like the word or phrase that Quillbot chose? Click on the changed text to see other choices.
Paid services
CleverSpinner is a subscription service for $9.90 (US)/month. A 43-second video shows the tool in action. Where the others I’ve identified above are considered paraphrasing tools because they only give you one new version of text, CleverSpinner is considered an “article spinner” because it renders multiple versions of the text. Why would one want multiple versions? Some web writers are writing for multiple web-based outlets. They write the text once, and then spin it. Now they have multiple versions that can be published in multiple venues without being pinged for publishing duplicate content. One article looks like ten.
What can you do about it?
If you have suspect text in a student assignment, there is probably not a whole lot you can do about it, frankly. If you really want to pursue it, you can use a cloze test. In the cloze test, words are removed from the suspect text, and the student is asked to enter the missing words. The idea is that if a student wrote the text herself, she should be able to fill in the missing blanks.
Here is a cloze test creation tool. When I entered the articlewritertool.com text from above, I get
Making sense of how __ examine changes lives. Scrutinizing __ the purpose behind the _________ of learning, for social ______________, for larger part lead __________, and for achievement in ___ workplace. Nonattendance of instruction _____ the overall economy more ____ $1 trillion (.US.. dollars) ____________ in arrange costs alone (_____ Literacy Foundation, 2015). The __________ costs are unmistakably critical __ light of the way ____ the failure to achieve ________ capability squares people from __________ fundamental learning, for instance, _____________ information about tidiness, eating _______, or prosperity. In this ______, low capability is an __________ supporter of dissimilarity and ________ the likelihood of poor ________ and passionate health, workplace ________, manhandle of medication, interest __ bad behavior, and welfare __________, all of which moreover ____ critical additional social and _________ costs (World Literacy Foundation, ______ Low training displays a ___________ and decided test the _____ over: Even in made _________, it is surveyed that ______ 20% of 15-year-olds don’t _______ a level of examining _________ that empowers them to ___________ sufficiently for the duration __ regular day to day _________ (Organization for Economic Cooperation ___ Development, 2016).
If you want to make it a little easier on your student, you can provide the list of removed words in random order:
World achieve anchoring and around budgetary circuitous consistently costs countries dependence enhances execution existence fundamental government have imperative in increasing is manner of participate physical pleasing regimen responsibility setbacks than that the to understanding world
Conclusion
It also can’t hurt to discuss the importance of academic integrity with your students. Ultimately, it’s their own personal integrity at stake.
References
Castles, A., Rastle, K., & Nation, K. (2018). Ending the reading wars: Reading acquisition from novice to expert. Psychological Science in the Public Interest, 19(1), 5–51. https://doi.org/10.1177/1529100618772271
Rogerson, A. M., & McCarthy, G. (2017). Using Internet based paraphrasing tools: Original work, patchwriting or facilitated plagiarism? International Journal for Educational Integrity, 13(2). https://doi.org/10.1007/s40979-016-0013-y
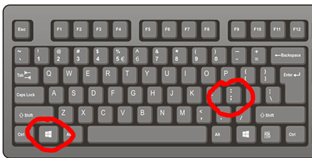
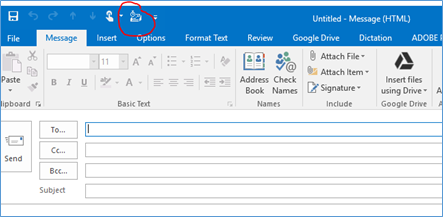
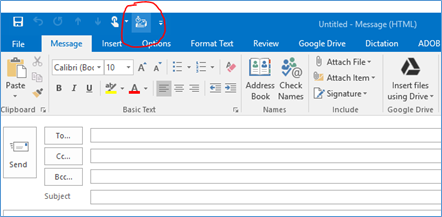
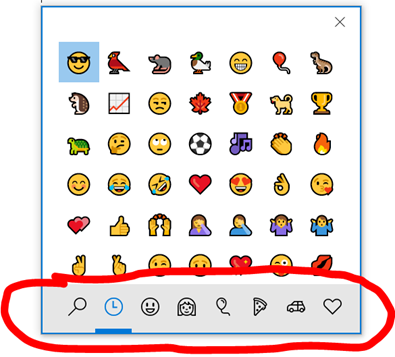 Choose an emoji from the menu.