YouCanBook.Me – Let People Schedule Themselves
UPDATE 9/5/2011 : Be sure to read an even more recent post on this tool.
UPDATE 12/2/2010: Be sure to read my more recent post on this tool.
It’s surprising how much of my email has to do with scheduling. Students or off-campus colleagues ask when they can meet with me in person or via a phone call. I ask when they’re available; they ask when I’m available. Five or six emails later we have a time. For my colleagues at my institution, they can just look at my Outlook calendar and suggest a time. Anyone else is stuck in the email spiral.
If you use Google Calendar, YouCanBook.Me solves this back and forth email exchange. (Since my work life exists inside of Outlook, I sync my Outlook calendar with my Google calendar so any changes made to one are reflected in the other. Click here to learn how to sync Outlook with Google Calendar.)
I have granted YouCanBook.Me access to my Google Calendar. They generated a fully-customizable webpage (http://sfrantz.youcanbook.me/) for me that looks like this.
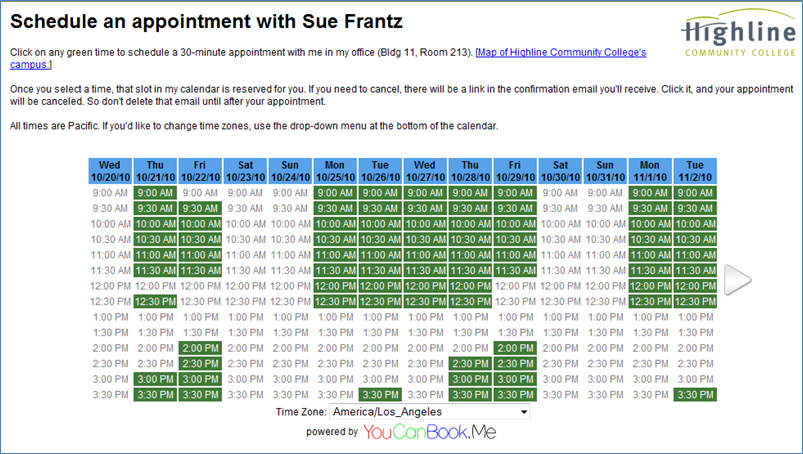
Everything in green is an available time slot. Everything greyed out is already a booked time in Google Calendar (and, by extension, Outlook). When I add an appointment to my Outlook calendar, Outlook syncs with Google Calendar, and Google Calendar syncs with YouCanBook.Me. YouCanBook.Me then greys out the time covered by that new appointment.
Clicking on Monday, October 25th, 9:00am brings up this page. The person requesting an appointment just fills in their email address, name, the reason for the meeting, and the code that appears.
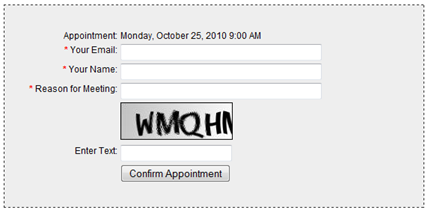
Clicking ‘confirm appointment’ seals the deal. YouCanBook.Me makes the change on my Google Calendar which syncs with my Outlook calendar, and I’m sent an email informing me of the appointment. The person requesting the appointment also gets a confirmation email with a link to use in case of the need to cancel. Clicking the link causes the appointment to disappear from my calendar. The requester also gets an appointment reminder 4 hours before the appointment complete with that same cancellation link.
The Dashboard
Let’s take a look at the dashboard for YouCanBook.Me. This is where you can customize YouCanBook.Me to look and act like you want it to look and act. Directly below the dashboard is a preview of what the page will look like. Any saved change to the settings generates a new preview. To save space in this blog, I’m not including the preview image in my screen captures.
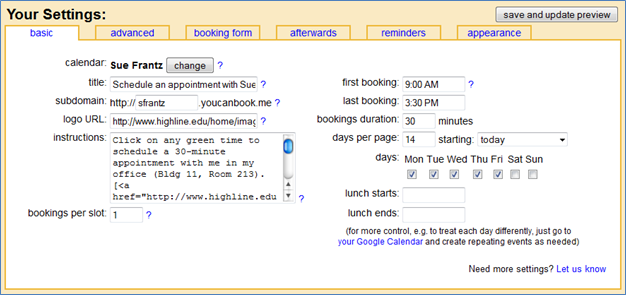
On the ‘basic’ tab, I can change which of my Google Calendars are accessed, the title that appears at the top of the page, what URL I want to use (‘sfrantz.youcanbook.me’), a URL for a logo (notice my college’s logo in the top right corner of the schedule page), instructions for visitors, and how many people I want to be able to sign up for a given time slot (one is fine for me). On the right I can set the first time available, the last time available, the time slot length, days per page, and which days I’m available. Of course if I’m traveling or doing something else that makes me unavailable for an entire day, I would block out that day using Google Calendar or Outlook, and that day would show as unavailable in YouCanBook.Me.
See the little blue question marks in each of the dashboard screen shots? At YouCanBook.Me, click those to learn more about each area of the dashboard.
On the ‘advanced’ tab, I’ve set the minimum notice to 12 hours. That means that the earliest available appointment is 12 hours from now. (A visitor at 8am cannot schedule an appointment at 9am.) I set the time zone to Pacific Time since I’m on the west coast, but visitors can change the time zone to their location. For instance, if an east coast colleague would like to schedule a time to call me, s/he could change the time zone to Eastern Time and avoid doing the math.

The ‘booking form’ tab contains one of the most powerful features of YouCanBook.Me. Each line is a separate field on the booking form. Want more fields? Just add a line. Want the field to be required? Put an asterisk in front of it. You can even add checkboxes if you’d like. (In the dashboard, click the little blue question mark at the bottom right of the field to learn how.)

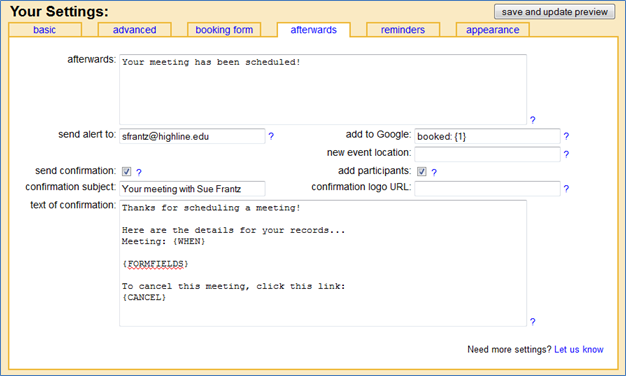
The ‘afterwards’ tab lets you determine what is displayed on the screen after someone has made their appointment, the email address where you want to be notified of new appointments, whether you want to send a confirmation email, and what it should say.
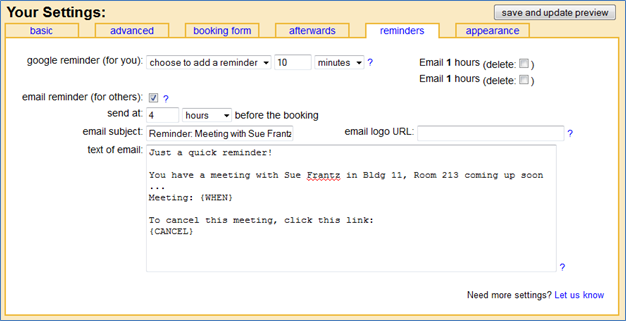
The ‘reminders’ tab lets me set an appointment reminder for me (none), and lets me send an appointment reminder for those who set appointments and determine when I’d like it sent (4 hours before the appointment time).
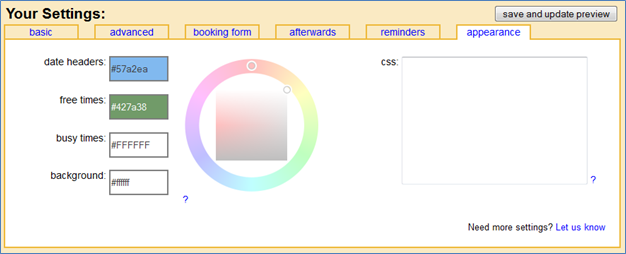
Finally, on the ‘appearance’ tab, customize the colors of your calendar. If you want to use your own cascading style sheets, you’re welcome to do so using the ‘css’ field.
Try it out, then leave a comment on how it works for you!
[UPDATE 11/24/2010 : Check out a newer post that offers some ways to customize YouCanBook.Me.]